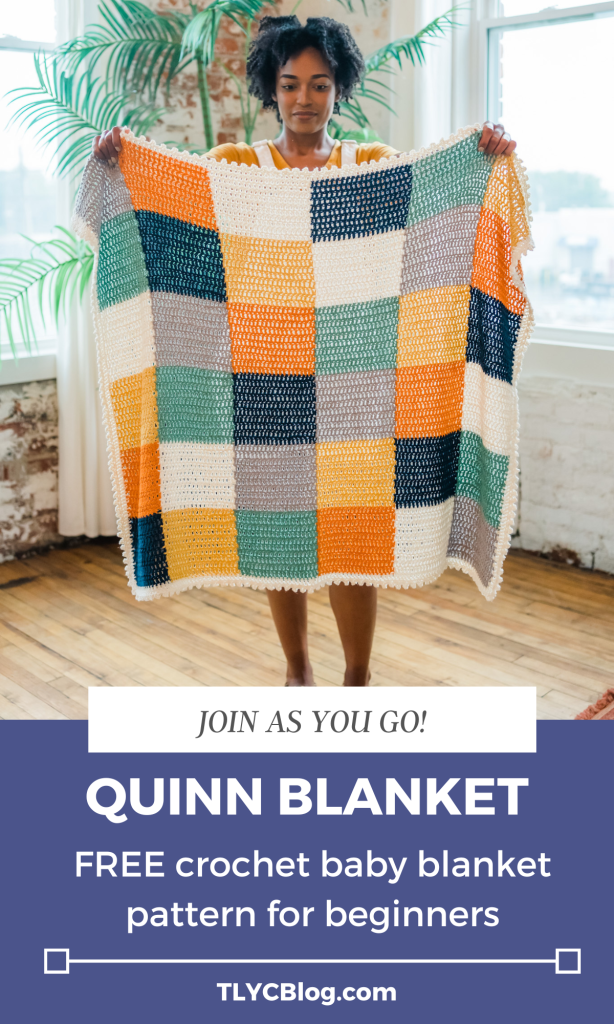
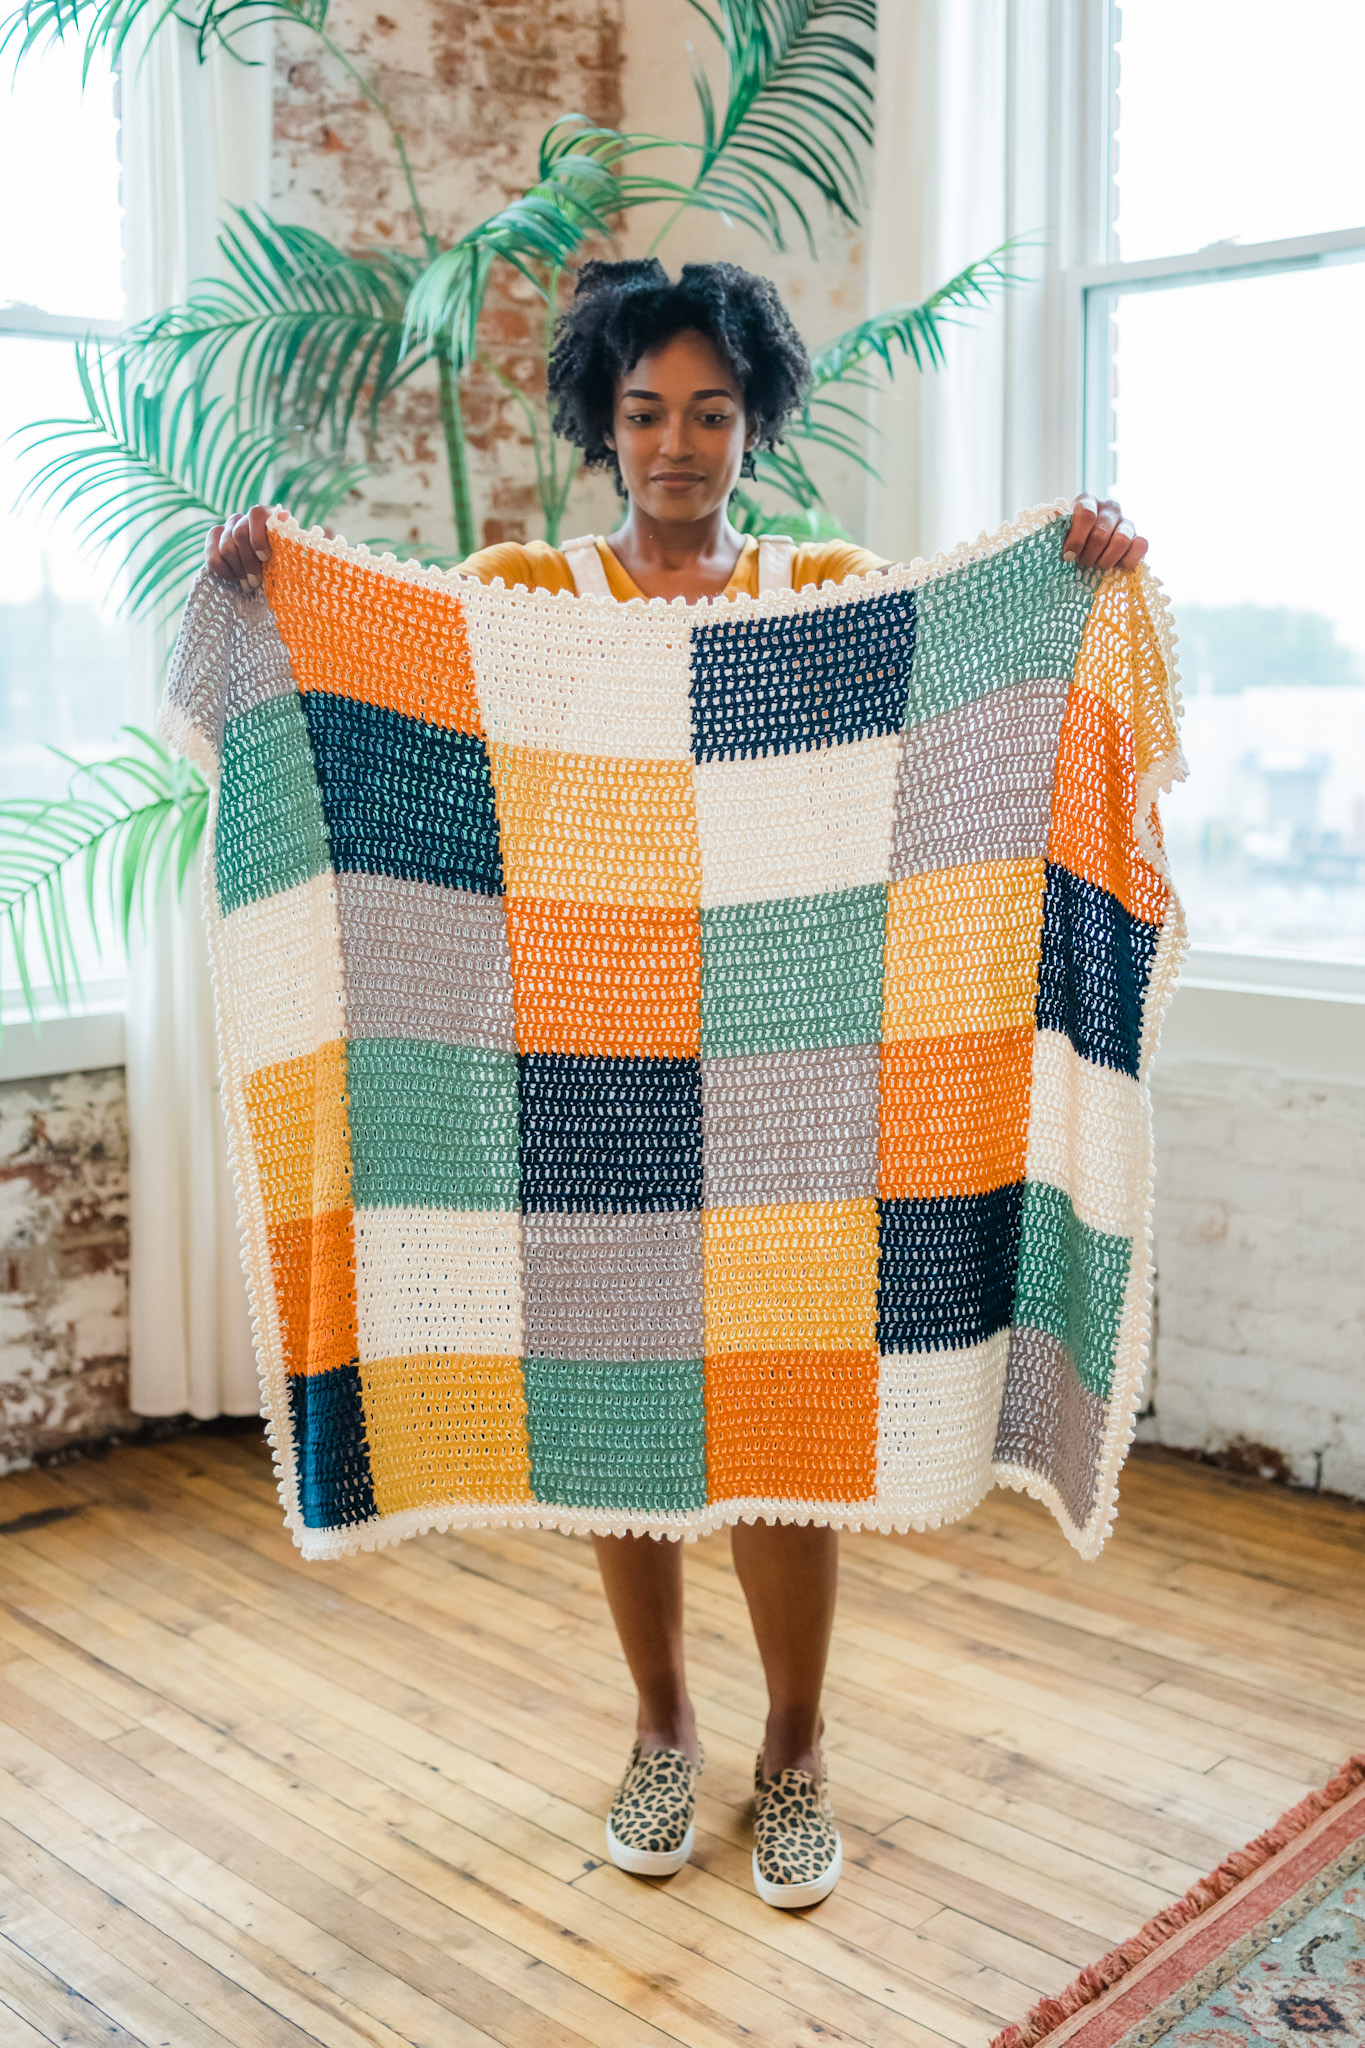
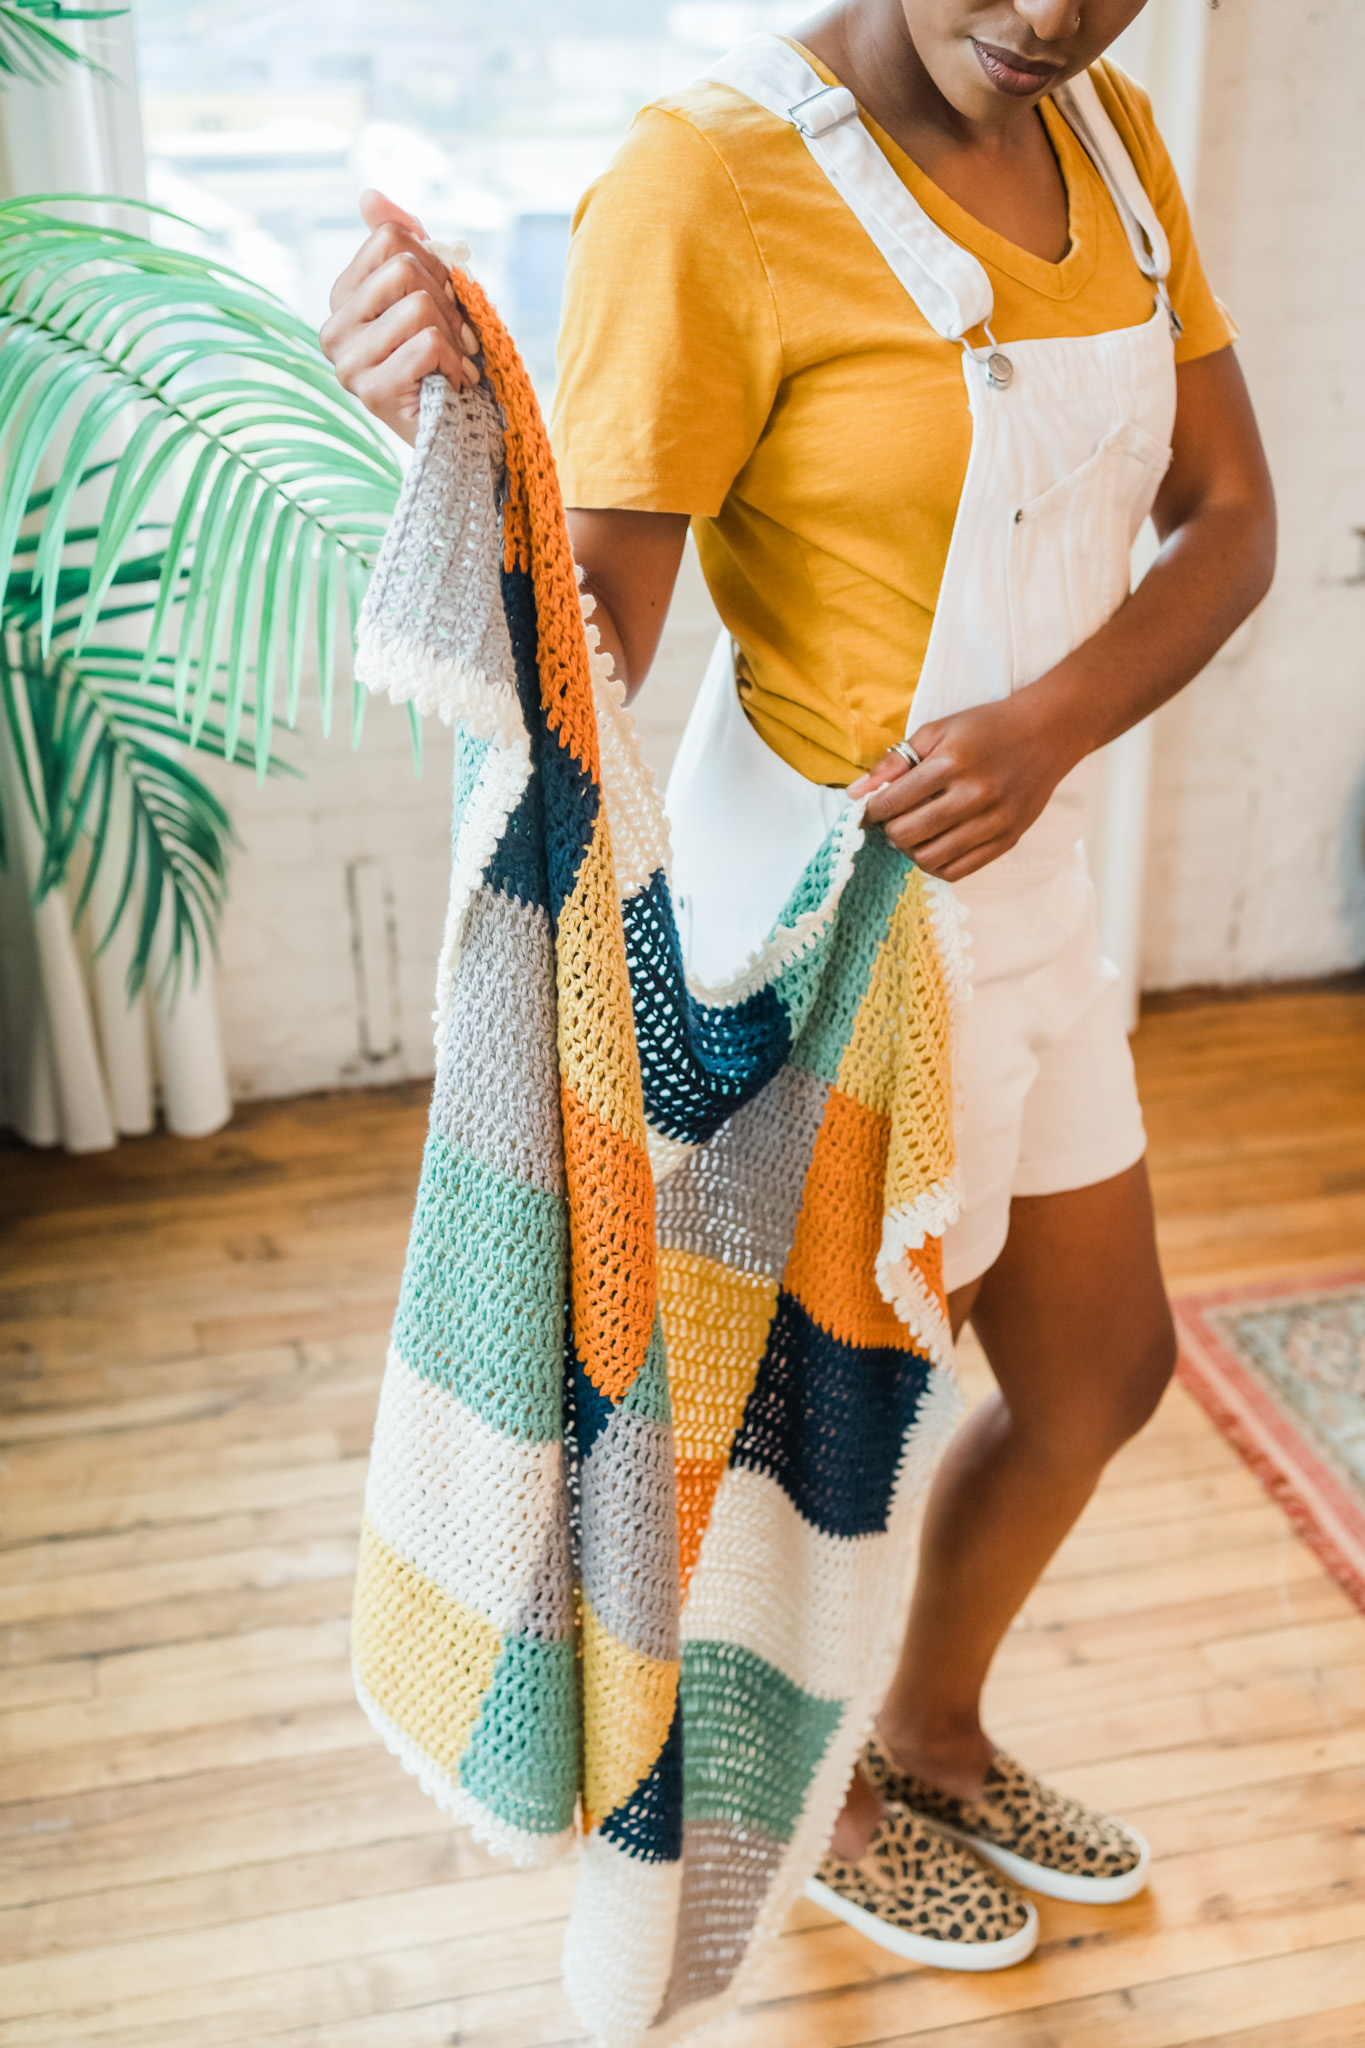
Quinn Blanket, a free crochet patchwork baby blanket pattern
")
Let your love for color shine through when you make the Quinn Blanket, a FREE crochet patchwork baby blanket designed in collaboration with WeCrochet.
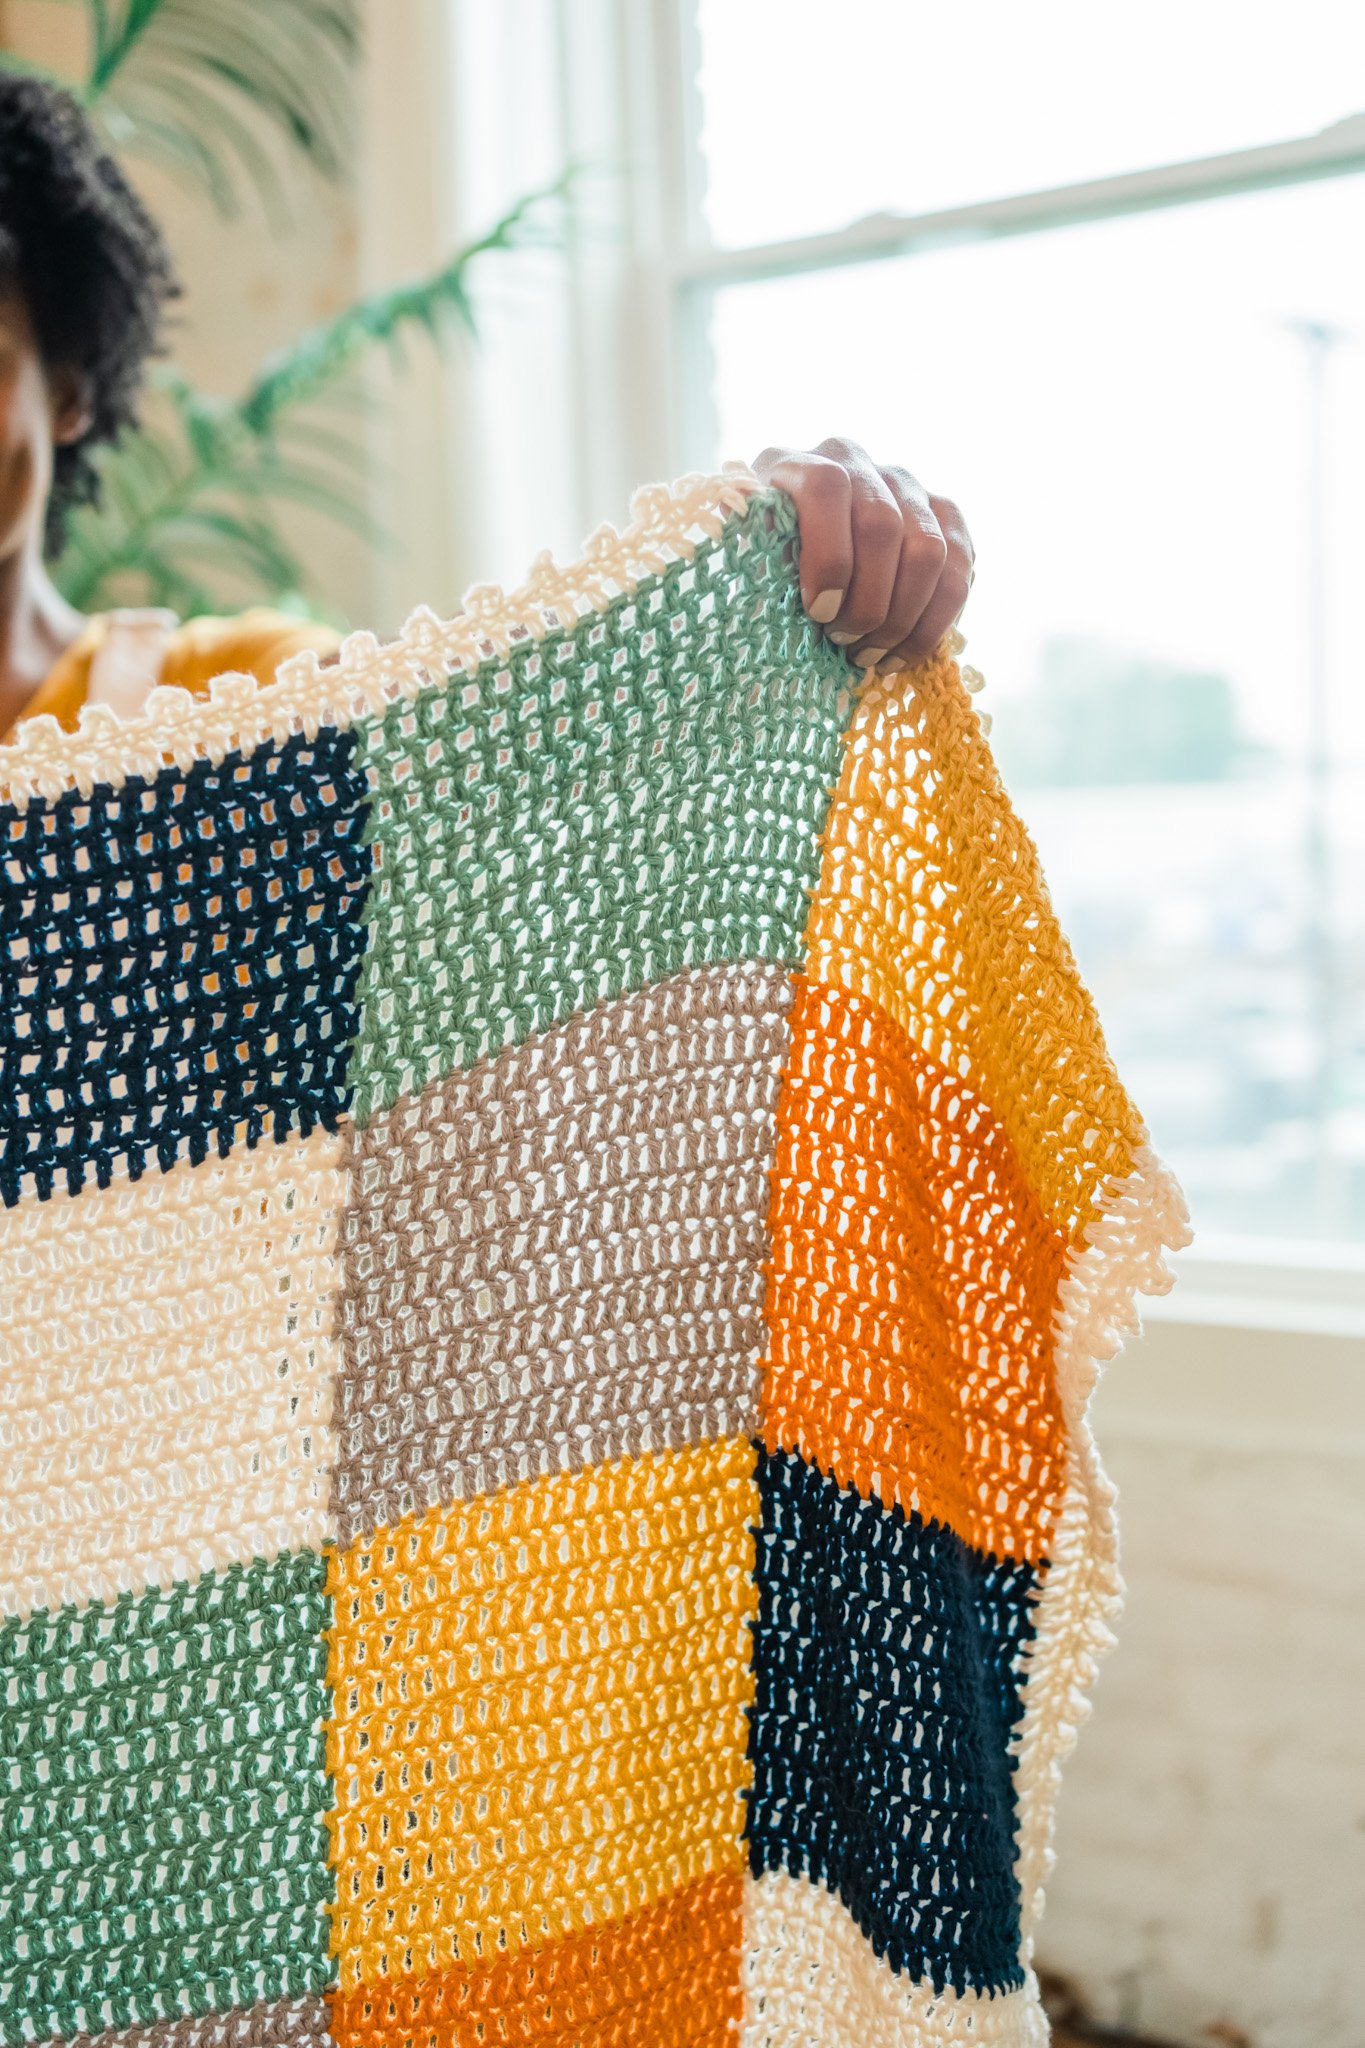
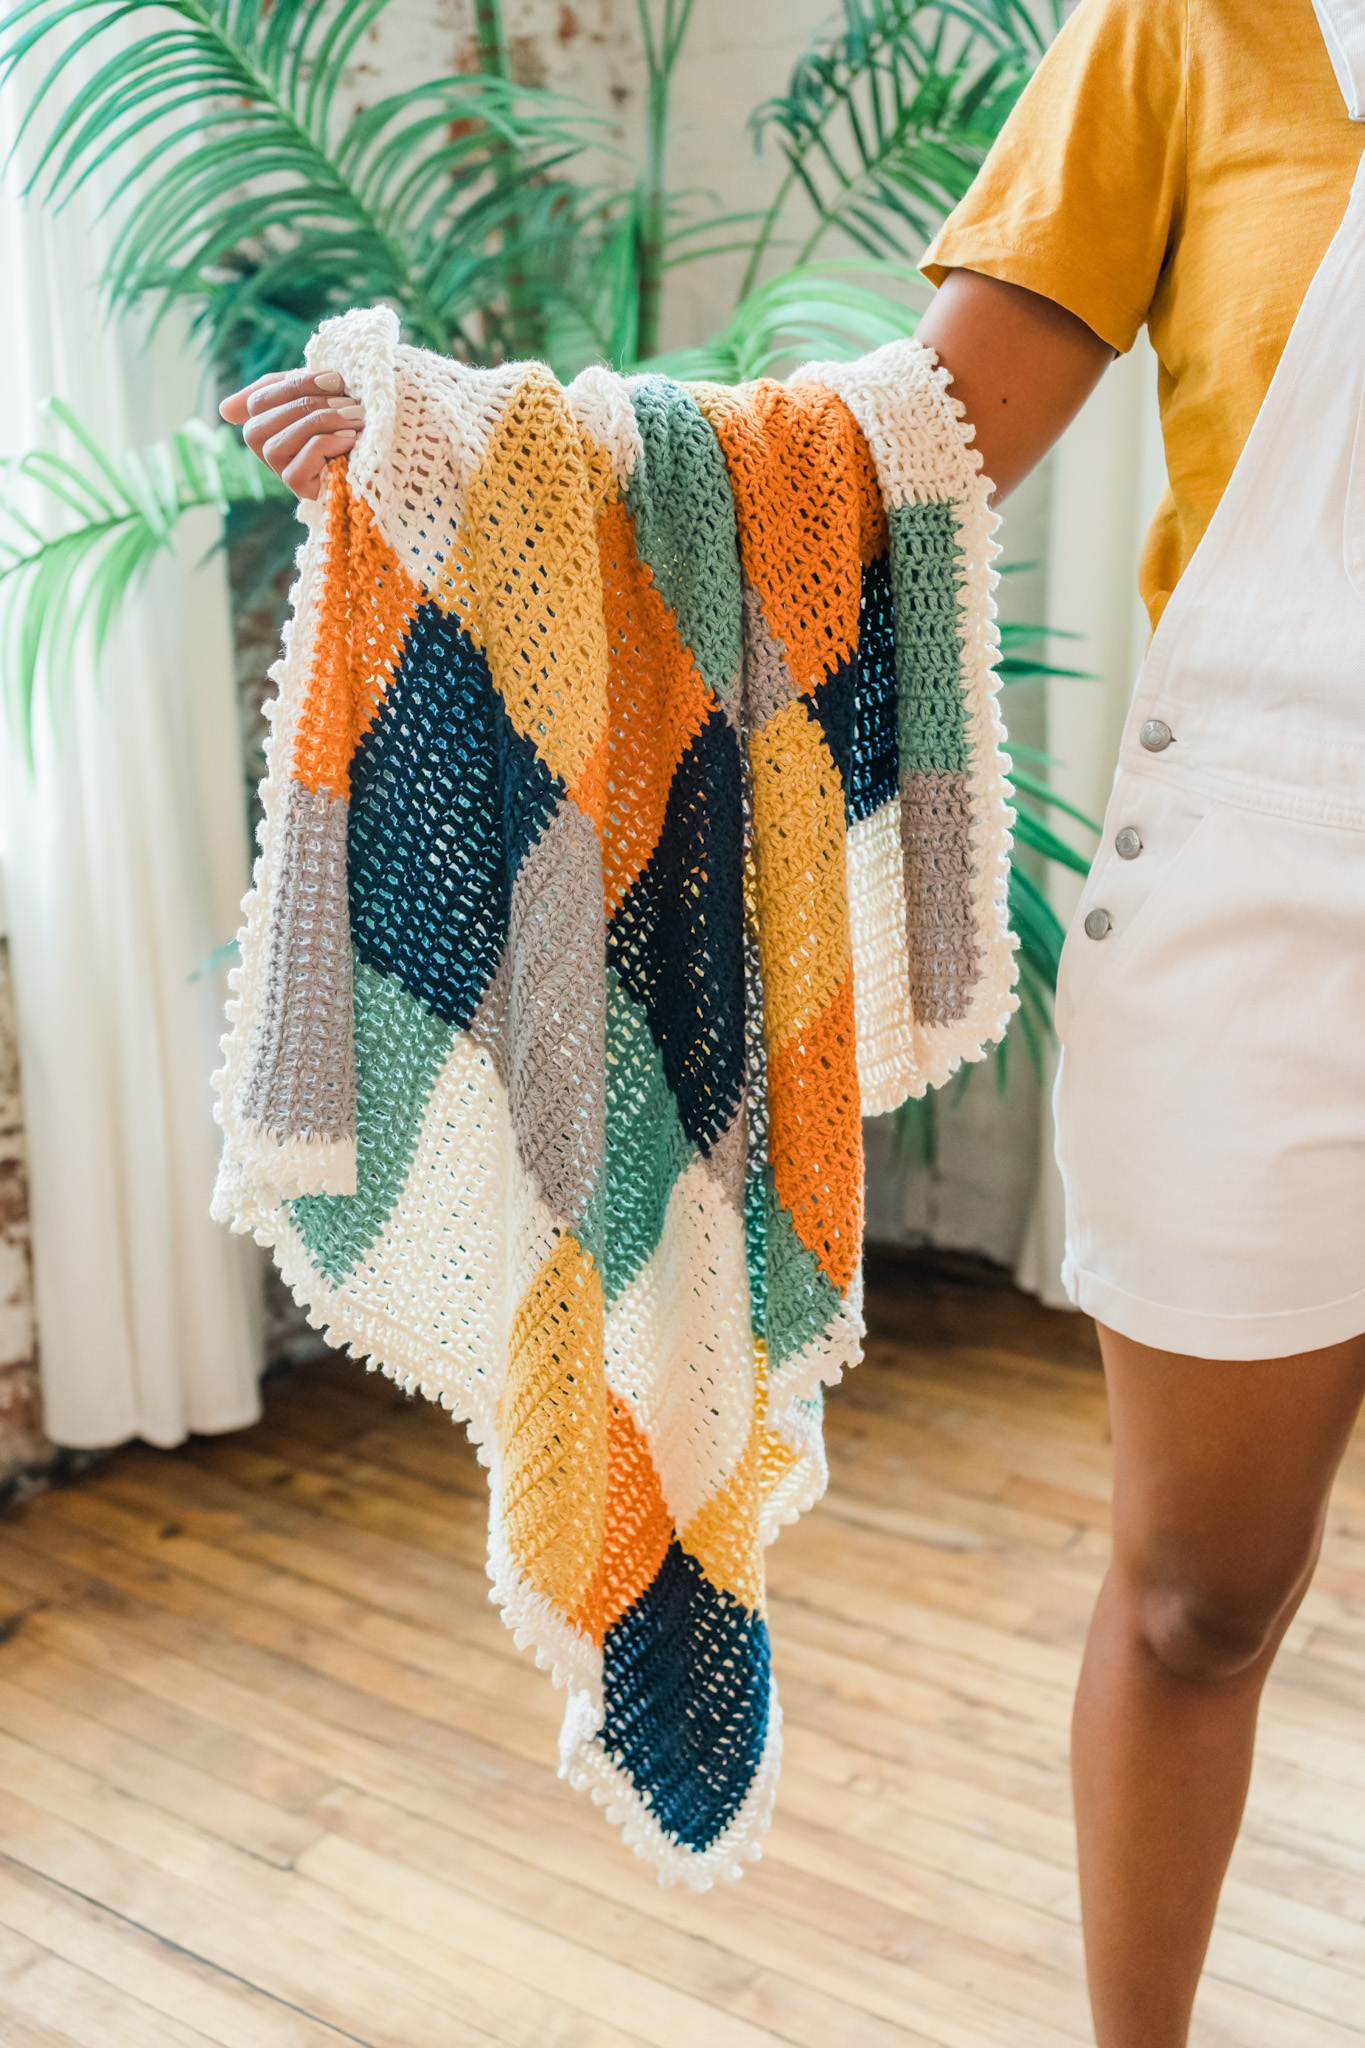
The quest to win the baby shower continues! This time, I’m coming with the Quinn Blanket, a seriously cute baby afghan that you can make in a pinch. My husband’s best friend is moments away from having his third little boy (yes, I said THIRD little boy!). I jumped into action with my favorite CotLin yarn from WeCrochet to make a blanket that is easy-care for these busy parents.
This post contains affiliate links that support the content on TLYCBlog.com. All opinions are my own. Find my Privacy & Disclosures Policy here.
Pin It Now, Make It Later
Get the Quinn Blanket
- FREE PATTERN: Keep scrolling for the free version of the Quinn Blanket, available to view in this blog post.
- PRINTABLE PDF: Purchase the printable PDF pattern. It’s easy to read, ad-free, and only 2 pages. Purchase the pattern HERE.
About the Quinn Blanket
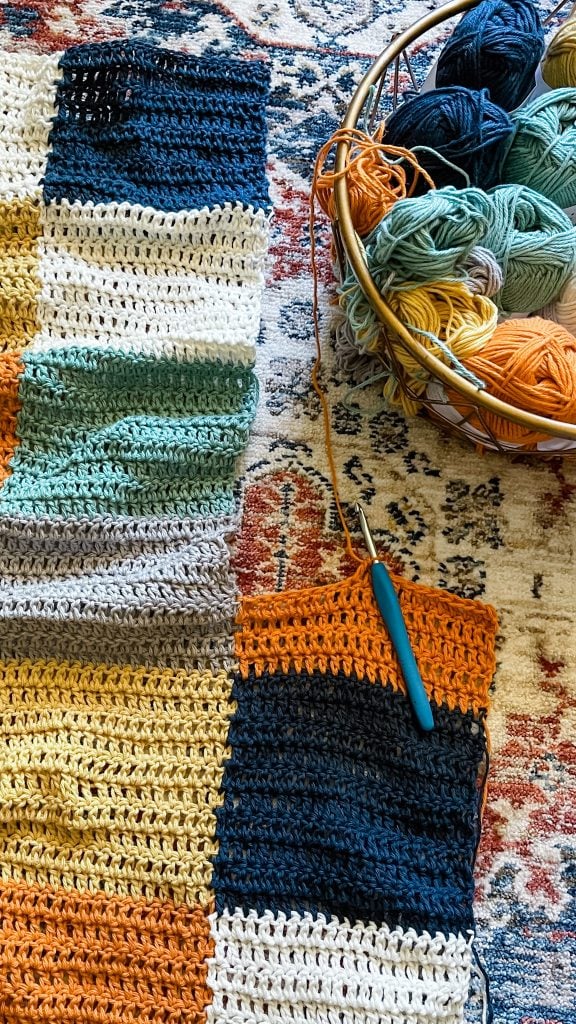
The Quinn Blanket is constructed using a unique join-as-you-go method for double crochet stitches. This technique allows you to crochet a patchwork baby blanket without making individual squares and seaming them together. Instead, construct the blanket one column at a time, connecting the columns as you stitch.
What You Need for the Quinn Blanket
Here’s a list of the supplies you’ll need to make the Quinn Blanket.
- THE YARN: The Quinn Blanket is made using CotLin from WeCrochet. CotLin is a DK-weight blend of 70% cotton and 30% linen. This blend creates a fabric that is soft to the touch, lightweight, and machine washable. You’ll need 3 skeins of your main color (Swan – B), and 2 skeins each of your accent colors (Planetarium – A, Clementine – C, Whisker – D, Sagebrush – E, and Creme Brule – F).
- THE HOOK: The Quinn Blanket uses a 5mm crochet hook. My favorite hook for this project is this one since it glides through the yarn so beautifully and offers consistent tension throughout the project.
- THE NOTIONS: In addition to the yarn and hook, you will also need a pair of scissors, a tapestry needle, and blocking supplies. Specifically, I used a garment steamer, these blocking mats, and the rust-proof t-pins that come with the mats to block my blanket. Learn more about steam blocking here.


QUINN BLANKET DETAILS
FINISHED SIZE
38″ wide x 32 long
GAUGE
4″ = 14 stitches x 8 rows
ABBREVIATIONS
Ch = chain
Dc = double crochet
Pic = picot (see Special Stitches)
RS = right side
Sc = single crochet
Sl St = slip stitch
St = stitch
SPECIAL STITCHES
-Join: Slip stitch into the top of the neighboring double crochet from the previous column, ch 1, slip stitch into the top of the double crochet one row up from the previous slip stitch.
-Picot (Pic): Ch 3, slip stitch into the single crochet at the base of the chain.
VIDEO TUTORIAL: Need some help making your Quinn Blanket? Follow me step-by-step in this tutorial video!
BLANKET PATTERN
COLOR CHART
Use the Color Chart below to place Colors A-F in your blanket. Proceed to the Border section when the full chart is complete.
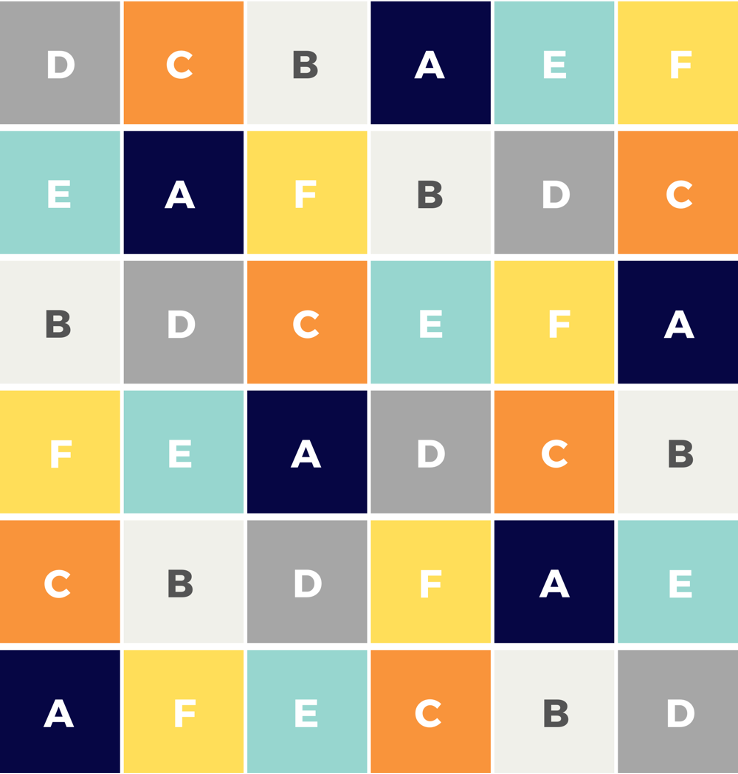
COLUMN 1
ROW 1: With A, ch 21, dc in 2nd ch from hook and each ch across row, turn. (20 dc)
ROW 2: Ch 1, dc in each st across row, turn.
Repeat Row 2 to 10 rows. Fasten off A and change to C.
Repeat Row 2 for 10 rows. Fasten off C and change to F.
Continue in double crochet pattern, changing color every 10 rows as indicated in the Color Chart. There are six squares of color in Column 1. Fasten off after last row. Weave in all ends from this column.
COLUMN 2
ROW 1: With F, sl st into the last ch of Row 1 from Column 1, ch 21, dc in 2nd ch from hook and each ch across row (there should be 20 dc in the row), join (see Special Stitches), turn.
ROW 2: Dc in each st across row, turn.
ROW 3: Ch 1, dc in each st across row, join, turn.
Repeat Rows 2 and 3 to 10 rows total. Continue in pattern, changing color every 10 rows as indicated in the Color Chart. The six squares of this column will join to the previous column. Weave in all ends from this column.

COLUMNS 3-6
Repeat instructions from Column 2 for each additional column, changing color every 10 rows as indicated in the Color Chart.
BORDER
ROUND 1: With B and RS facing, join with a sl st in furthest right st of top row. Ch 1, dc in same st, dc in each st across row, 2dc in last st of row, rotate to work along row ends. 2dc in each row end to last row, 3dc in last row, rotate to work along bottom. Dc in each st along bottom of blanket to last st, 2dc in last st, rotate to work along row ends. 2dc in each row end to last row, 3dc in last row, join with sl st to first dc of round.
ROUND 2: Ch 1, sc in same st as join, sc in next st, pic, (sc 2, pic) around blanket, sl st in first sc of round. Fasten off.
FINISHING
–Weave in all remaining ends.
-Steam block to finished measurements.
Thanks for joining me to make the Quinn Blanket. This gorgeous crochet patchwork baby blanket is headed to it’s new home soon, but I’m sure I’ll have another baby blanket on my hook soon.
Share your crochet patchwork baby blanket with me on Instagram using #TLYCMakers. Then pop into the TLYC Makers Facebook group and share there too – we can’t wait to see it!
MORE FREE CROCHET BABY BLANKET PATTERNS


This is a wonderful pattern! Thank you for sharing. I would like to make it bigger. Would adding columns change the directions for the border?
Hi! Changing the dimensions shouldn’t be an issue for the border, no. 🙂
Is there a tutorial for this pattern. Join as you got has always been confusing to me, and I’ve been crocheting over 45 years.
Thank you.
There sure is a tutorial! I just updated the pattern to include it. Take a look and let me know how it goes 🙂
Hello! Do you have any suggestions for how to modify this project to use your Happy Place Solid yarn? Thanks so much!
Hi! Happy Place is also a Dk weight yarn and a 5mm hook works perfectly with it. The only adjustments you’ll need to make are how many skeins of yarn to purchase (2 skeins of your main color and 1 skein each of the other colors) and what colors to get (1 main color and 5 additional colors). Have fun!!
Hello! The pattern looks wonderful! Do you have any advice on changing colors for a left-handed person? And I assume I should start from the bottom right? Thank you in advance!
Hi There! The color changes will be the same as a normal crochet color change, just mirrored for a leftie. And yes, you’ll start from the bottom right instead of the left. Happy stitching!!