

October Tote – a FREE crochet crossbody bag tutorial + pattern
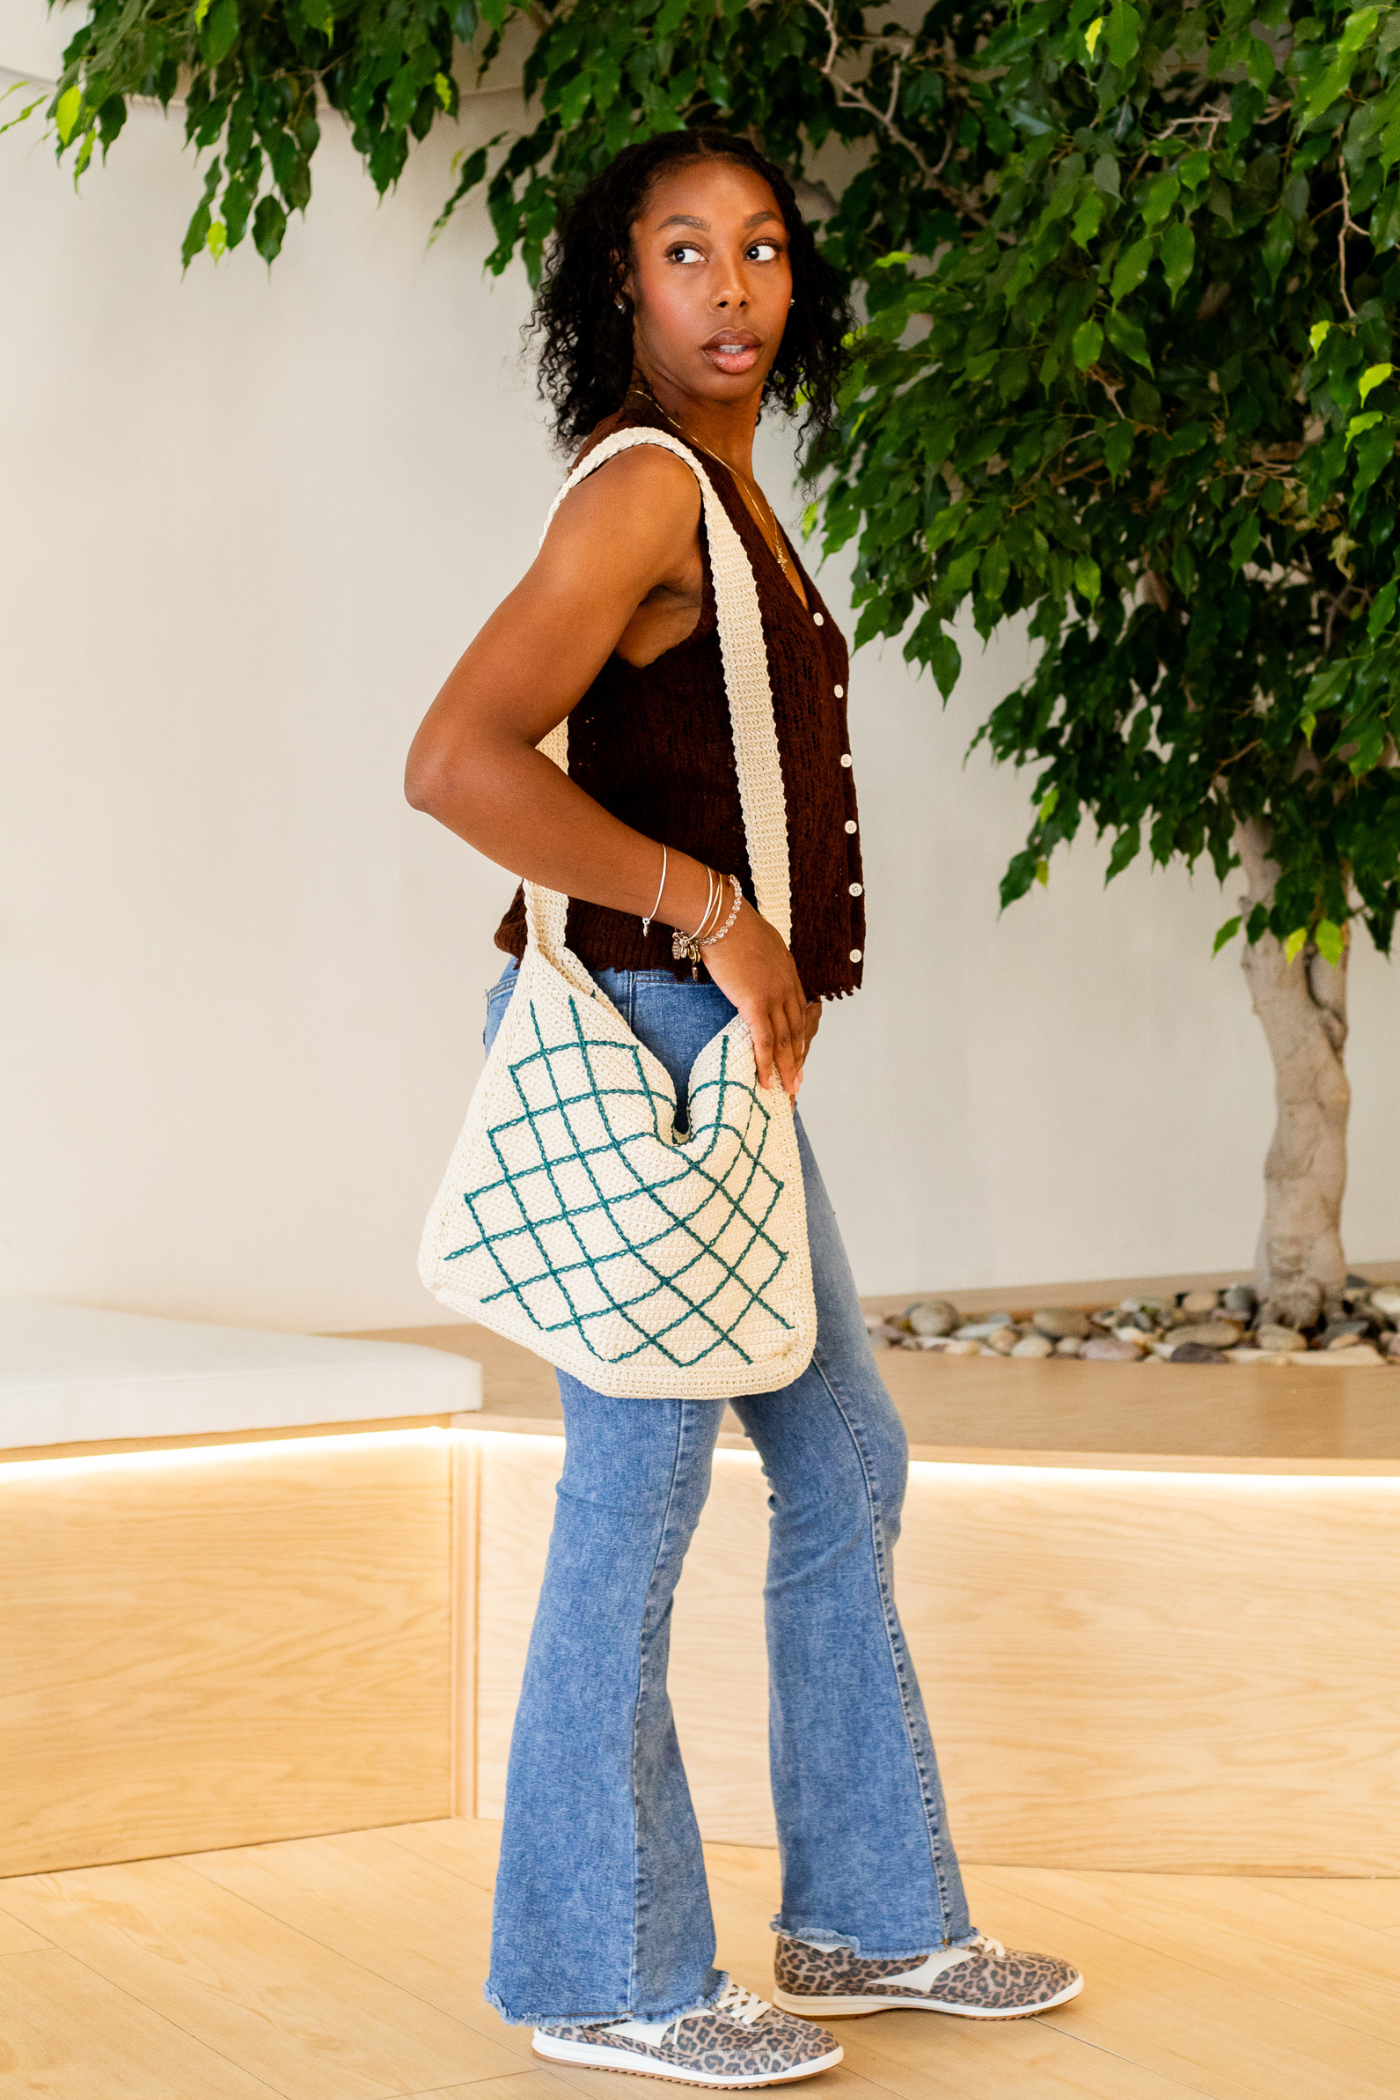
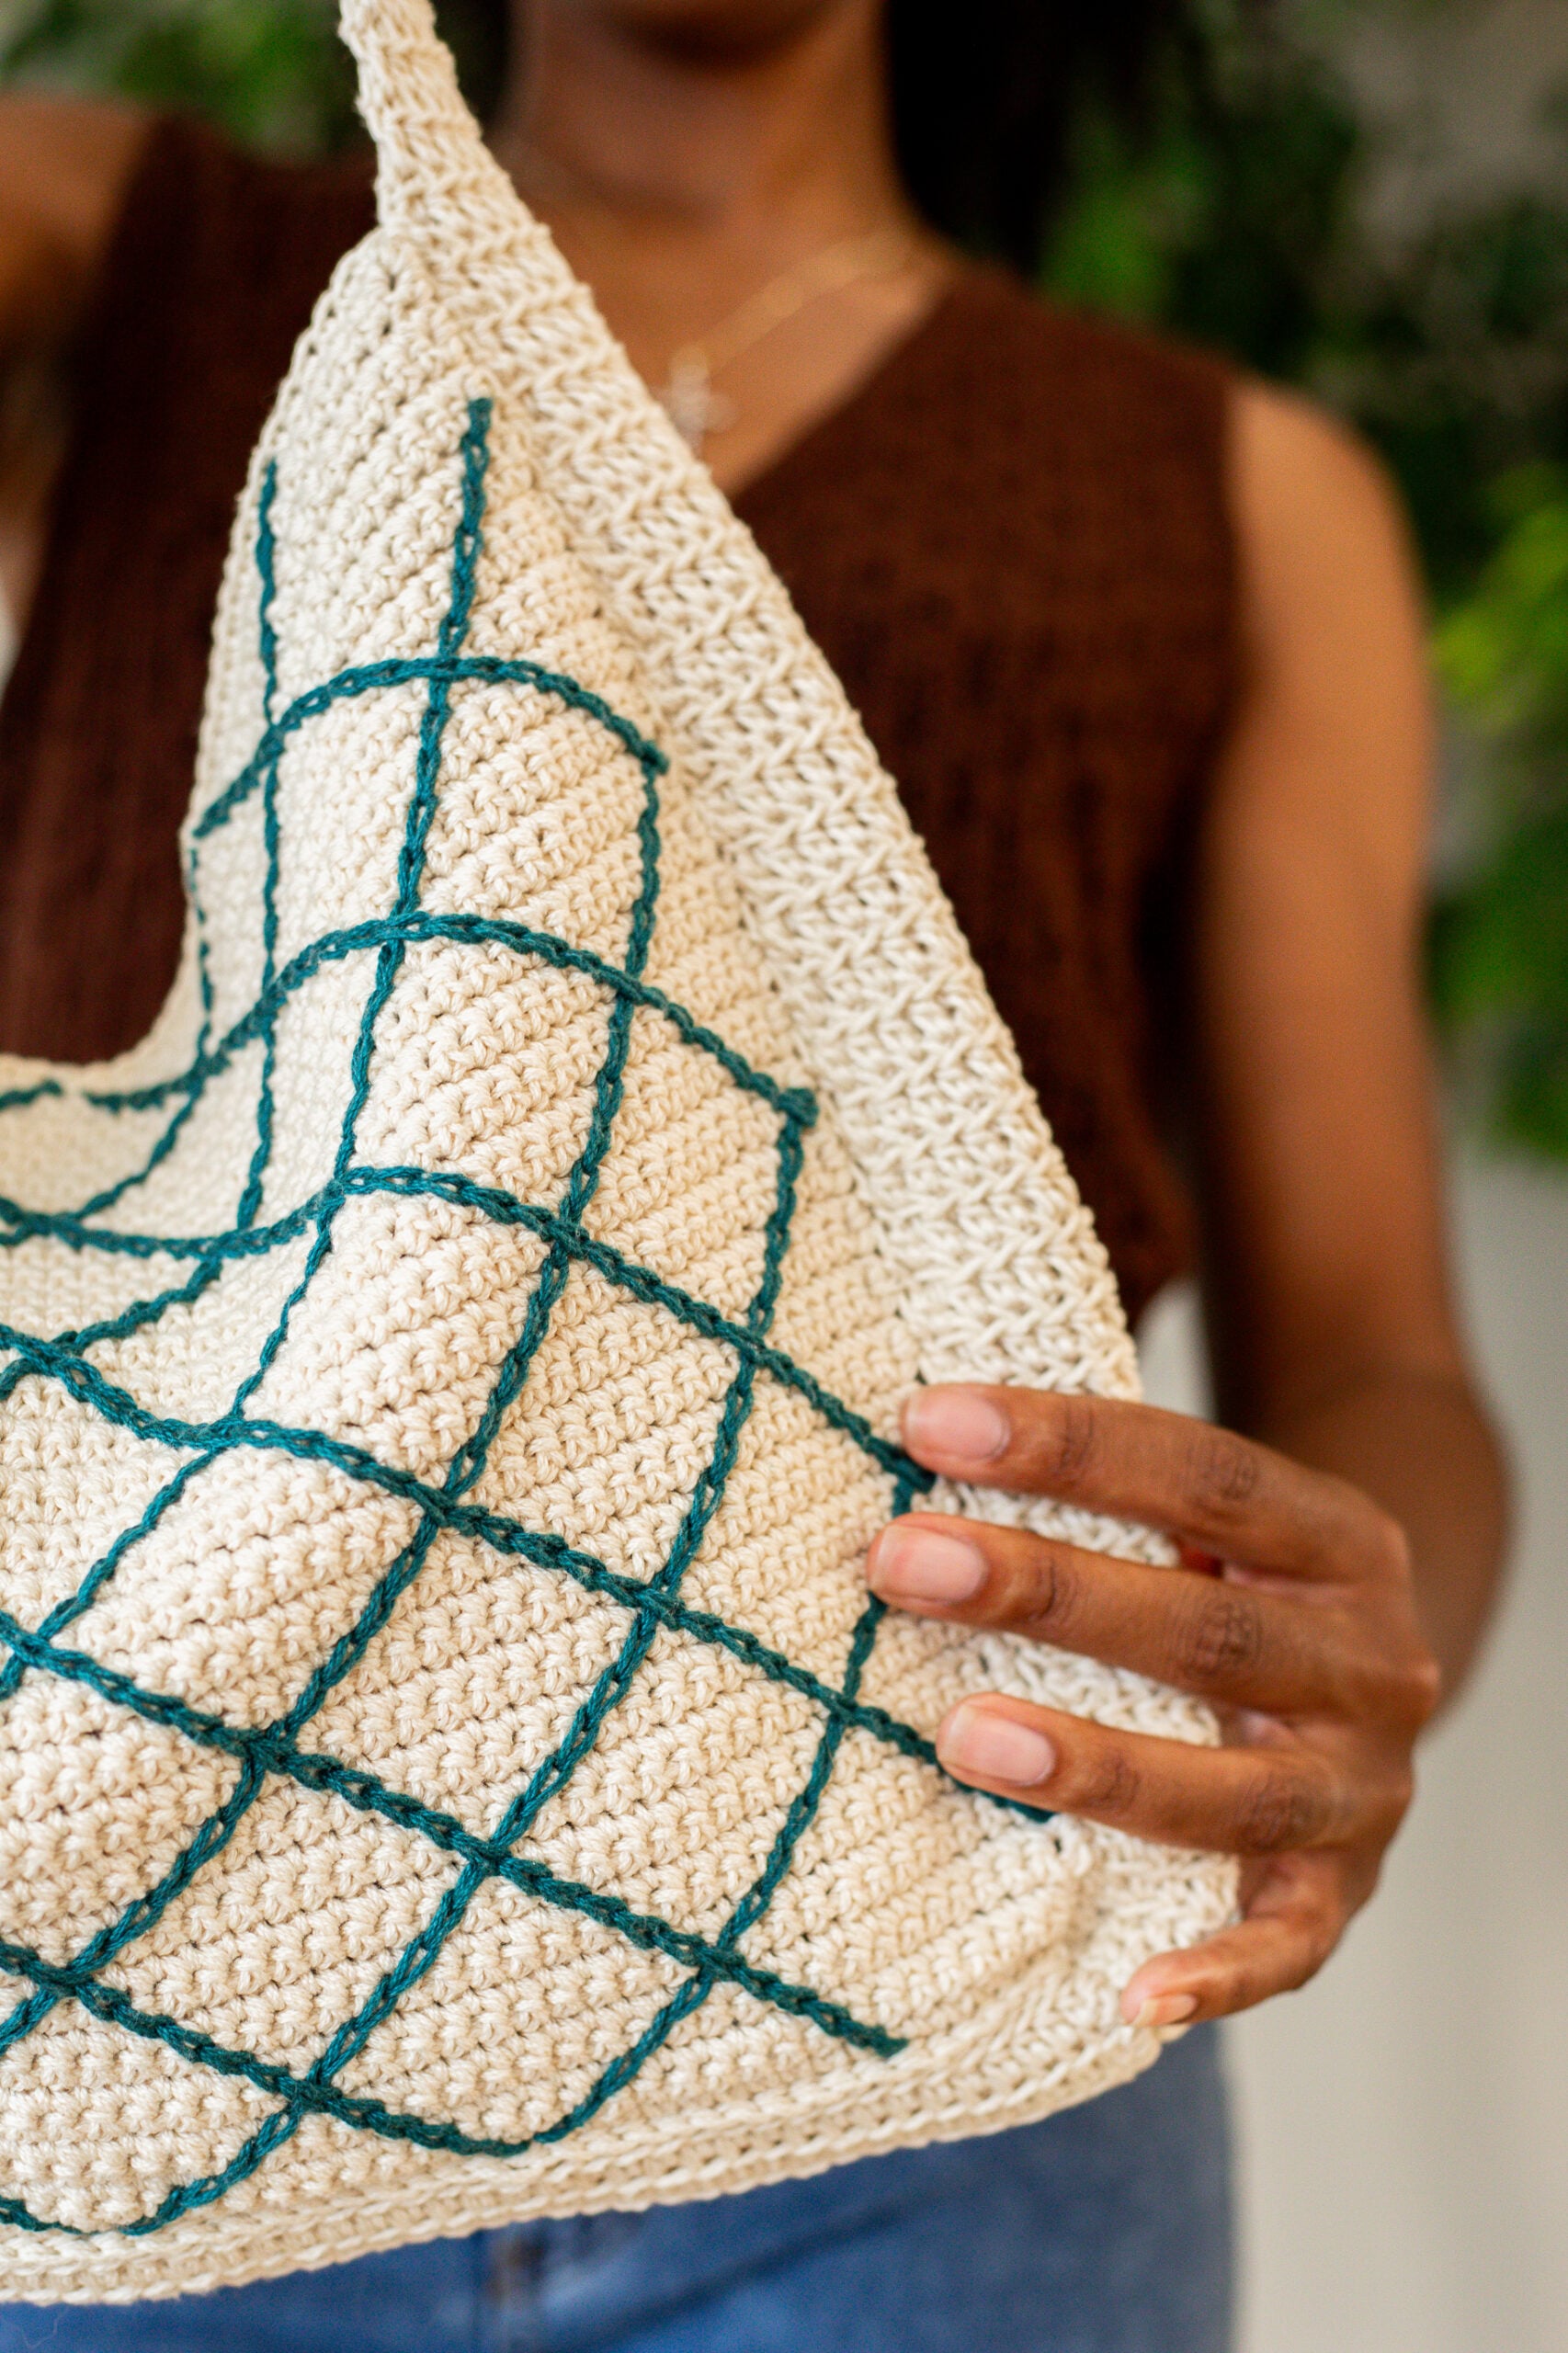
The October Tote doesn’t play around. A striking lattice design, sturdy crossbody strap, and enough room to throw in your laptop, your latest WIP, and everything in between. It’s the crochet crossbody bag that goes everywhere and looks good doing it.
It’s no surprise – I’m a sucker for a crochet bag. I’ve designed bags for your projects, for the beach, and for the farmer’s market. But ever since I started schlepping my laptop to the coffee shop for admin days, I realized I didn’t have a crochet bag that could do everything. Enter the October Tote, a FREE beginner-friendly crochet crossbody bag pattern with a step-by-step tutorial video. The basic stitches keep things meditative, and the surface crochet keeps things interesting — exactly the kind of balance that makes a project genuinely fun to make.
This post contains affiliate links that support the content on TLYCBlog.com. All opinions are my own. Find my Privacy & Disclosures Policy here.
PIN IT NOW, MAKE IT LATER
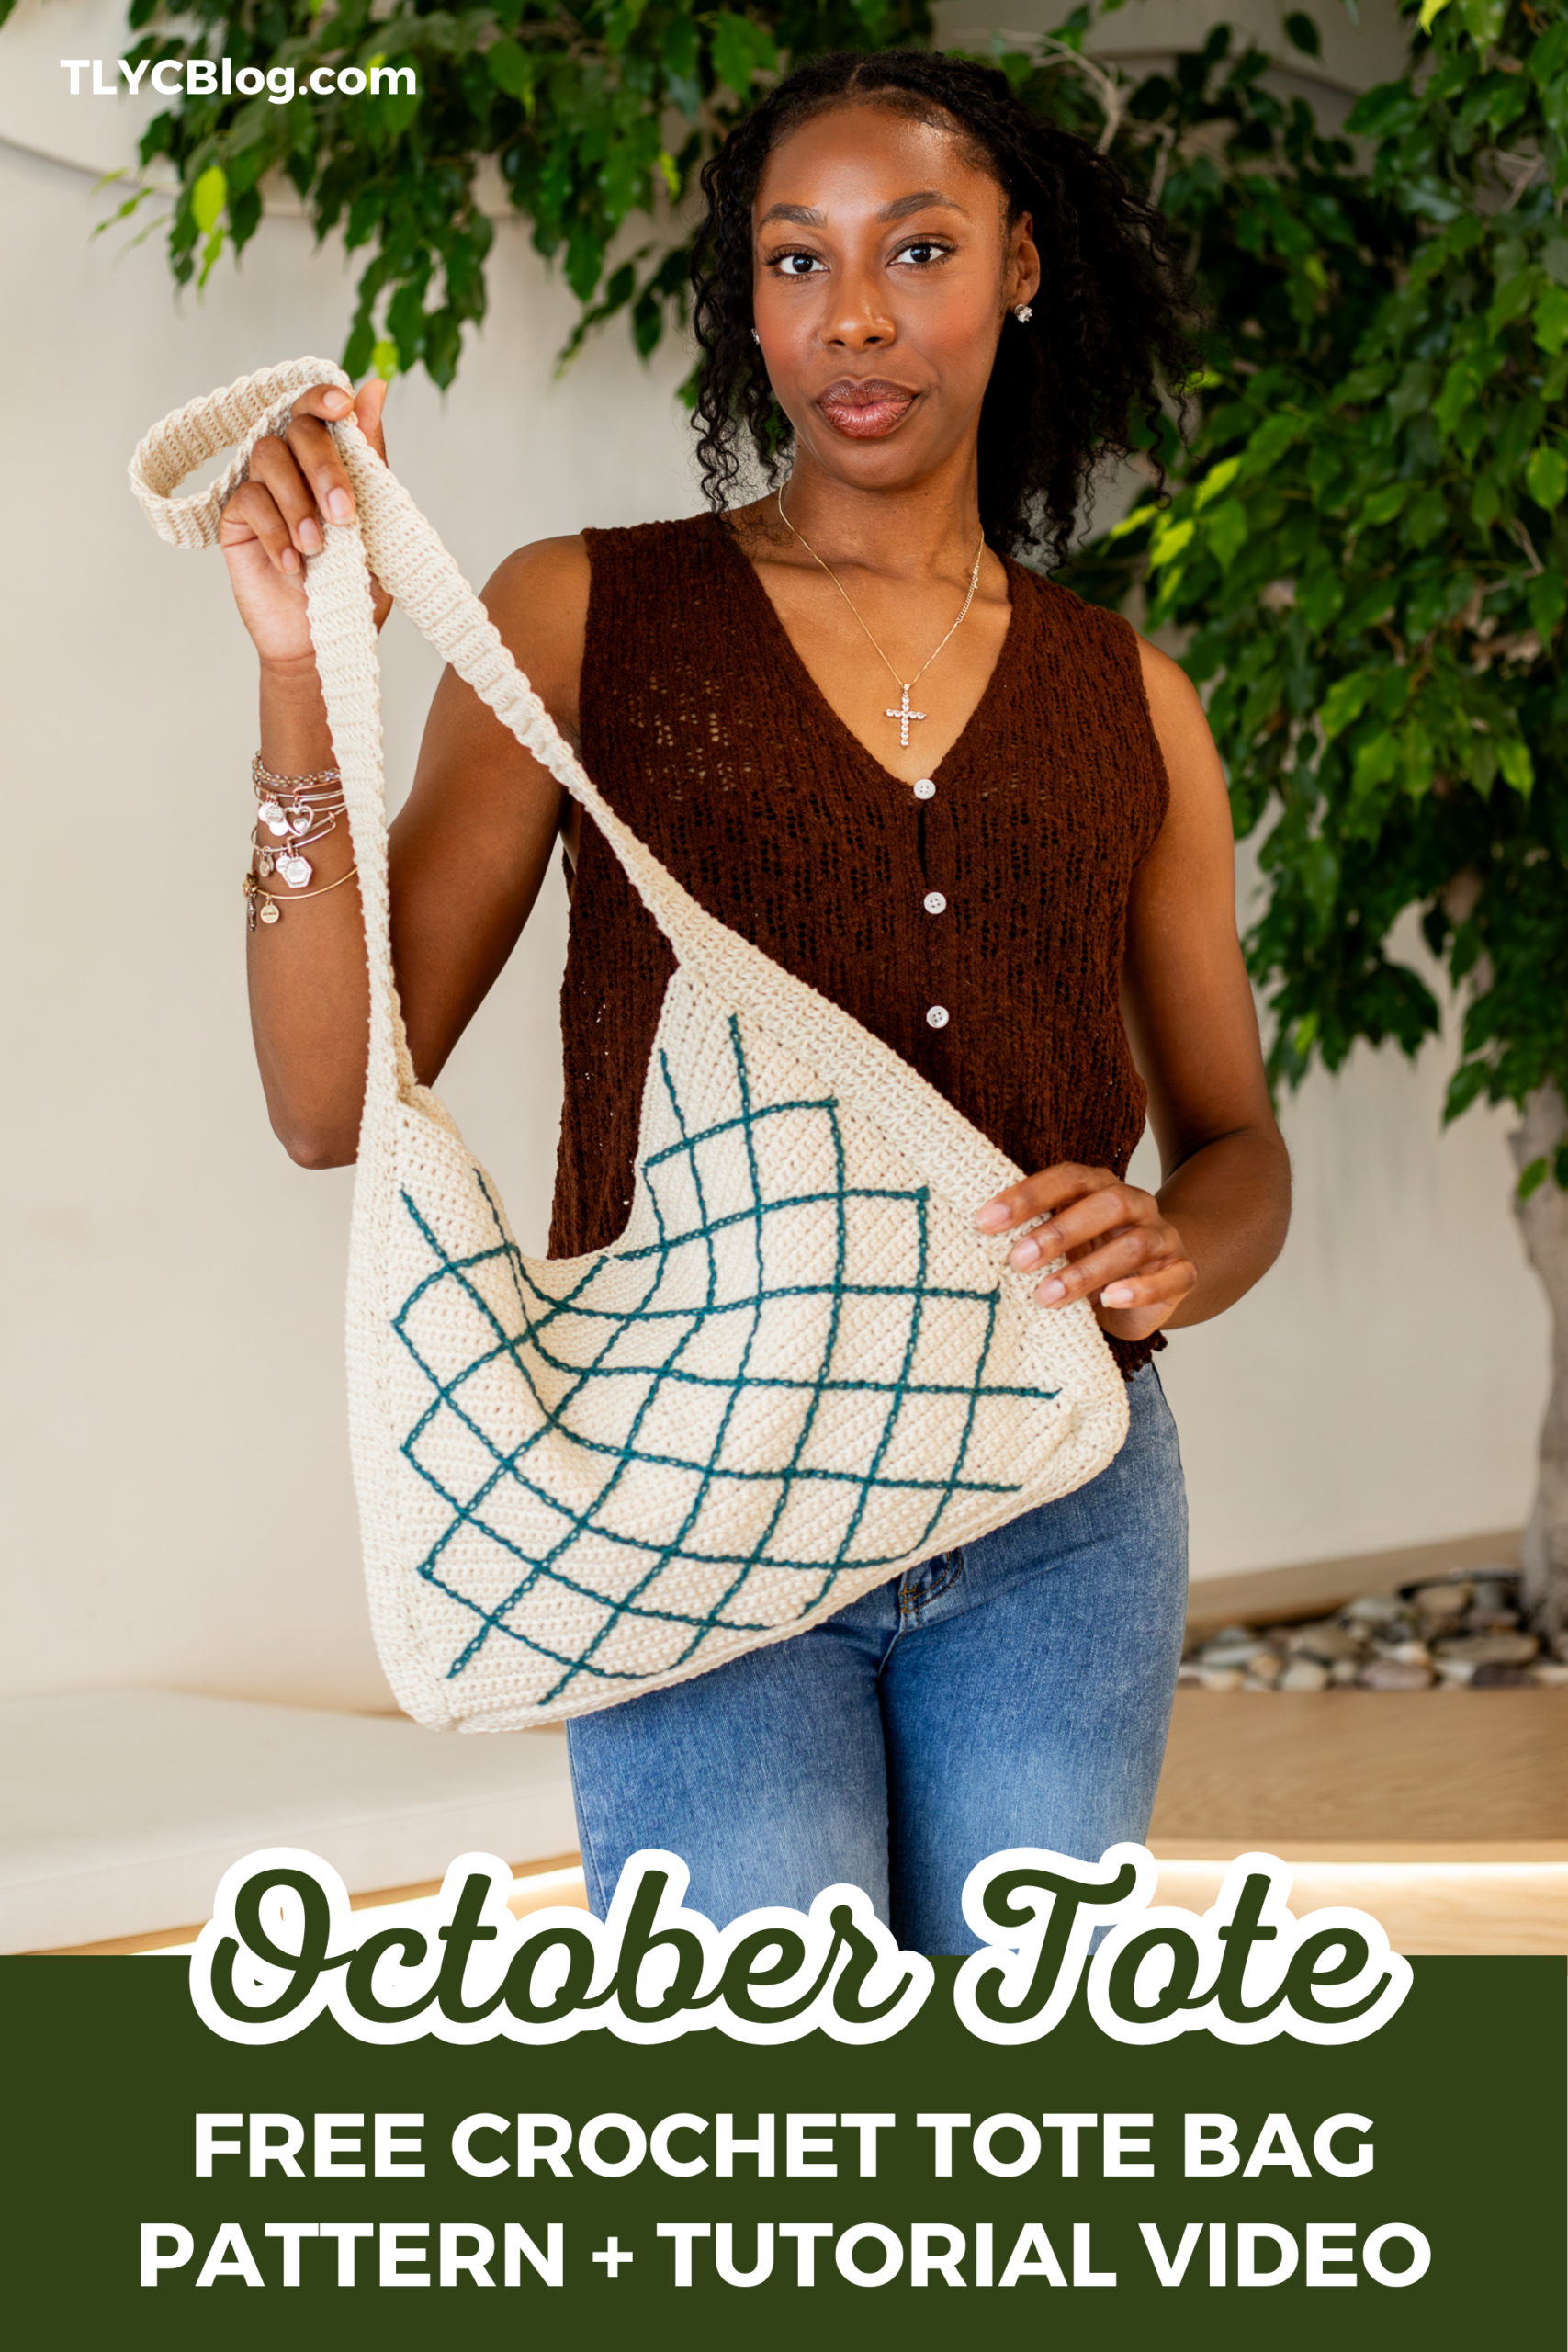
Make the October Tote!
- FREE PATTERN: Keep scrolling for the FREE version of the October Tote
- PRINTABLE PDF: Get a printer-friendly, ad-free PDF version of the Woodstock Granny Blanket from Ravelry and TLYarnCrafts.com
- PROJECT KIT: Customize your Woodstock Granny Blanket project kit from Lion Brand HERE
Crocheting a Useful Tote Bag
There’s no shortage of crochet bag patterns out there, but many of them are designed to be pretty rather than practical. We’ve seen it all before – handles that look good in photos but permanently overstretch with one heavy haul; gaps that let your precious pencils and crochet hooks fall out. A truly good crochet bag needs to be all the things – cute AND functional AND built to last. A tricky combination, but certainly not impossible.
Designing the October Tote Bag was a welcome challenge. How do you bring all the elements together for a functional bag that still looks good? Start with picking the right yarn, then add thoughtful details that hold up over time – tighter gauge to make it sturdy yet flexible, surface single crochet to add structure as well as style, and thermal stitches for added strength. Once I wove in the last end, I knew I had something special on my hands – a crochet crossbody bag made for our everyday lives.
The Yarn Talk: Choosing the Right Skein for Your Crochet Crossbody Bag
The first step to designing a crochet crossbody bag that’s beautiful AND functional is picking the right yarn. I tend to love a soft, squishy yarn that feels good on my skin. That might be perfect for my next sweater, but it would be a terrible choice for a crochet bag. Some things I kept in mind when picking yarn include:
- Fiber Content. Bags take a beating in a way that blankets and garments don’t. You need a fiber that holds its shape, resists stretching, and doesn’t pill or fuzz out after a few weeks of use. Natural fibers tend to perform best in structured projects like bags.
- Durability. This is not a display piece — it’s going to be loaded up, set down, slung around, and used hard. The yarn needs to be tough enough to handle daily friction without breaking down. Look for something with a track record of holding up over time.
- Weight. The yarn weight affects how structured the finished bag will be. A worsted or bulky weight gives you enough density to create a firm, self-supporting body without making the bag so heavy that it’s uncomfortable to carry before you even put anything in it.
- Color Range. A crossbody bag is an accessory first — it needs to work with your wardrobe. A yarn that comes in a wide, well-curated range of colors gives you the freedom to make the bag actually wearable rather than just crochet-able.
That’s a tall order to fill, and each of these bullets takes a big chunk of options off the table. It will take one very special yarn to meet all these needs and produce a bag you’ll want to use every day.
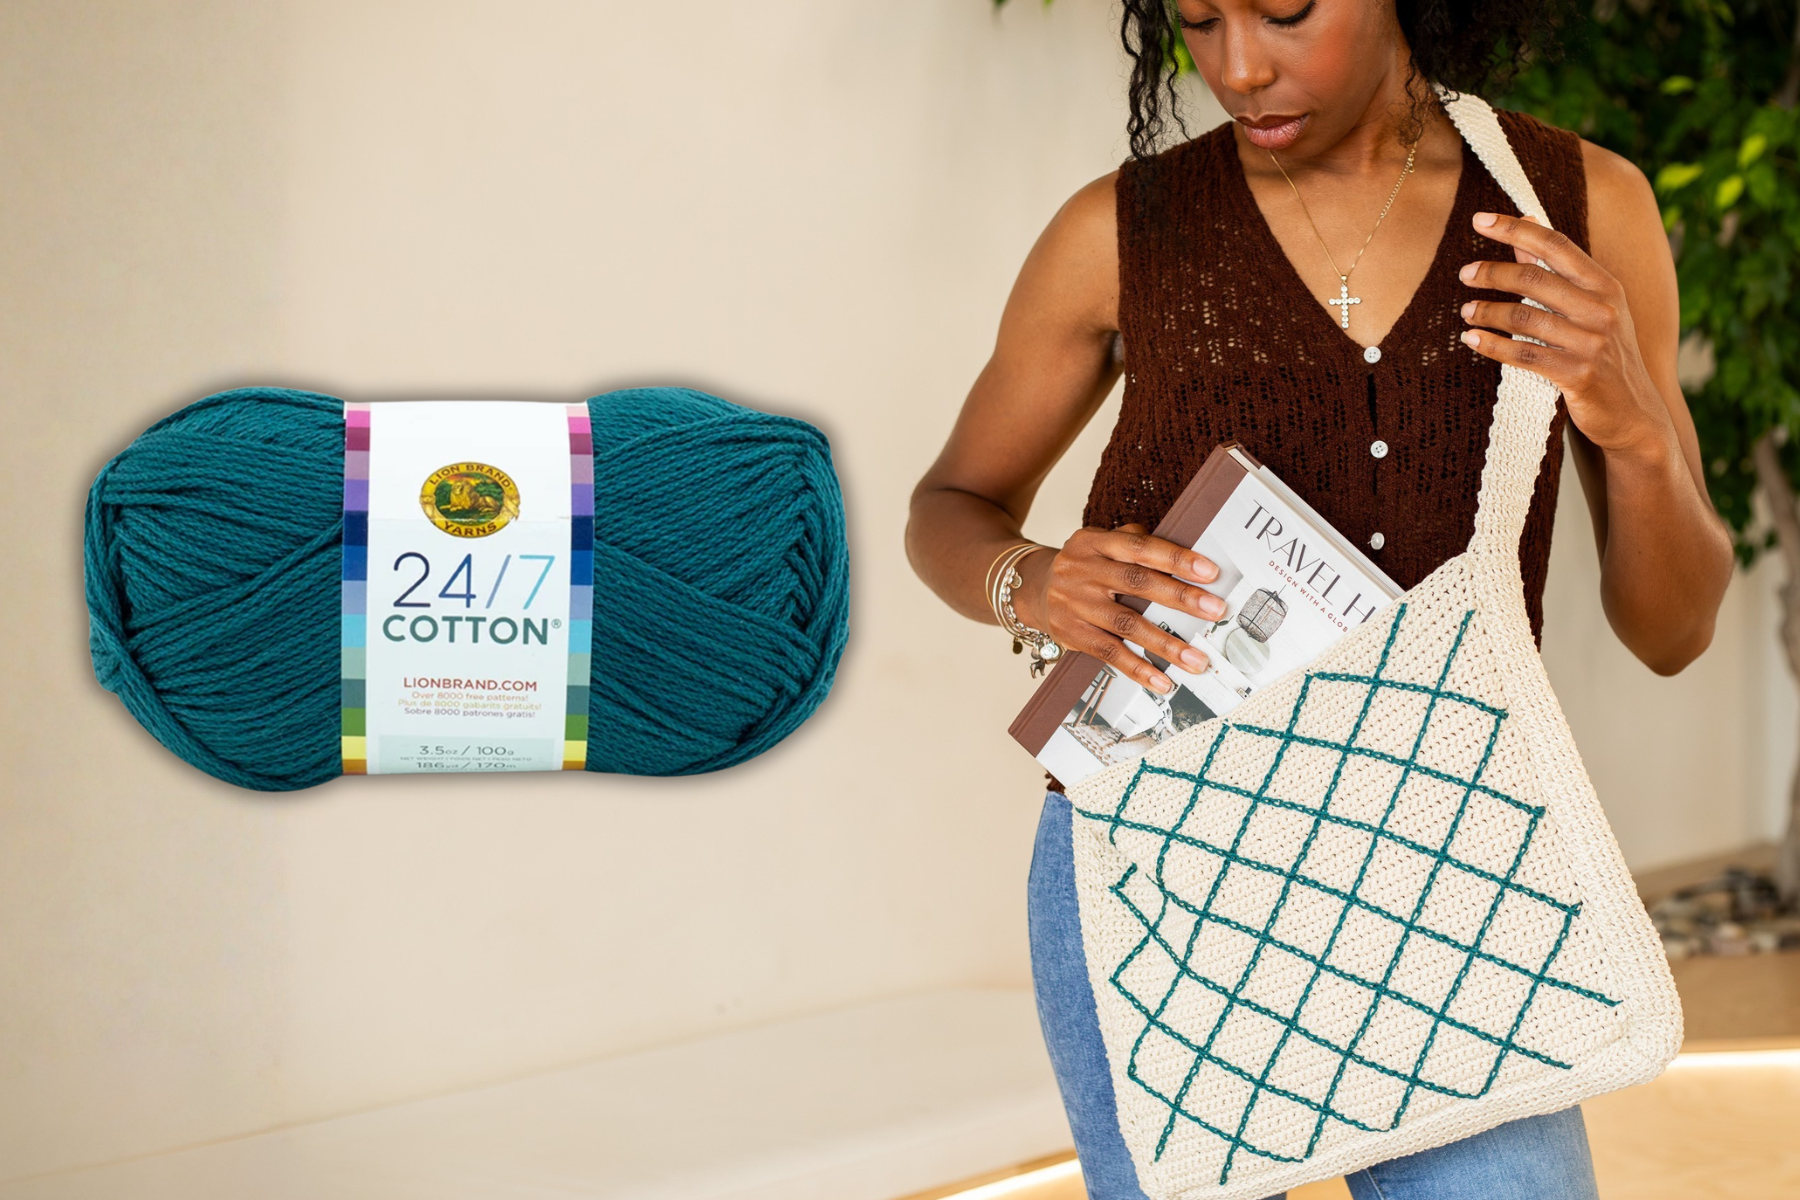
With such a hefty checklist to fulfill, I knew there was only one yarn for the job – it’s Lion Brand’s 24/7 Cotton. This yarn has so much going for it. First, there’s the chainette construction – durable with amazing stitch definition, I know this yarn won’t break under pressure. Then there’s the mercerization. This process conditions the fibers, making them stronger, shinier, and more receptive to dye. Speaking of dye, 24/7 Cotton has an ever-expanding collection with 51 shades so far. The color combos are endless.
Is 24/7 Cotton your next stash staple? Click here to find out!
Make the October Tote!
- FREE PATTERN: Keep scrolling for the FREE version of the October Tote
- PRINTABLE PDF: Get a printer-friendly, ad-free PDF version of the Woodstock Granny Blanket from Ravelry and TLYarnCrafts.com
- PROJECT KIT: Customize your Woodstock Granny Blanket project kit from Lion Brand HERE
October Tote Bag Details
DESCRIPTION
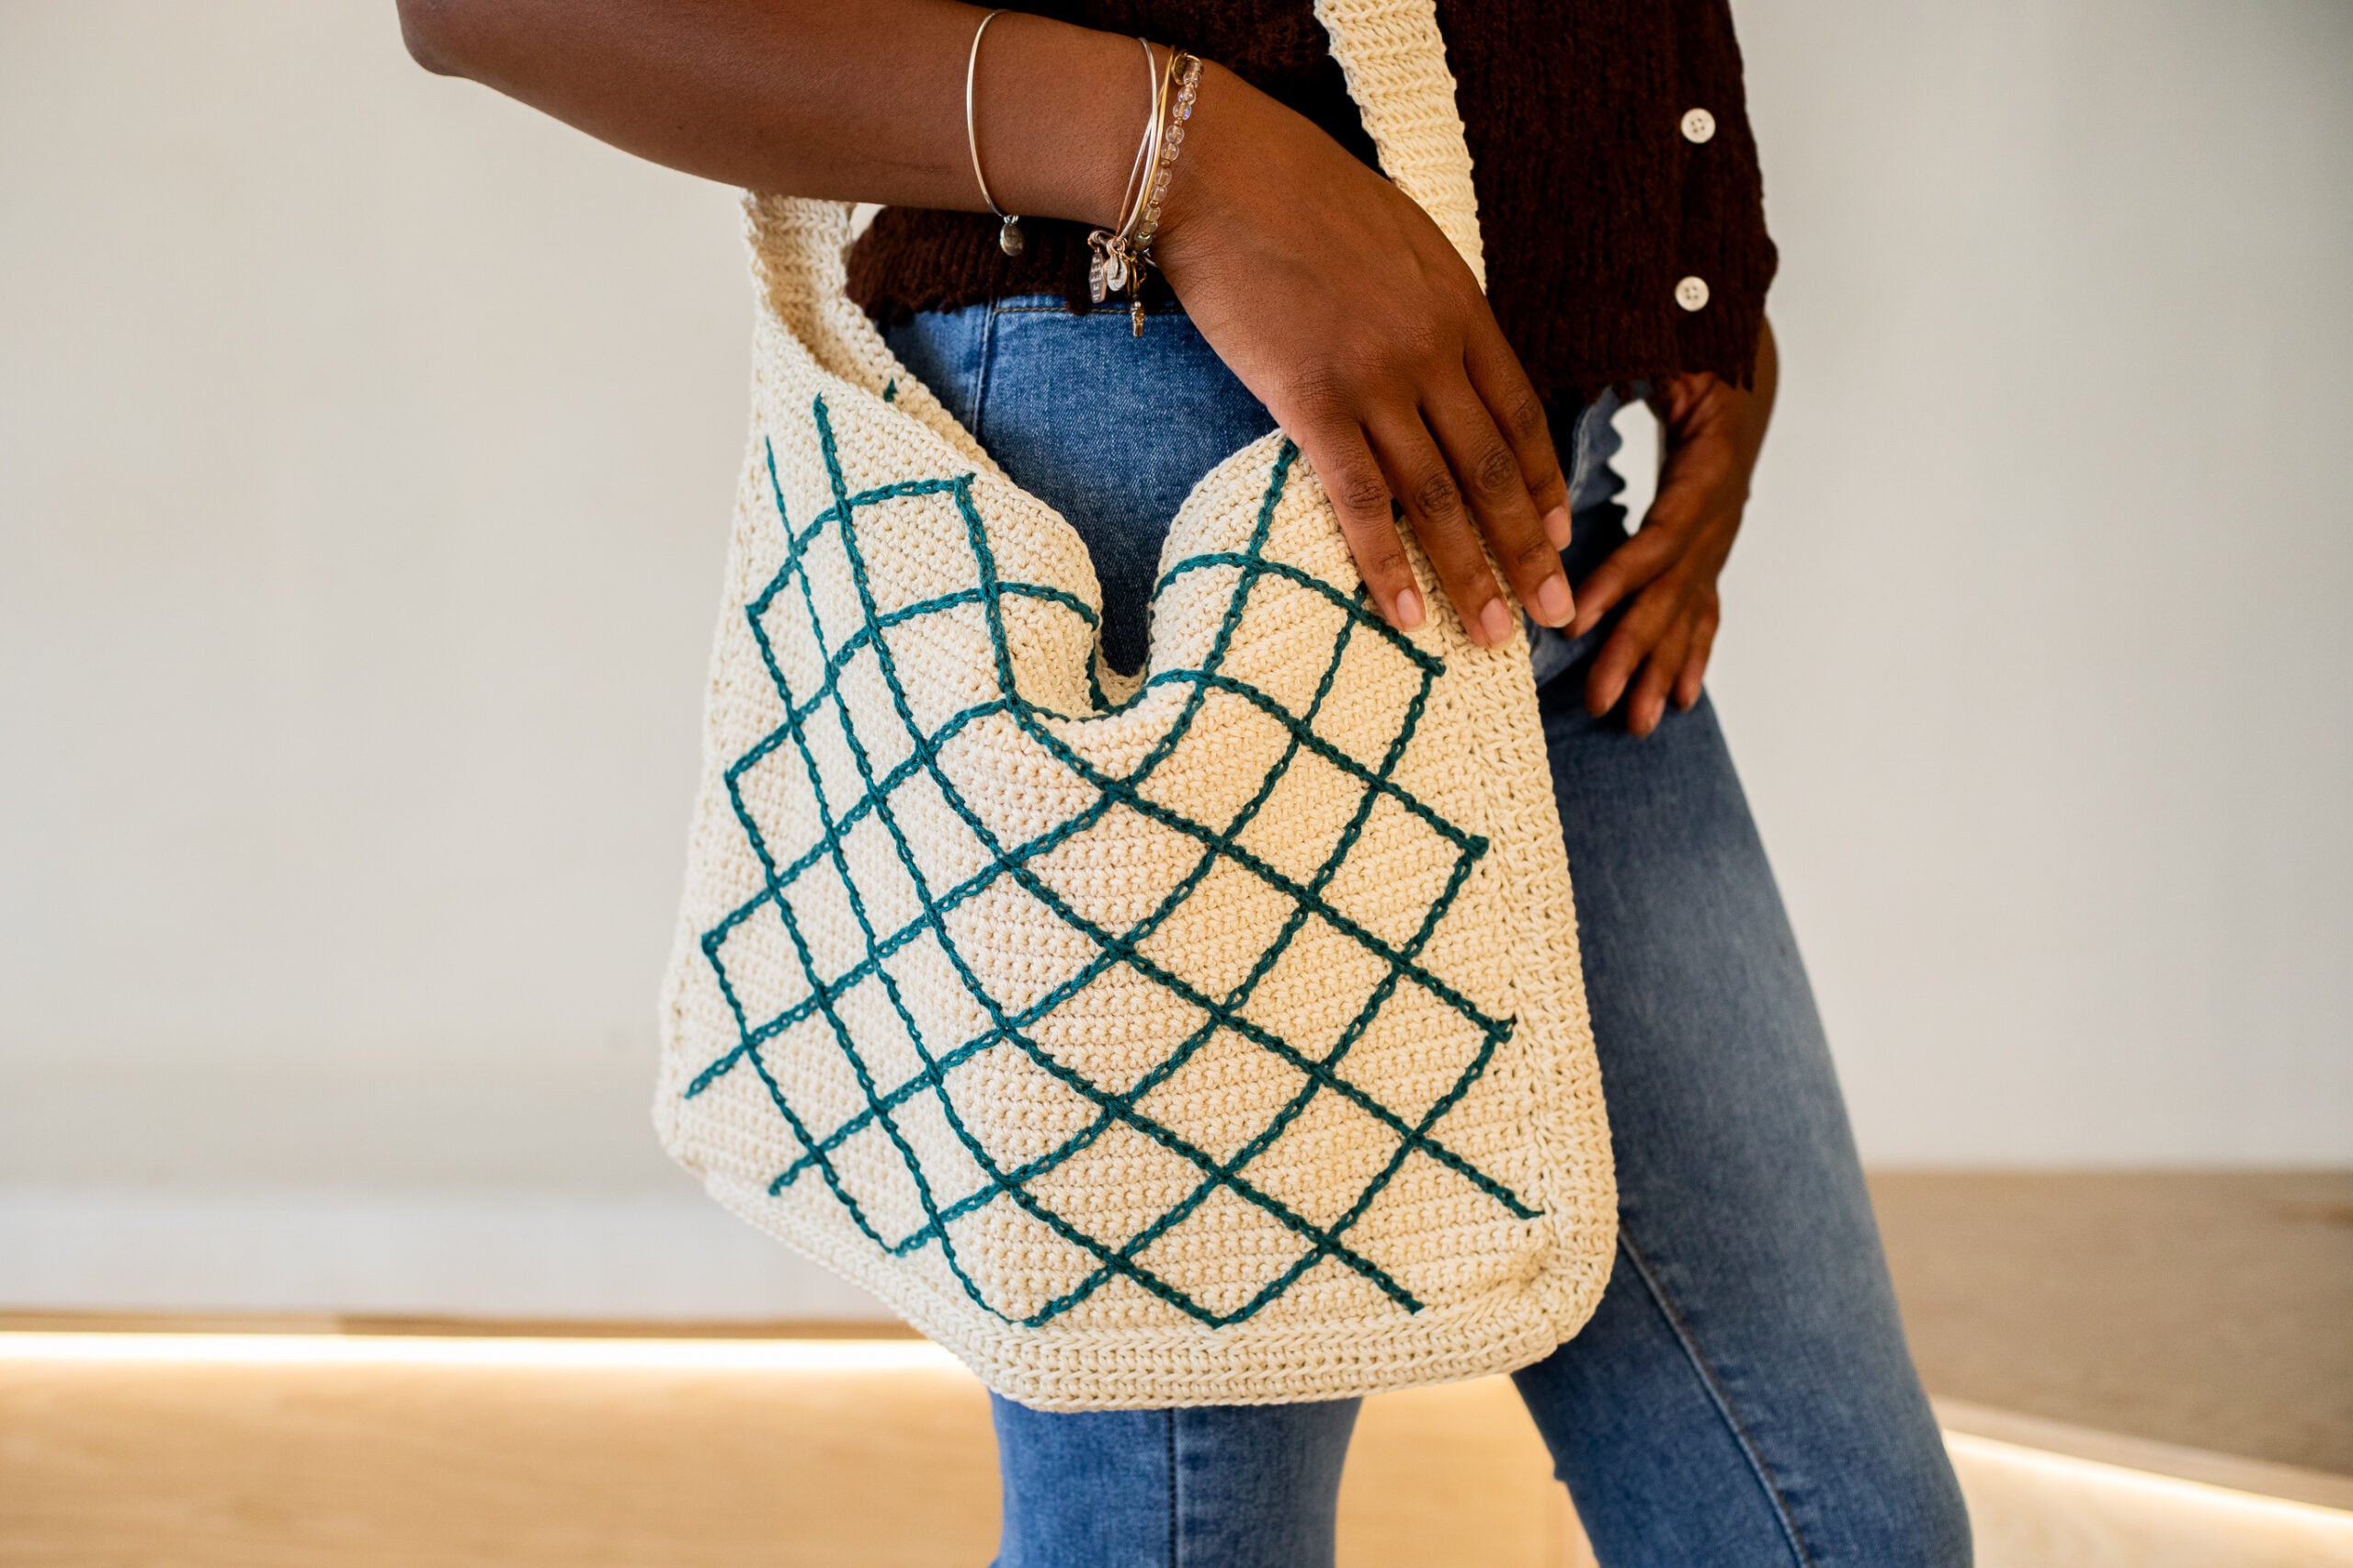
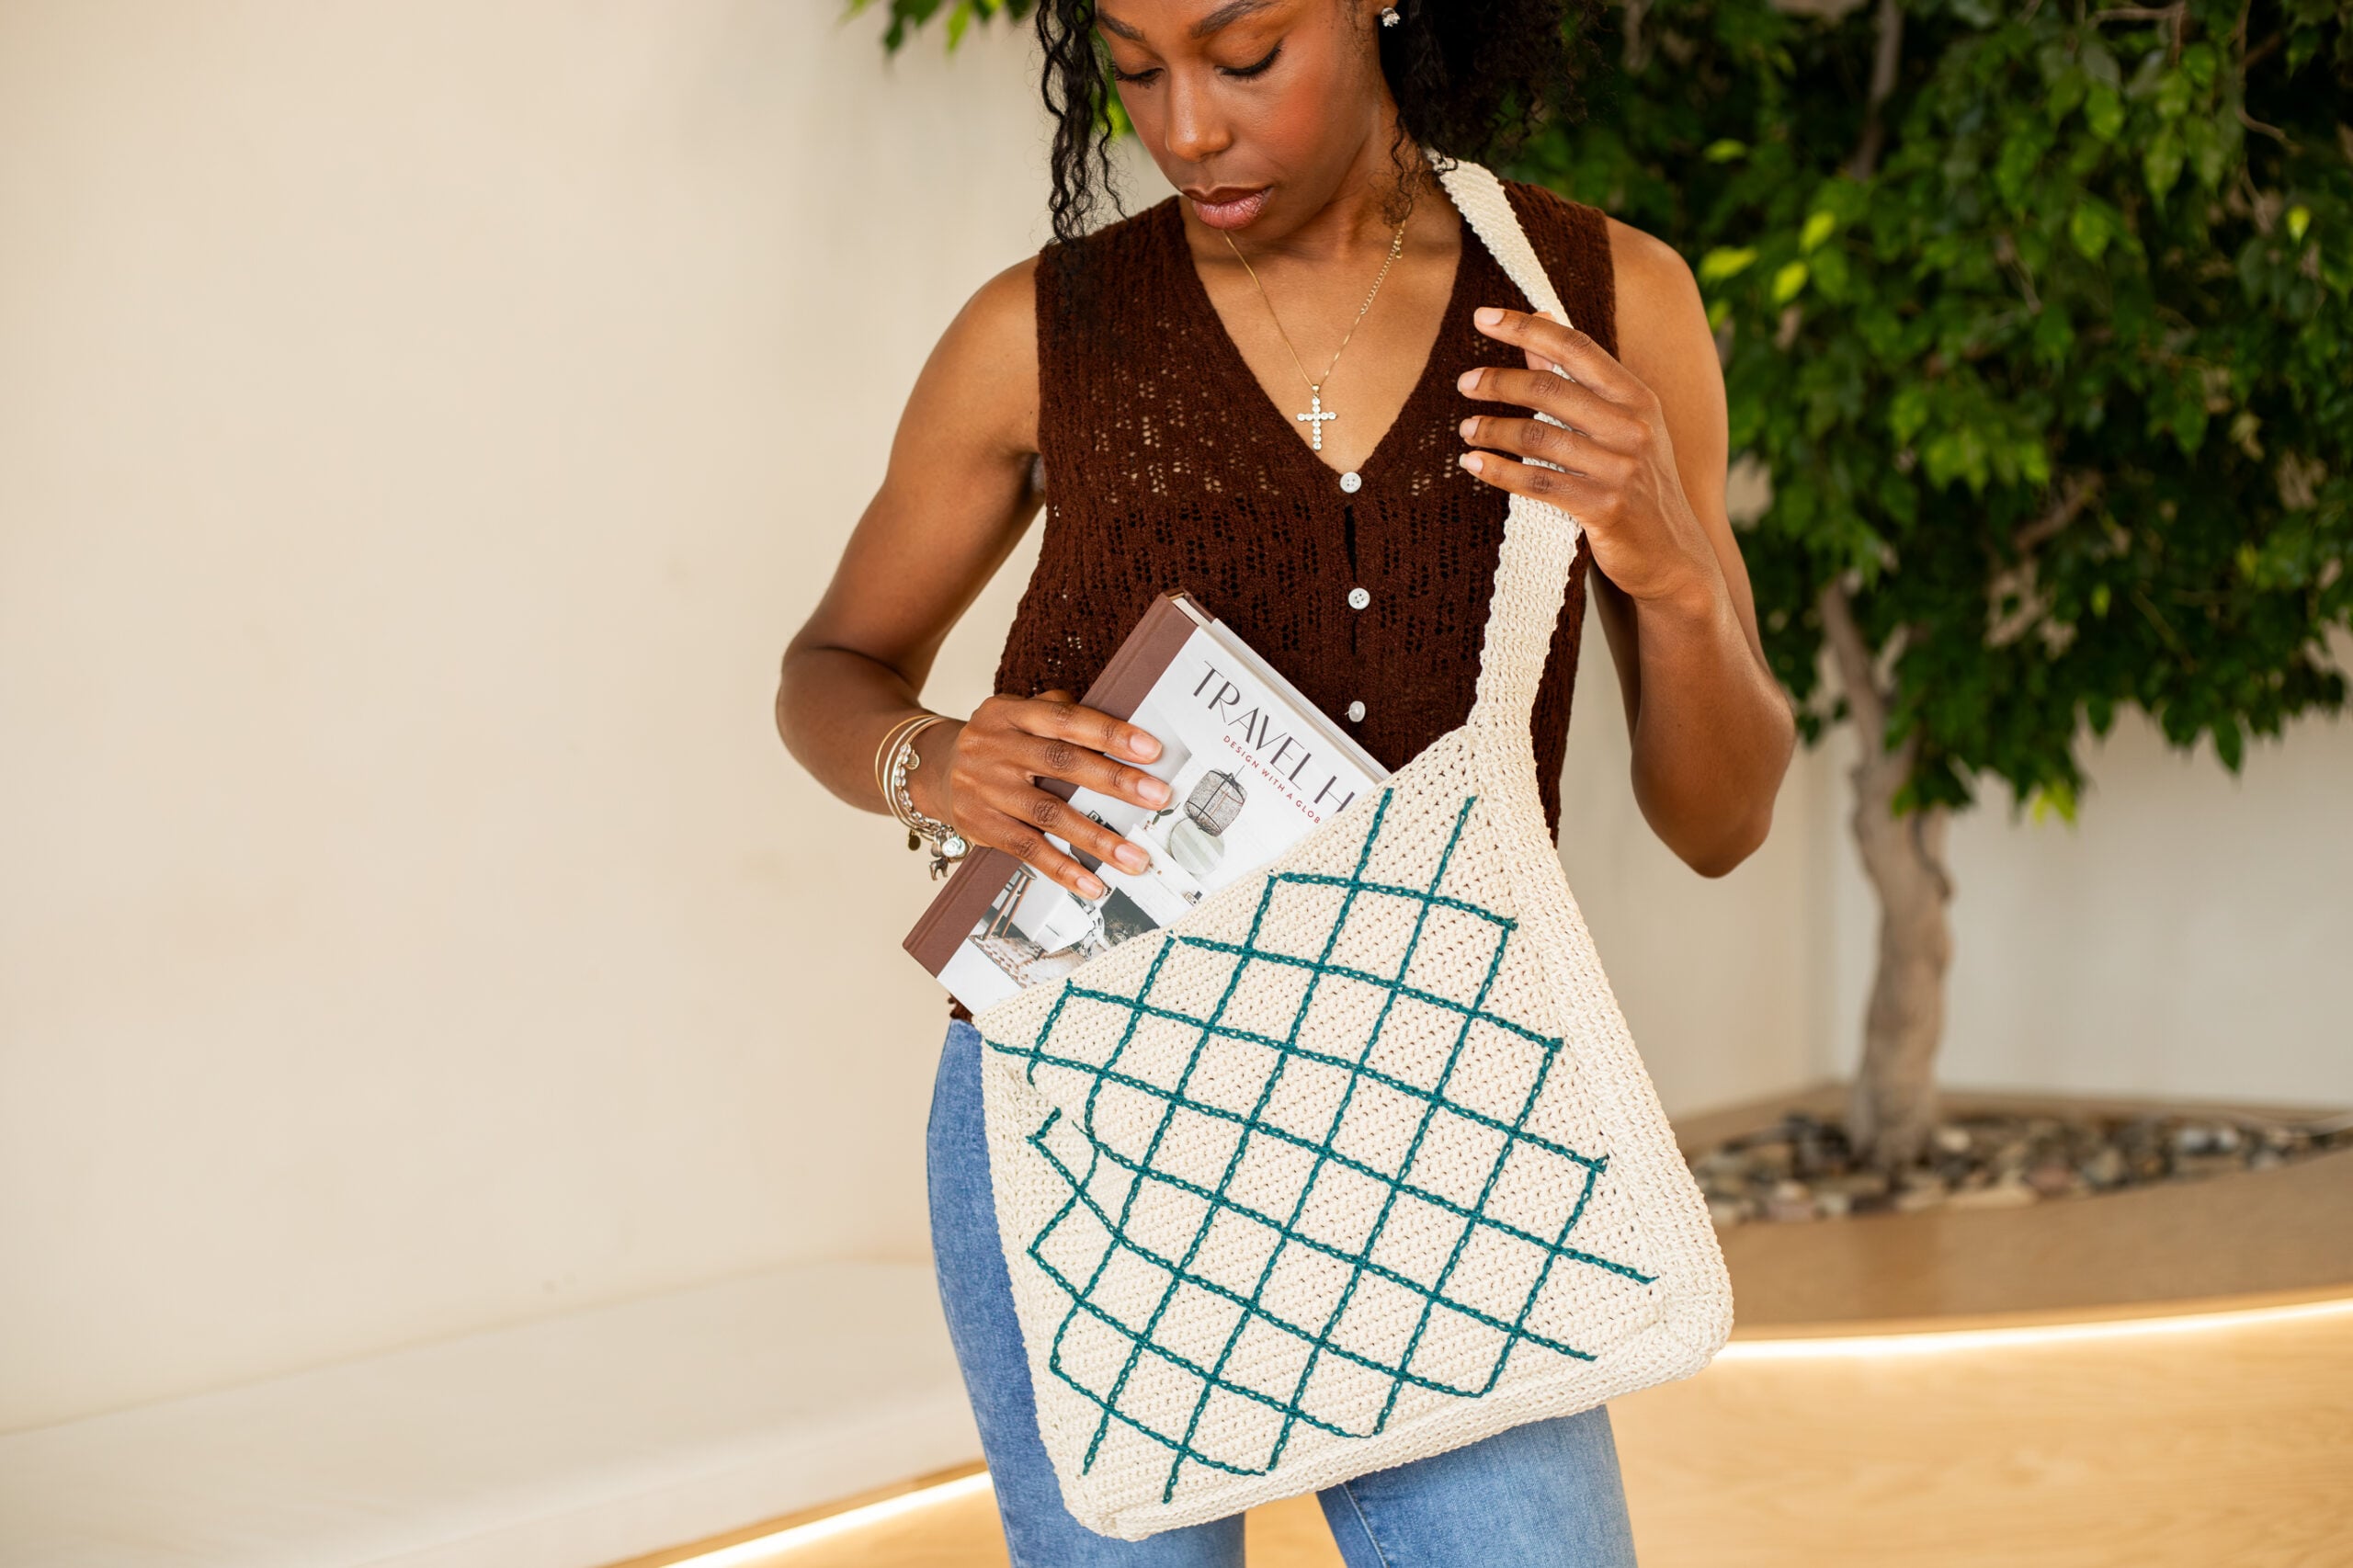
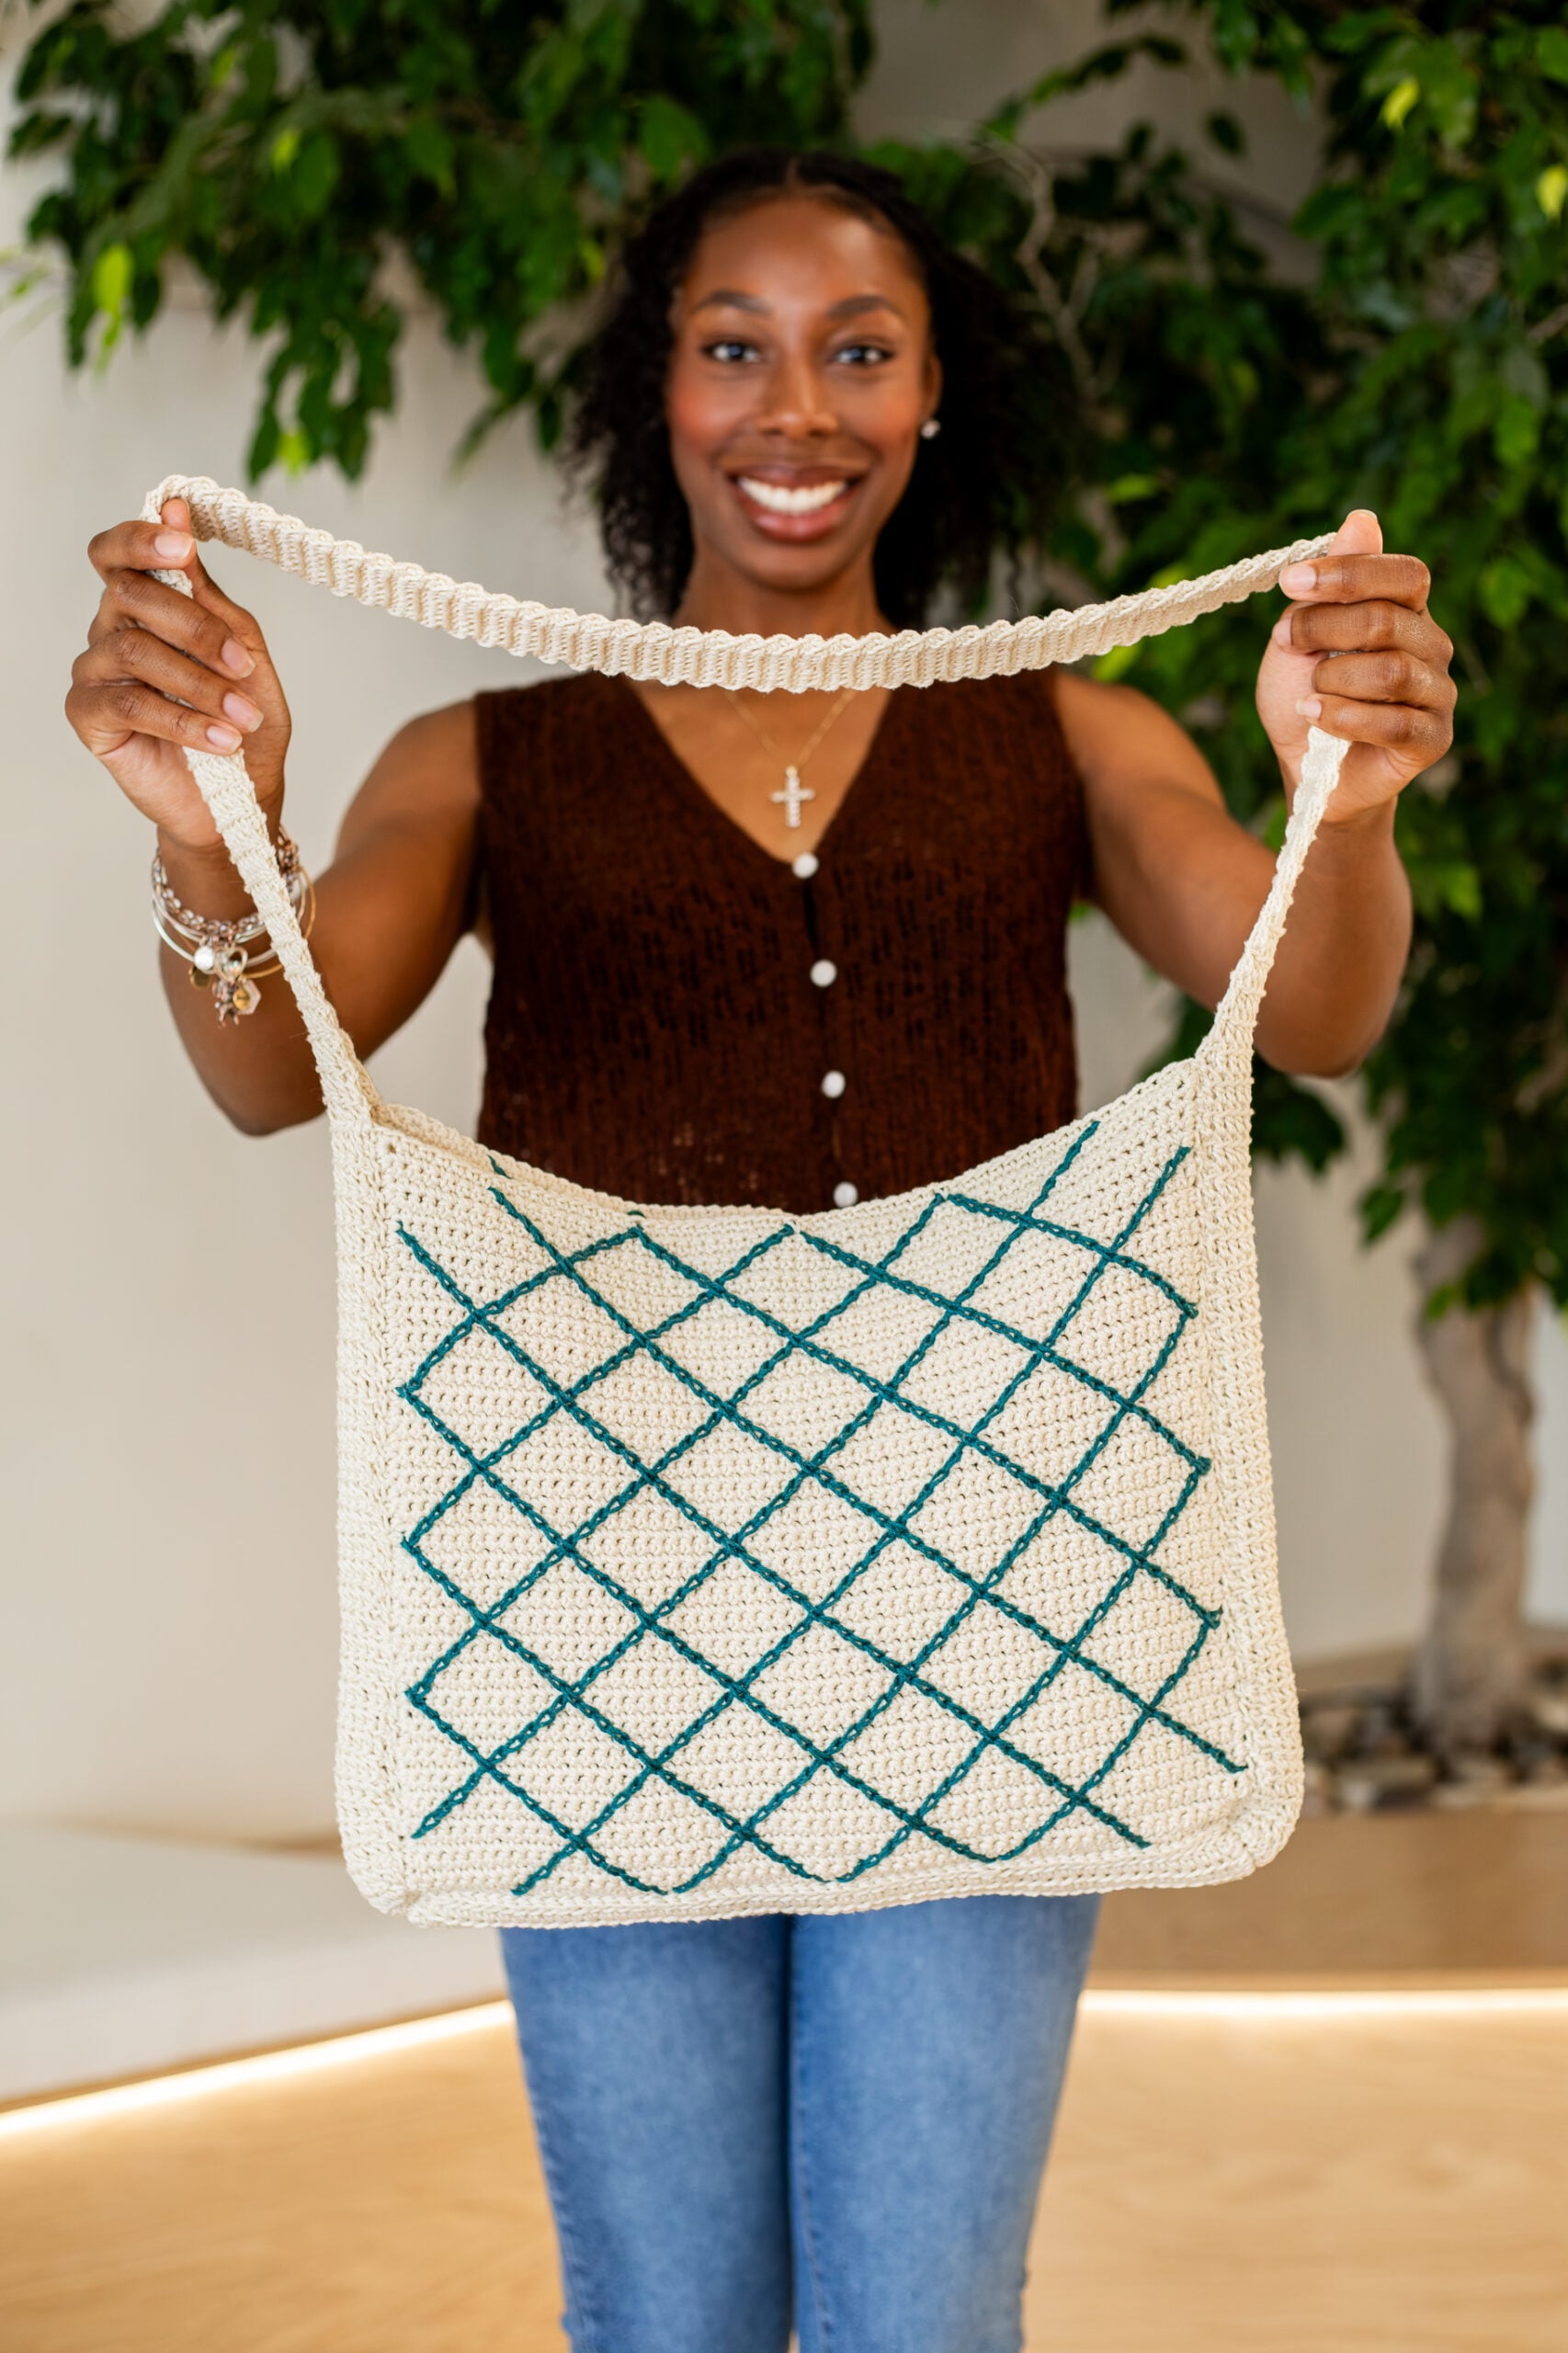
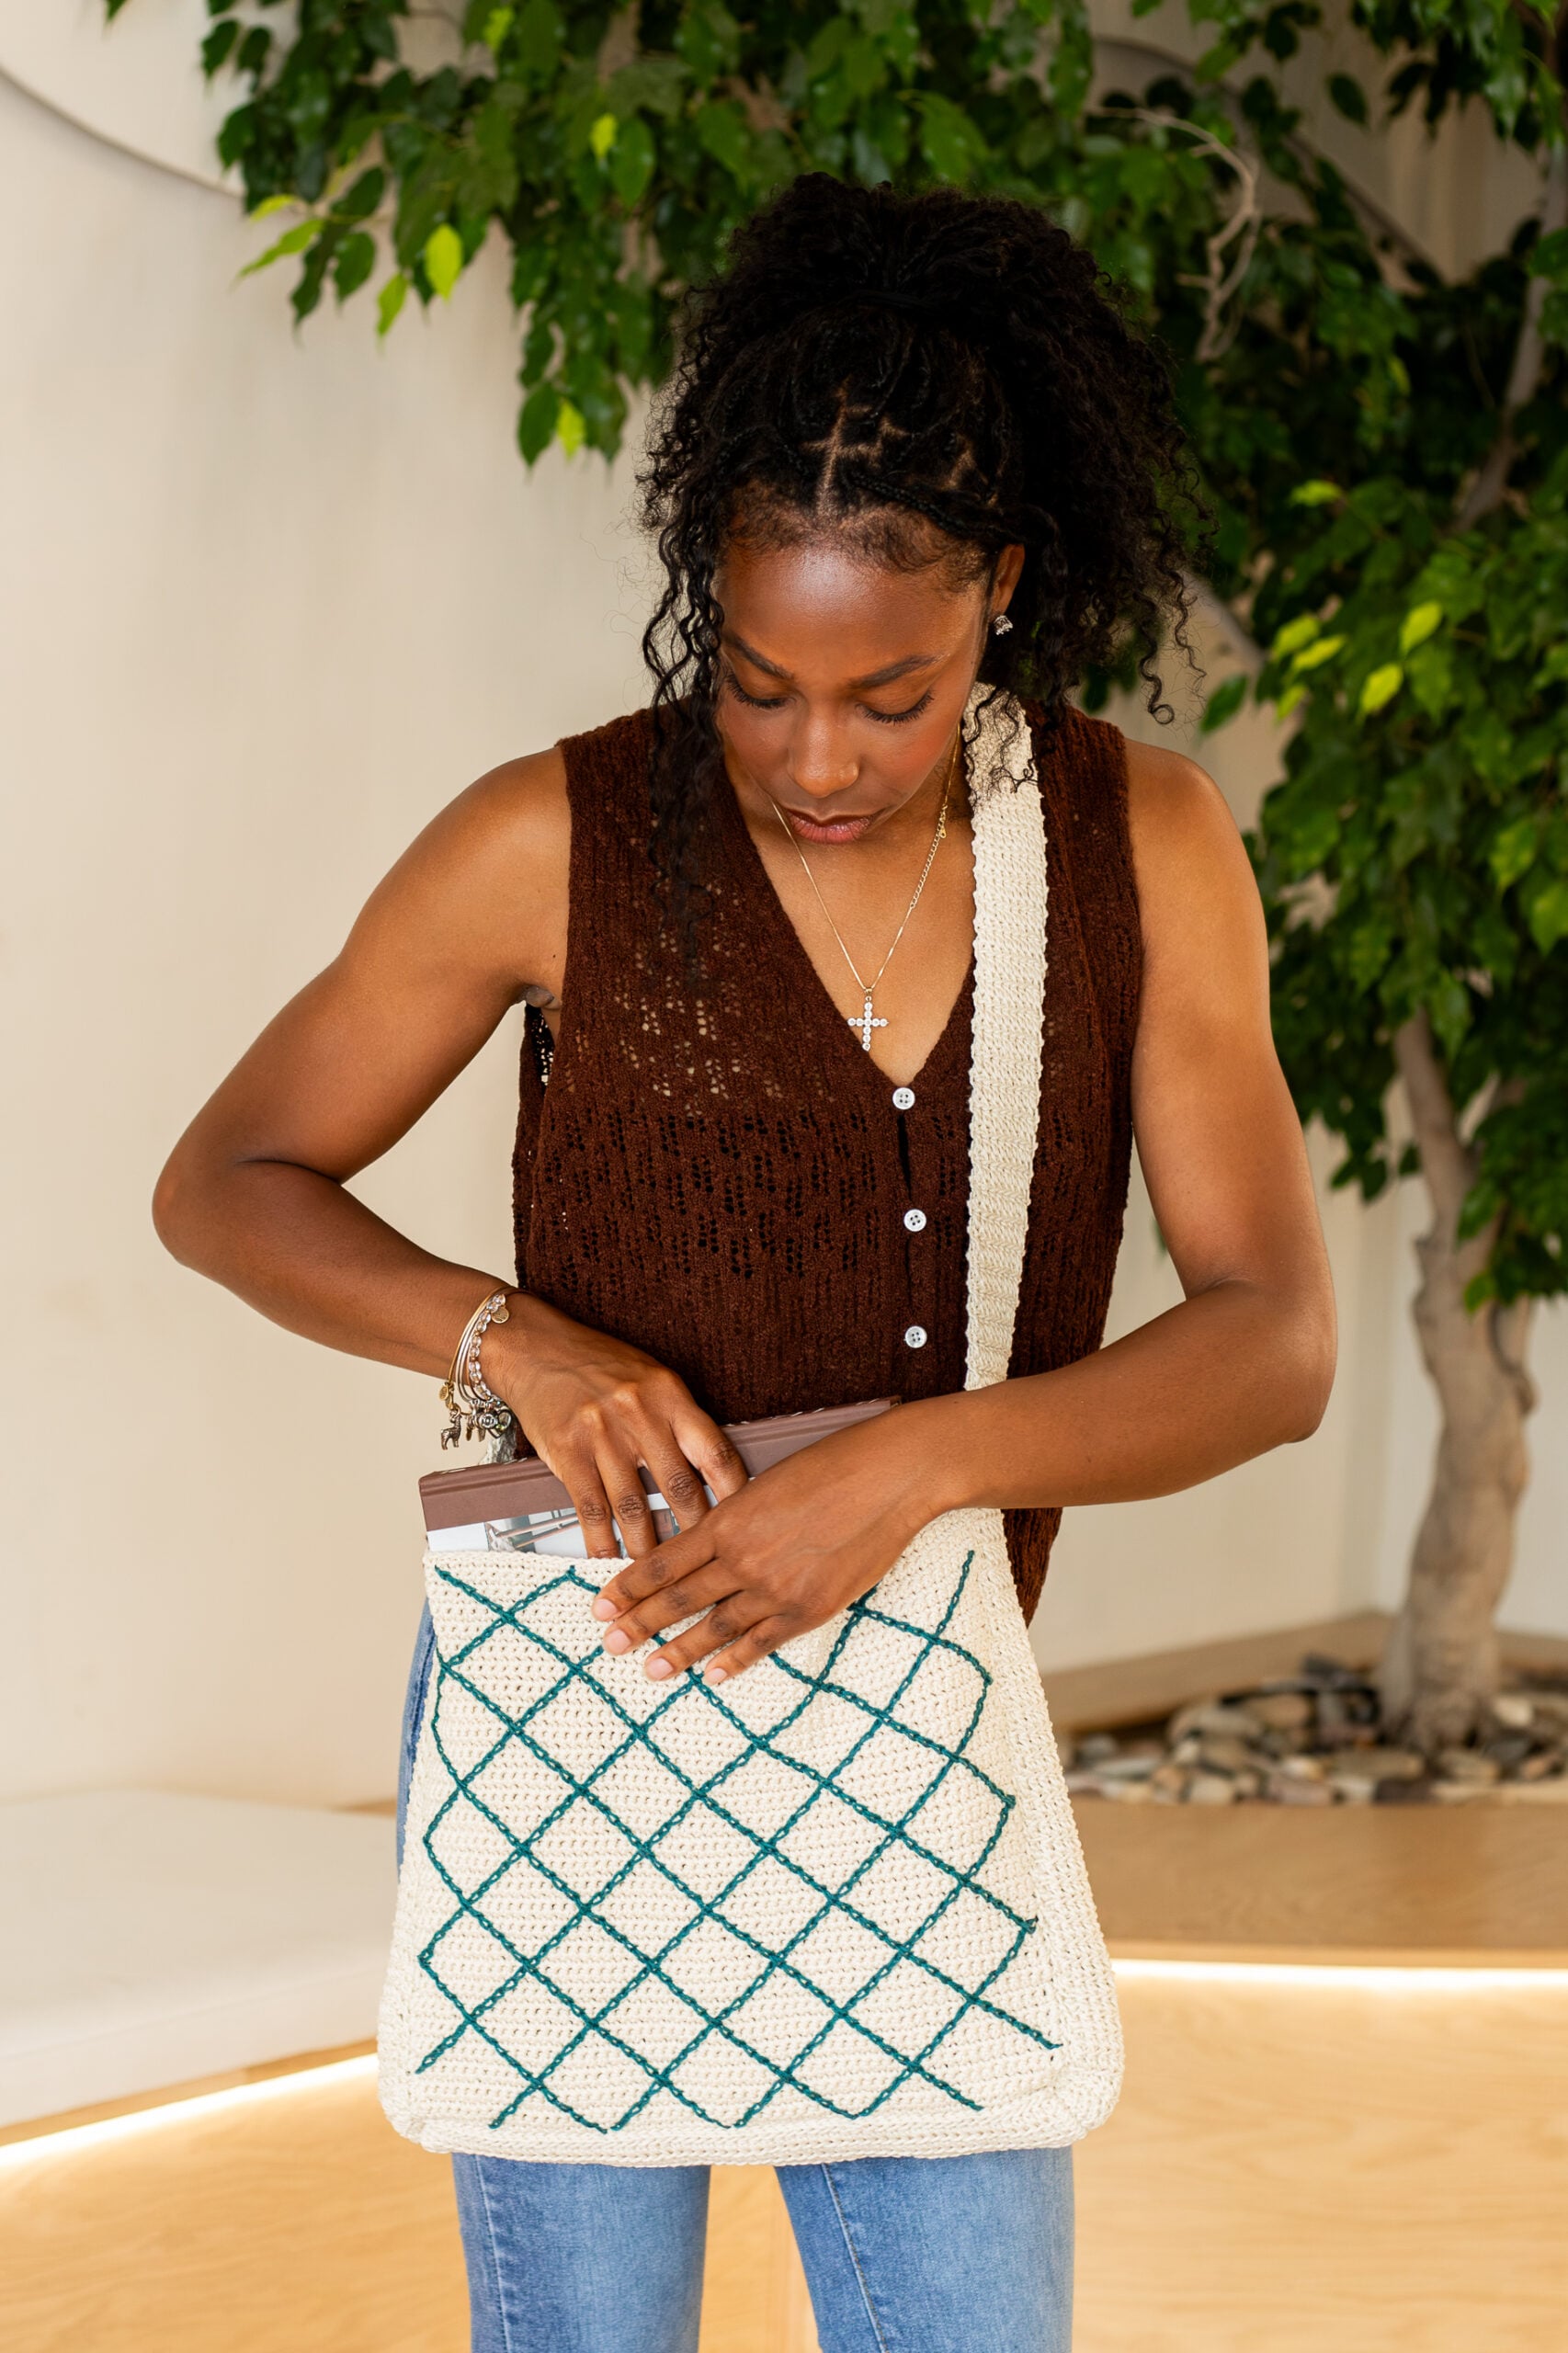
A bag for every adventure, the October Tote is ready for whatever the day throws at you. This versatile crochet crossbody bag features a bold diamond grid design in a two-color combination meant to draw stares. Consider lining your bag with a manufactured tote bag, or hand-sewing a coordinating fabric to create a practical piece that’s as unique as you are.
MATERIALS
- Lion Brand 24/7 Cotton. Sample made in the colorways Ecru (A – 3 skeins) and Dragonfly (B – 1 skein). Substitute worsted weight cotton yarn of your choice. Ensure a tight gauge.
- 4.5mm crochet hook (try this set!)
- Scissors
- Tape measure
- Tapestry needle
- Locking stitch markers
SIZE
- Bag: 14” long x 16” wide
- Strap: 16” drop x 2” wide
GAUGE
4” = 16 sts and 16 rows in single crochet
ABBREVIATIONS
Ch = chain
Hdc = half double crochet
Lp = loop
Rep = repeat
RS = right side
Sc = single crochet
Sl St = slip stitch
St = stitch
WS = wrong side
NOTES
- Construction: This bag is made in stages, beginning with two single crochet panels. Once complete, each panel will receive the diamond lattice surface crochet pattern. Next, work directly off one panel to make the Bottom, then whip stitch the other panel to the Bottom. Finally, a thermal stitch handle is created separately to easily adjust the length, and it’s then seamed to the sides of the bag. Finish with a light steam blocking to define the stitches as needed.
- Turning Chains: Starting ch-1 does not count as the first stitch.
- Surface Crochet: Pay close attention to your tension for the surface crochet slip stitches to avoid puckering. If you find your tension is too tight, go up a hook size for the surface crochet.
- Crochet Shorthand: When instructions say “3sc”, this means to place 3 single crochet stitches into the same stitch (corner made). When instructions say “2sc”, this means to place 2 single crochet stitches into the indicated stitch (corner completed).
October Tote Bag Pattern
Ready to make a bag that’s ready for your next adventure? Let’s do it together!
Panels (Make 2)
With A, ch 58.
ROW 1 (RS): Sc into the back bump of 2nd ch from hook and each ch across, turn. (57 sc)
ROW 2 (WS): Ch 1, sc in each st across, turn.
ROWS 3 – 55: Rep row 2.
SURFACE CROCHET (Complete for Both Panels)
Surface crochet is done with the RS facing you at all times. Yarn should stay on the WS of fabric.
Use B for all surface crochet throughout section.
Counting along the bottom from right to left, mark the 18th, 29th, 40th, and 51st starting chains.
Counting along the top from right to left, mark the 18th, 29th, 40th, and 51st single crochet stitches.
Counting along the side from bottom to top, mark the 5th, 16th, 27th, and 38th, and 49th rows on the left side.
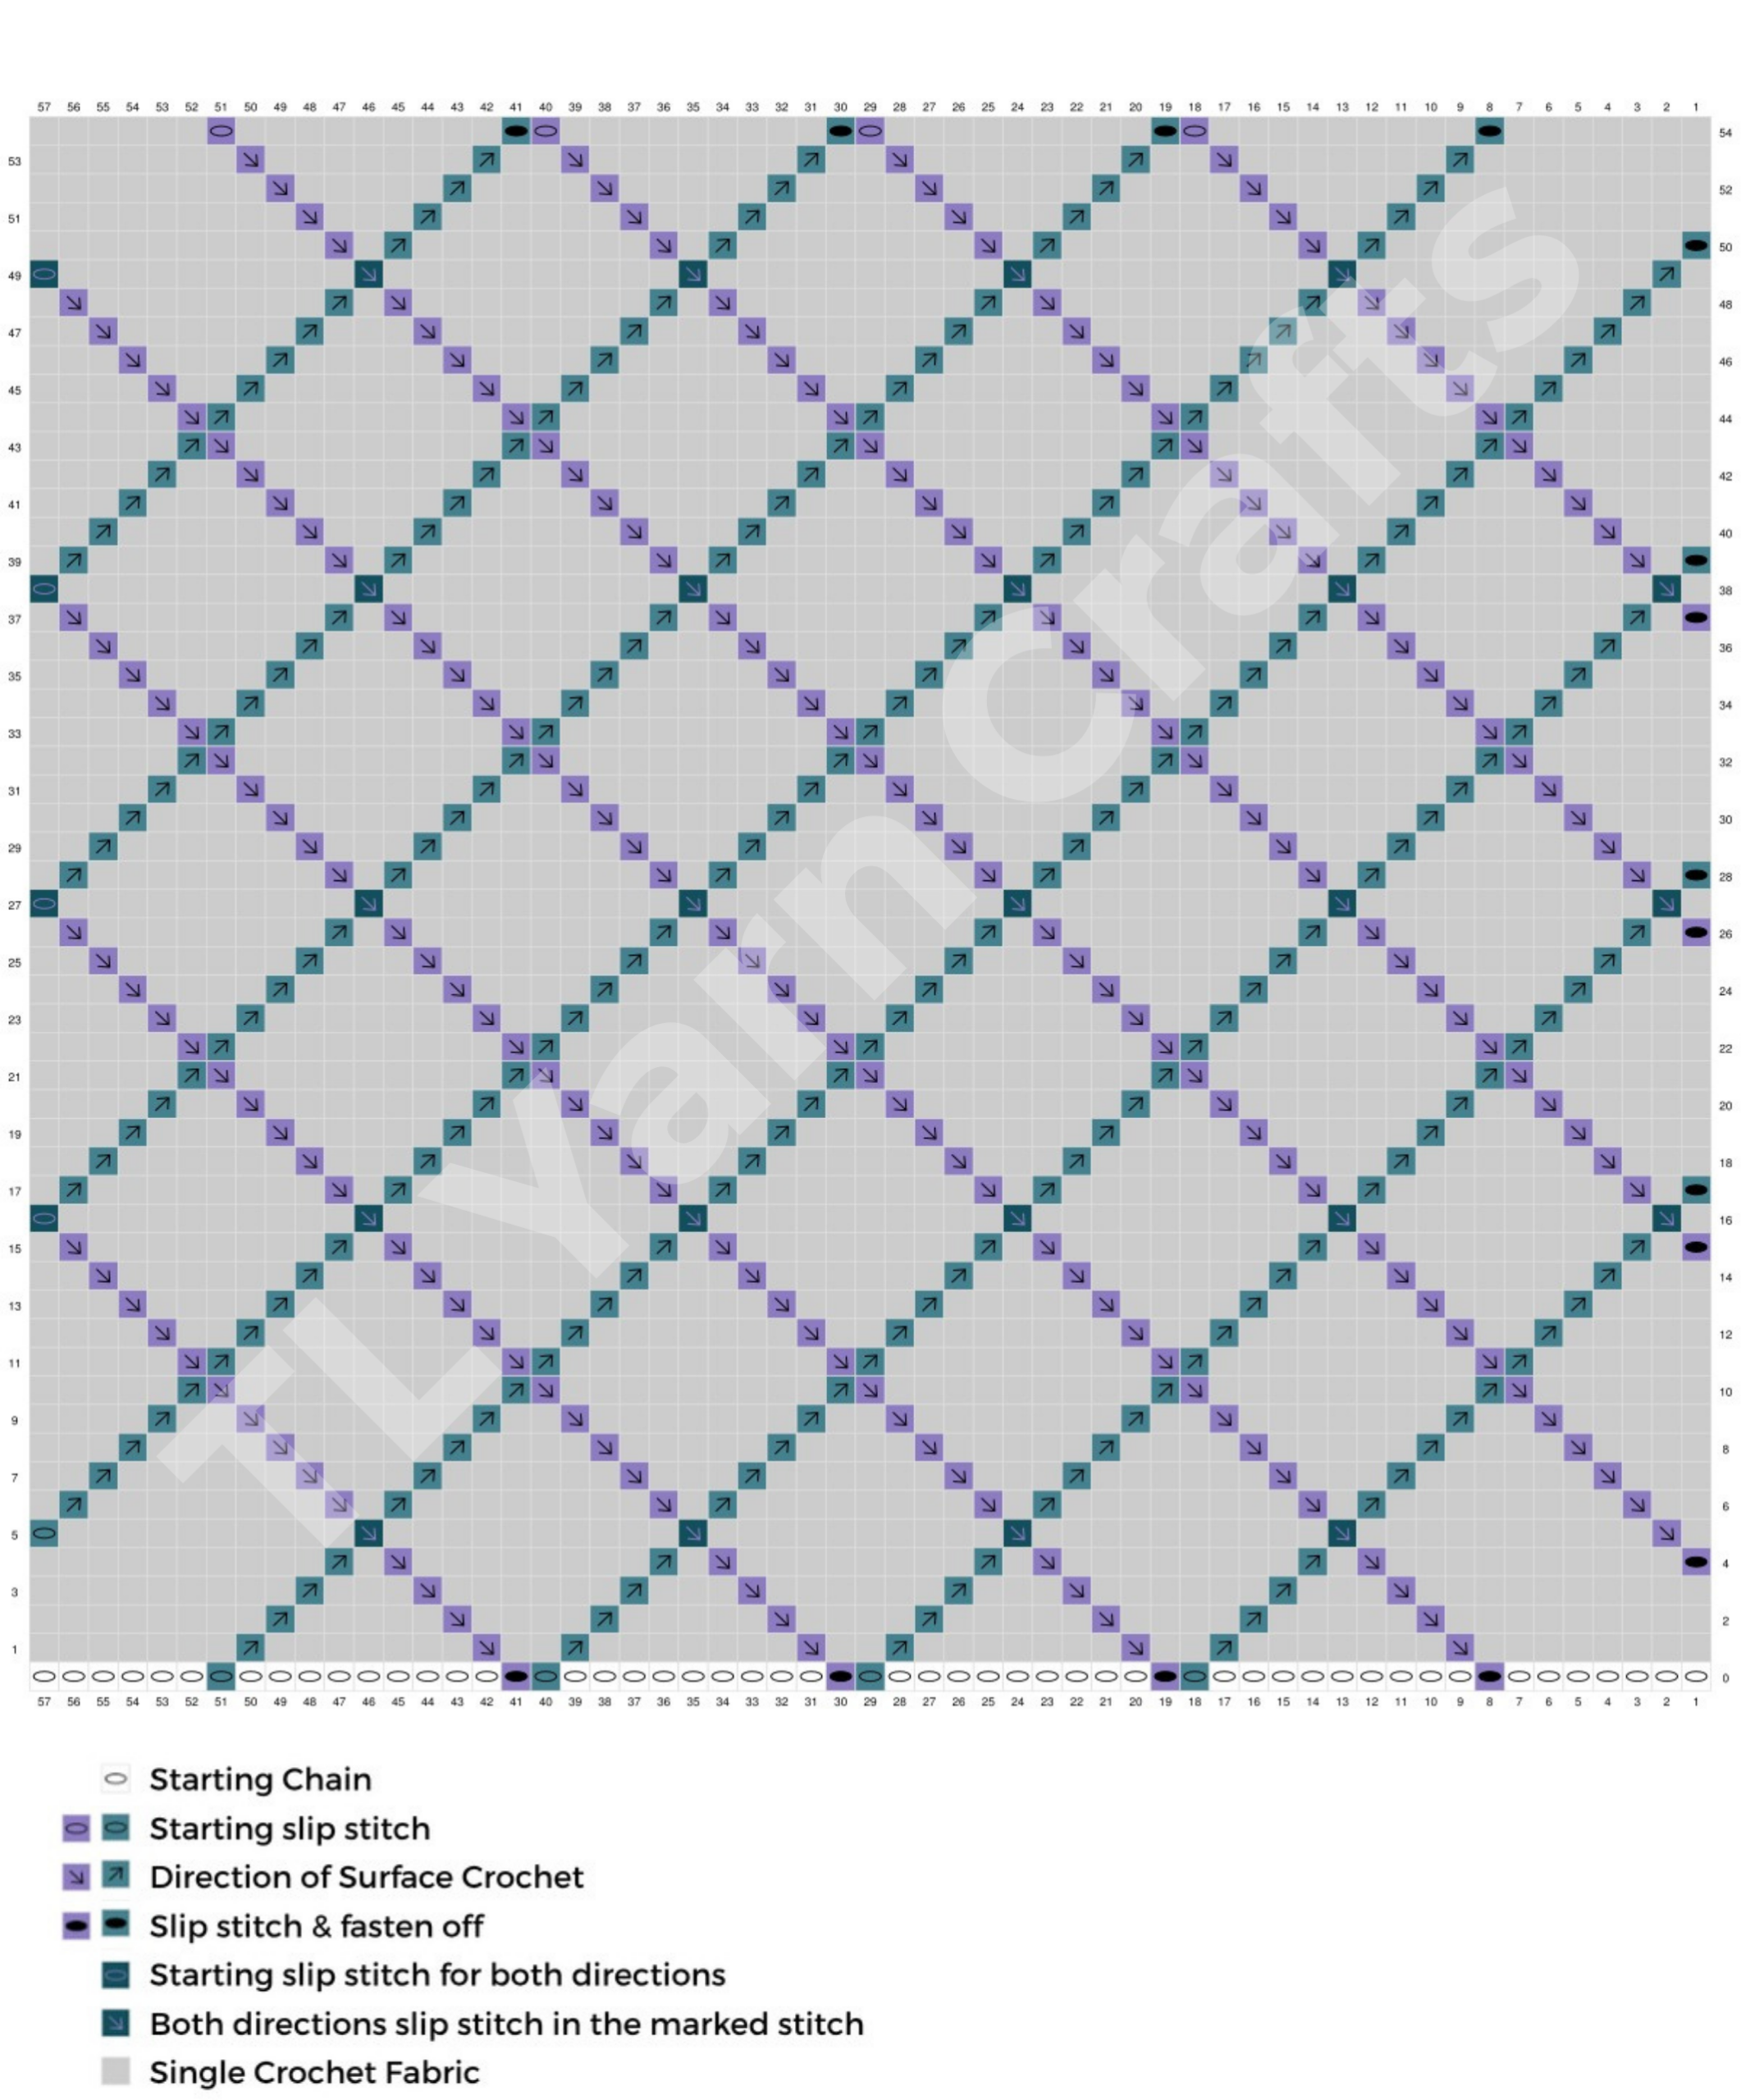
1 – Diagonal-Up Instructions
Make a slipknot. Insert hook into the marked ch or row-end, place slipknot on hook, pull up the lp. Working diagonally to the right, sl st into the sc 1 row above and to the right of the starting st. Sl st into the row above and one st to the right of the previous st. Continue this way across the bag. Fasten off yarn.
Continue for each marked ch along the bottom edge. Rep for each marked row along the left edge but SKIP the last marked row (Row 49).
2 – Diagonal-Down Instructions.
Make a slipknot. Insert hook into the marked st or row end, place slipknot on hook, pull up the lp. Working diagonally to the right, sl st into the sc 1 row below and to the right of the starting st. Sl st into the row below and one st to the right of the previous st. Continue this way across the bag. Fasten off yarn.
Continue for each marked st across the top. Rep for each marked row along the left edge but SKIP the last marked row (Row 5).
Weave in all ends.
Bottom & Border
Bottom of Bag
Rotate one Panel to work along the bottom starting ch with RS facing you.
With A, attach yarn at the bottom right corner with a sl st.
ROW 1: Ch 1, hdc in the back lp of each starting ch, turn. (57 hdc)
ROW 2: Ch 1, hdc across row, catching the back lp of the st + the free lp of the starting chain (thermal hdc tutorial), turn.
ROW 3: Ch 1, hdc across row, catching the back lp of the st + the free lp of the st one row below, turn.
ROWS 4-8: Rep Row 3.
Fasten off, leaving a tail that’s 2.5x the width of the panel for joining. Whip stitch the last row of the Bottom to the bottom of the other panel – ensure the RS of both panels is facing up when seaming.
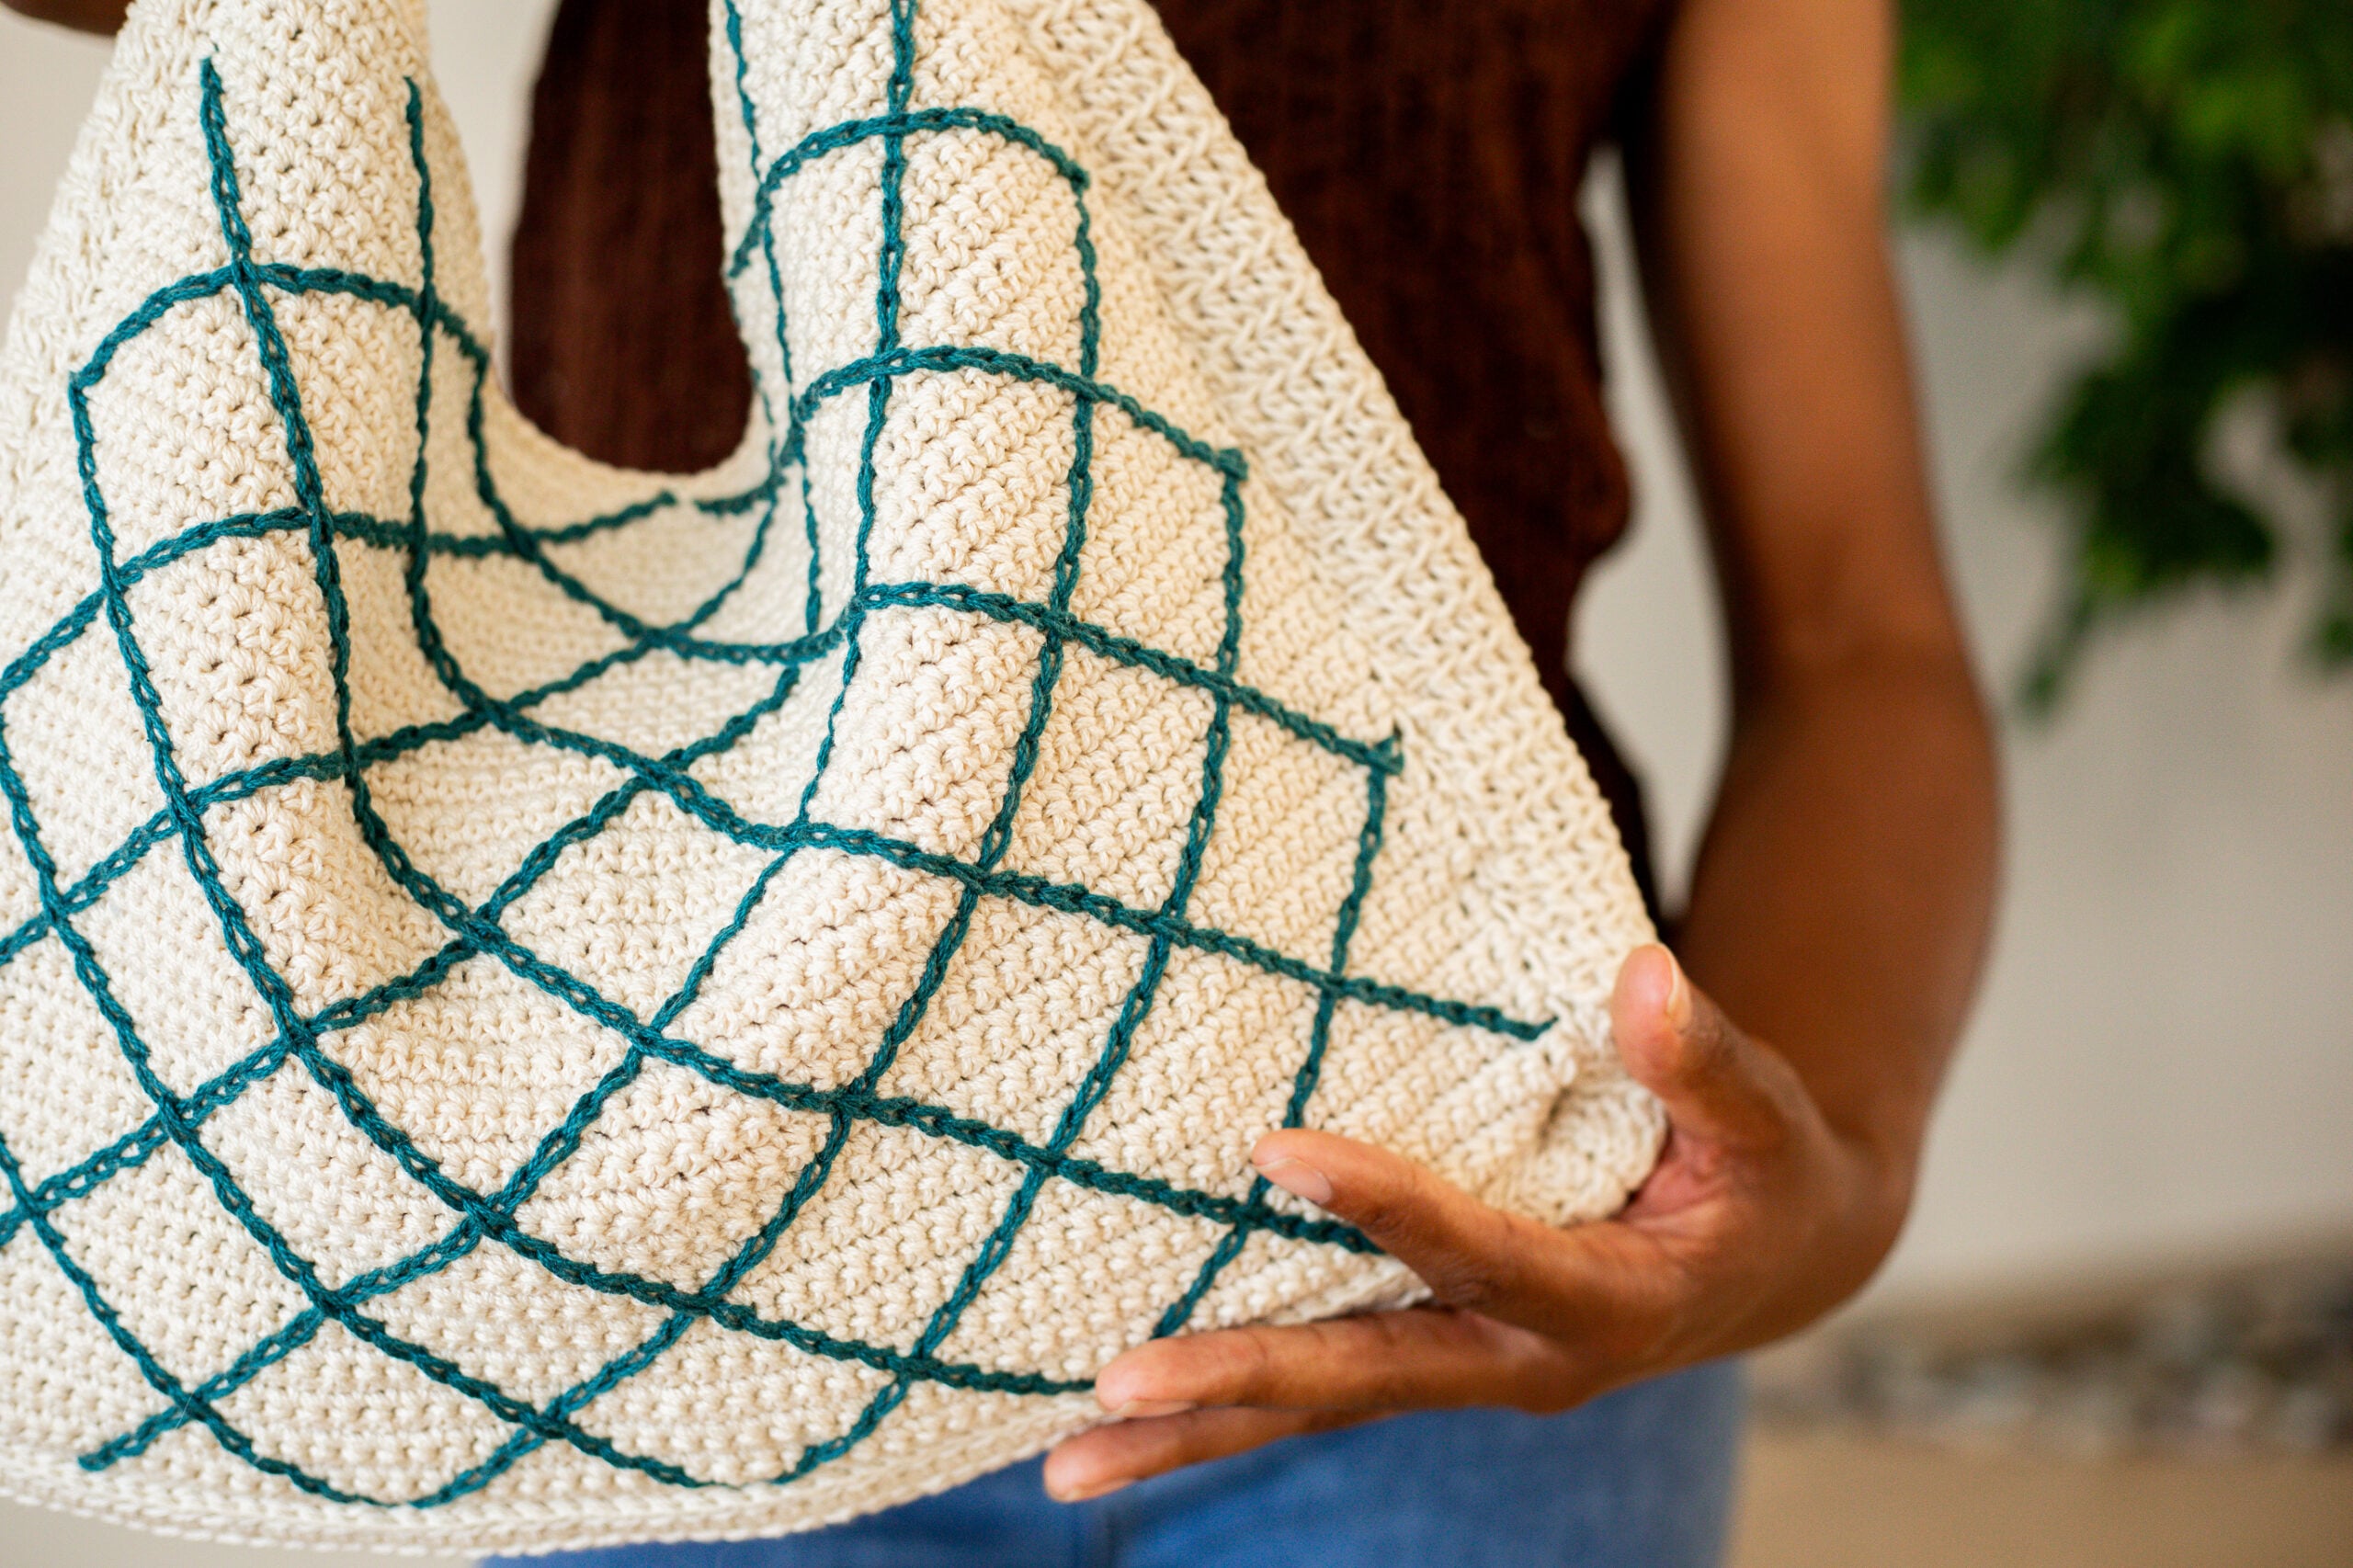
Border
With A and RS facing you, join with a sl st in the top-left corner of either panel.
Ch 1, sc in the same st as join, sc in each row end along the panel, then the Bottom, then the other panel. You are now at the top corner of the other panel 3sc in the corner.
Rotate to work along the top edge. Sc in each st across row. 3sc in the corner.
Continue in this way, working a sc in each row end and st, and 3sc in each corner around until you reach the first st of the round. 2sc in same st as first st, sl st in first st of round to join. Fasten off. Weave in all ends.
Strap
With A, ch 9.
ROW 1: Hdc in the back bump of the second ch from hook and each ch across, turn.
ROW 2: Ch 1, hdc across row, catching the back lp of the st + the free lp of the starting chain, turn.
ROW 3: Ch 1, hdc across row, catching the back lp of the st + the free lp of the st one row below, turn.
Repeat row 3 until strap measures approximately 60”. Use locking stitch markers to pin the strap to the bag, ensuring the strap is long enough. If it is not, continue repeating Row 3. If the strap is too long, you can take out some rows.
Fold bag in half with wrong sides facing each other. Align the end of the strap to the bottom and use locking stitch markers to pin in place. Align the sides of the panels evenly with the strap. Pin in place with locking stitch markers. With A and starting at the top left, whip stitch the strap to the bag. Repeat on the other side.
Finishing
-Weave in any remaining ends.
-Lightly steam block to smooth any stitches and straighten any lines.
Prefer an ad-free, printable version of this pattern? I got you!
I love it when a project both soothes and challenges me, and the October Tote does both effortlessly. And the final bag is one I’ll be keeping close for years to come.
Before you dive into your next WIP, be sure to share your project on Instagram and Ravelry. Then come show off in the Yarn Hive – we can’t wait to see what you made!
MORE FREE CROCHET PATTERNS FOR YOU:

Come here often?
Hey, crochet babe! I’m Toni, the designer, educator, and unashamed yarn hoarder behind TL Yarn Crafts. Thanks for stopping by this post – because we can never have too many WIPs, right?
While you’re here, sign up for happy mail, or buy me a coffee. And stop by my membership – the Honeybees would love to meet you.


I love this bag and can’t wait to make it!