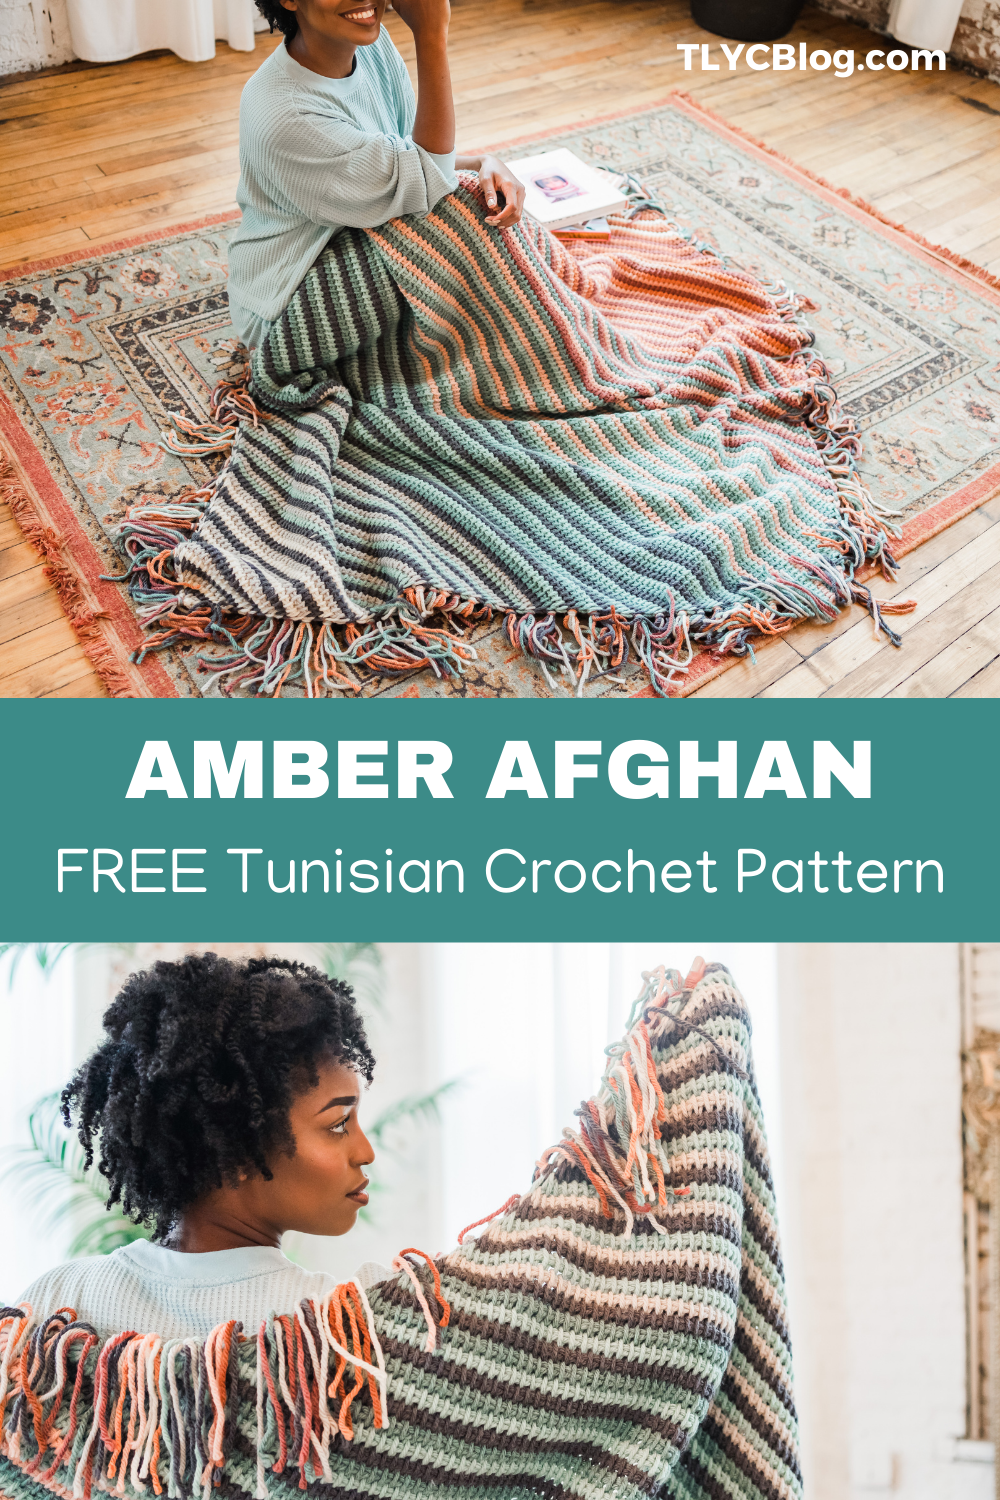
Amber Afghan, free beginner Tunisian crochet blanket pattern
")
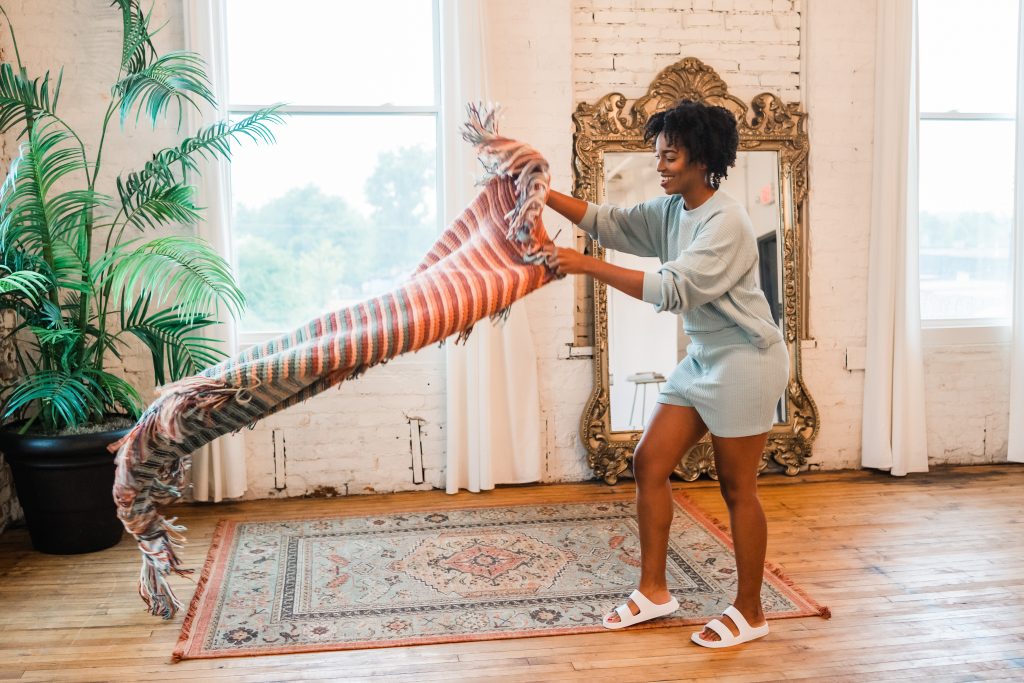
Embrace the fringe as you snuggle under the Amber Afghan, my newest FREE Tunisian crochet blanket pattern, created in collaboration with Lion Brand.
The Amber Afghan turns the Tunisian simple stitch sideways, literally! Worked on the bias and starting with just 3 stitches, this cuddly afghan pattern winds its way through a 9-color palette for a bold finish.
This post contains affiliate links that support the content on TLYCBlog.com. All opinions are my own. Find my Privacy & Disclosures Policy here.
Pin It Now, Make It Later!
Get the Amber Afghan
- FREE PATTERN: Keep scrolling for the FREE version of the Amber Afghan
- PRINTABLE PDF: Get a printer-friendly PDF version of the Amber Afghan from Ravelry or TLYarnCrafts.com
- ALL IN ONE KIT: Customize your personal Amber Afghan Kit. Build the palette of your dreams, add in a few notions, and everything you need to make this blanket can arrive on your doorstep! Get the kit from Lion Brand now – LINK.
Colorful Tunisian Crochet Blanket with Fringe
It’s no secret – blankets are kind of my thing. And it’s even better with Tunisian crochet. After designing the vibrant Bahama Blanket and the fan favorite Mulberry Afghan, I knew it was time to add another Tunisian crochet stunner to my catalog.
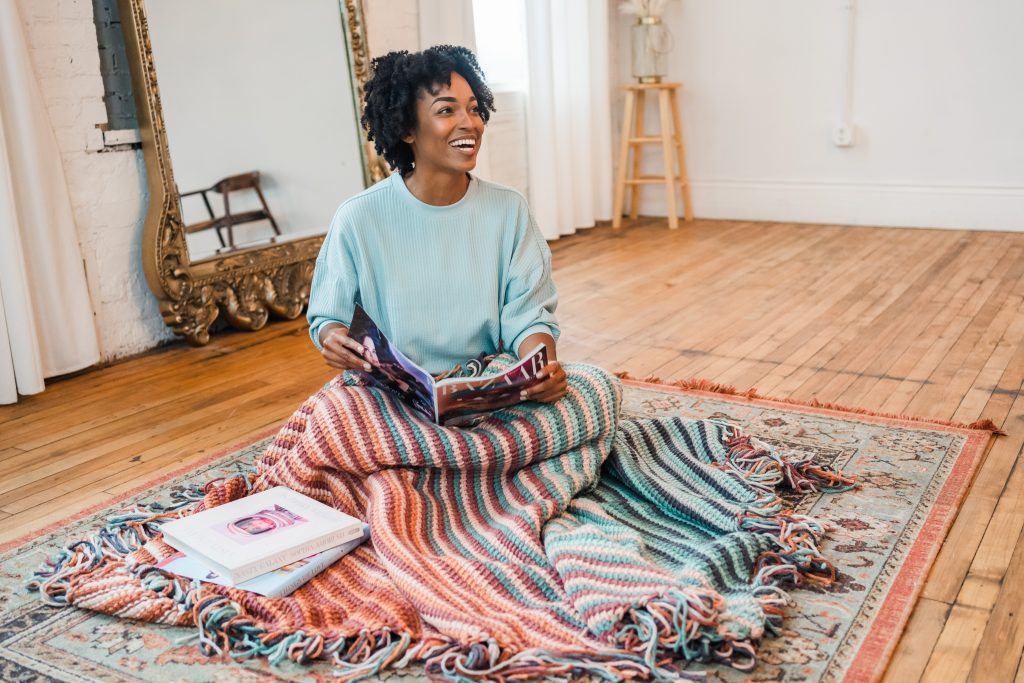
Now that the gray of fall in Michigan has set in, I’m desperately looking to add more color to my everyday life. What better than a cozy blanket to drive away the midwest winter blues? The Amber Afghan does the trick by striping three colors at a time, creating distinct color stories throughout the blanket.
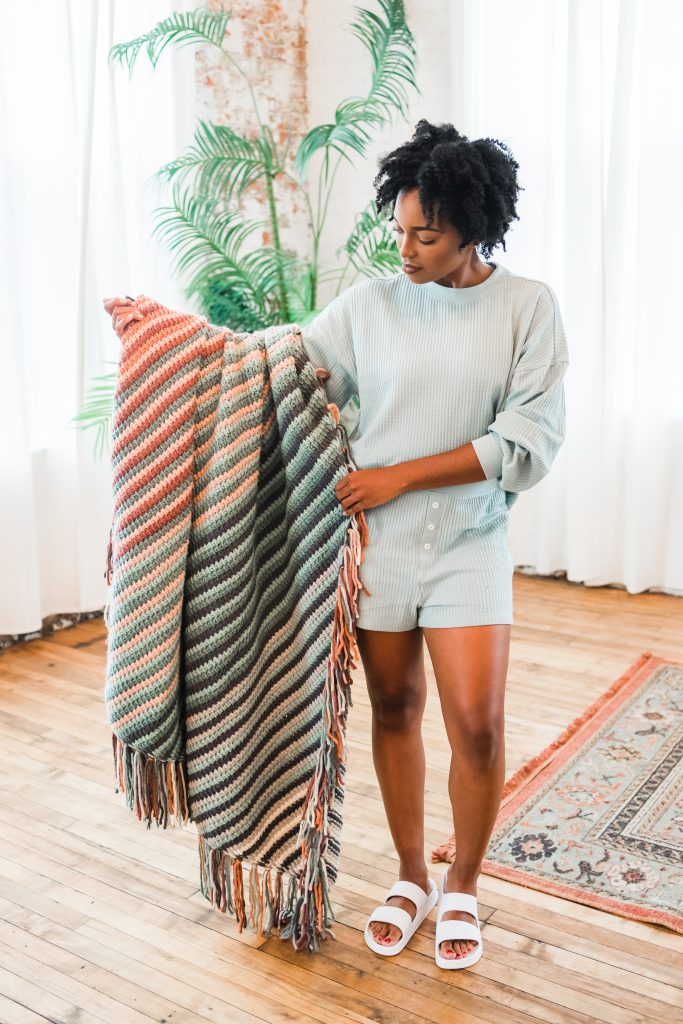
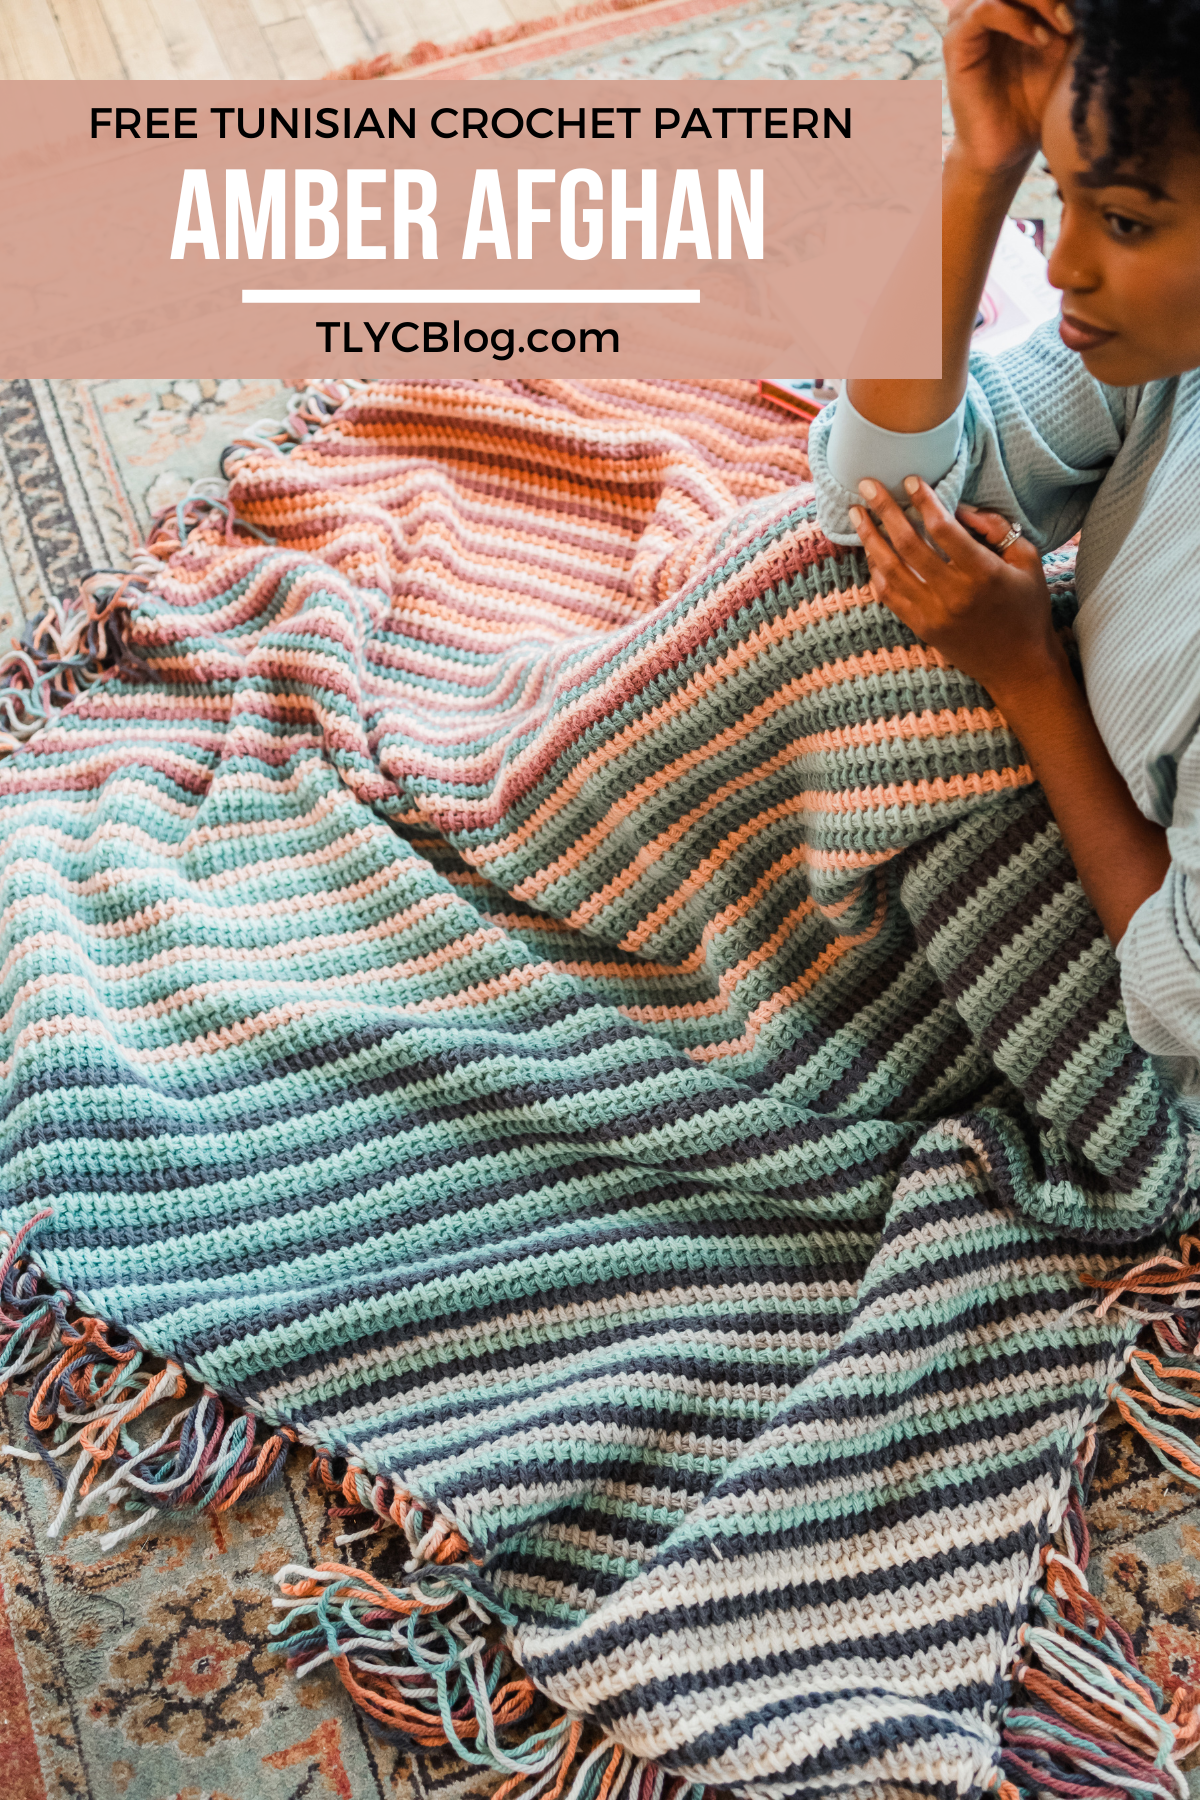
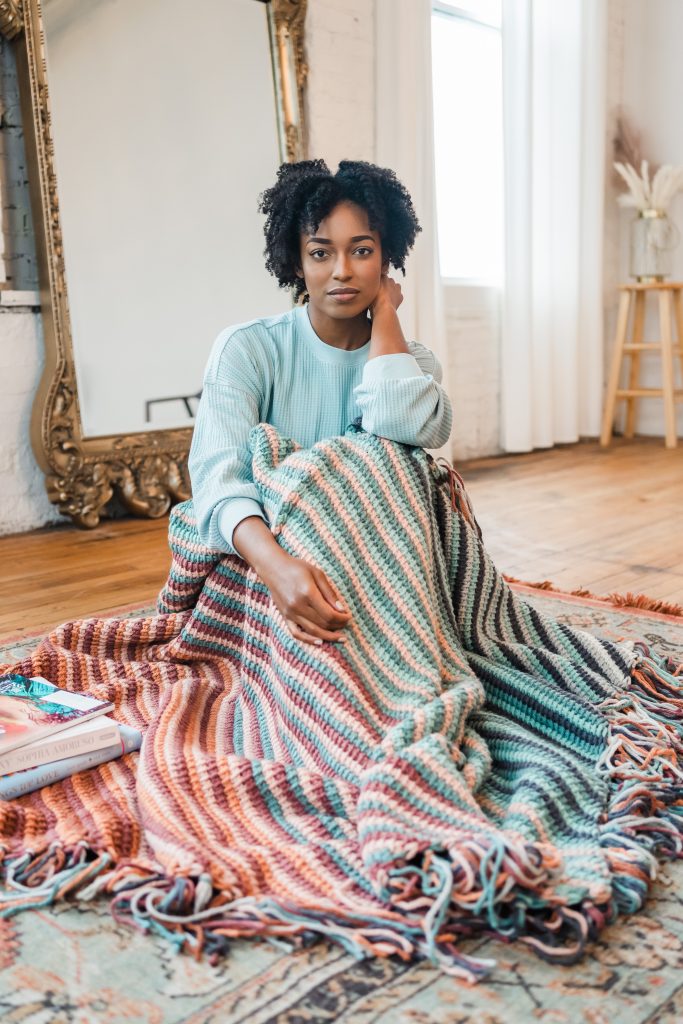
And don’t forget the fringe! There was plenty of yarn left over after completing my blanket, so I added fringe to all four sides. This final touch adds tons of personality to the blanket and uses up most of the leftover yarn. A win-win!

Falling in Love with Hue + Me
I’m no stranger to Lion Brand’s Hue + Me yarn. If it’s new to you, prepare to fall in love with this chunky blend of wool and acrylic fibers.
But this yarn isn’t all about substance – there’s a lot of style to it as well. From the imagination of NYC’s coolest crochet genius, Alexandra of Two of Wands, Hue + Me now comes in 30 stunning colors, all of which are designed to work well together.

The Amber Afghan takes advantage of this well-designed palette and combines 9 colors. I started with a combination of gray and white, added in some blues and greens, and finished off with pinks and dark red. The final look is a bit zany but somehow works. It’s literally me in a blanket!
Lion Brand is offering a kit version of this project, which includes all the yarn you need plus a PDF version of the pattern. You can mix and match the colors in your blanket, making it a truly unique piece to compliment your own decor. Explore the Amber Afghan kit here!

Ready to start the Amber Afghan? Here’s how!
- FREE PATTERN: Keep scrolling for the FREE version of the Amber Afghan
- PRINTABLE PDF: Get a printer-friendly PDF version of the Amber Afghan from Ravelry or TLYarnCrafts.com
- ALL IN ONE KIT: Customize your personal Amber Afghan Kit. Build the palette of your dreams, add in a few notions, and everything you need to make this blanket can arrive on your doorstep! Get the kit from Lion Brand now.
CLICK TO PIN THIS PATTERN
Amber Afghan Details
MATERIALS
- Lion Brand Hue + Me in 9 colors. Colors in order are A – Salt (1 skein), B – Whisper (2 skeins), C – Smoke (2 skeins), D – Sea Glass (3 skeins), E – Agave (3 skeins), F – Rose Water (3 skeins), G – Love Song (3 skeins), H – Grapefruit (2 skeins), and I – Saffron (1 skein).
- 9mm Tunisian crochet hook with 32″ cable (like this one!)
- Scissors
- Tapestry needle
- Sturdy book, or another device for making fringe
GAUGE
4″ = 9 stitches x 7 rows in Tunisian simple stitch after blocking
SIZE
42″ wide x 72″ long after blocking. To make your blanket wider, continue Row 1 repeats in Section 3. To make your blanket longer, continue Row 1 repeats in Section 5.
ABBREVIATIONS
CC = change color
Ch = chain
Inc = increase (see Special Stitches)
Lts = Last Tunisian Stitch (see Special Stitches)
Rep = repeat
RetP = Return Pass (see Special Stitches)
Sk = skip
Sl St = slip stitch
St(s) = stitch(es)
Tss = Tunisian simple stitch
SPECIAL STITCHES
- Increase (Inc): Pull up a loop in the next space between stitches.
- Last Tunisian Stitch (Lts): Insert hook under BOTH vertical bars of the last stitch and complete as for Tss.
- Return Pass (RetP): Ch 1, (yarn over, pull through next 2 loops on hook) until 1 loop remains on the hook.
NOTE: Do not fasten off any colors until instrcuted.

Amber Afghan Pattern
Need a little help getting started? Use this video to begin your Amber Afghan:
Section 1
FOUNDATION ROW: With A, ch 3, pull up a loop in the back bump of the 2nd ch from the hook and the remaining ch, ch 1, (yo, pull through 2 loops) 2 times. CC to B. (3 sts)
ROW 1: Inc, tss 1, inc, Lts, RetP. CC to C. (5 sts)
ROW 2: Inc, tss to last st, inc, Lts, RetP. CC to A. (7 sts)
ROWS 3-20: Rep Row 2, maintaining the color sequence of A, B, C. CC to D and fasten off A after Row 20.
Section 2
ROW 1: Inc, tss to last st, inc, Lts, RetP. CC to B.
ROWS 2-21: Rep Row 1, maintaining the color sequence of D, B, C. CC to E and fasten off B after Row 21.
Section 3
ROW 1: Inc, tss to last st, inc, Lts, RetP. CC to D.
ROWS 2-21: Rep Row 1, maintaining the color sequence of E, D, C. CC to E and fasten off C after Row 21.
Section 4
ROW 1: Inc, tss to last st, inc, Lts, RetP. CC to D.
ROWS 2-9: Rep Row 1, maintaining the color sequence of E, D, F.

ROW 10: With F, inc, tss to last 2 sts, sk 1, Lts, RetP. CC to E.
ROWS 11-21: Rep Row 10, maintaining the color sequence of E, D, F. CC to G and fasten off D after Row 21.
Section 5
ROW 1: Inc, tss to last 2 sts, sk 1, Lts, RetP. CC to F.
ROWS 2-10: Rep Row 1, maintaining the color sequence of G, F, E.
ROW 11: With F, sk 1, tss to last 2 sts, sk 1, Lts, RetP. CC to E.
ROWS 11-21: Rep Row 11, maintaining the color sequence of G, F, E. CC to H and fasten off E after Row 21.
Section 6
ROW 1: Sk 1, tss to last 2 sts, sk 1, Lts, RetP. CC to G.
ROWS 2-21: Rep Row 1, maintaining the color sequence of H, G, F. CC to H and fasten off F after Row 21.
Section 7
ROW 1: Sk 1, tss to last 2 sts, sk 1, Lts, RetP. CC to G.
ROWS 2-21: Rep Row 1, maintaining the color sequence of H, G, I. CC to H and fasten off G after Row 21.
Section 8
ROW 1: Sk 1, tss to last 2 sts, sk 1, Lts, RetP. CC to A.
ROWS 2-17: Rep Row 1, maintaining the color sequence of H, A, I. CC to I. (7 sts)
ROW 18: Sk 1, tss 3, sk 1, Lts, RetP. CC to H. (5 sts)
ROW 19: Sk 1, tss 1, sk 1, Lts, RetP. Do not CC. (3 sts)
BIND OFF ROW: Sl st 1, sl st last st as for Lts. Fasten off all colors.
FINISHING
STEP 1: Weave in all ends.
STEP 2: Block to finished dimensions. I recommend flipping the blanket wrong side up and pinning it to shape. Steam block liberally. I steam blocked my blanket 3 times over 2 days and allowed it to dry completely each time.
FRINGE
STEP 1: Use the remaining yarn to make 13” lengths of yarn. I like to use a sturdy book like in this example. Keep the yarn in piles of the same color.
STEP 2: Gather three lengths of yarn, each a different color.
STEP 3: Secure the fringe to the end of any row.
STEP 4: Repeat steps 2 and 3 around the entire perimeter of the blanket. Try to keep things random – don’t group any particular color too close to like colors.
STEP 5: (Optional) Steam fringe lightly and trim them to an even length.
Prefer an ad-free version of the Amber Afghan? Find it here!
The Amber Afghan will be my companion on many Netflix-binge nights through the fall and winter. I love how this Tunisian crochet blanket is just heavy enough to keep you warm, and it’s even big enough to share (but only if you want to…). I’ll be sharing mine with my husband, who’s great at keeping me warm – he’s like a walking furnace!
Share your projects with me on Instagram @TLYarnCrafts. Then drop by my private Facebook group, TLYC Makers, and share there too!
Find more FREE crochet blanket patterns here:


This is a beautiful blanket!
Hi Toni. Love this pattern (and all of your patterns!) and am making the blanket now. I’ve reached section 4 and had a question. Should I be repeating Row 10 or Row 9? I am confused as to why it would decrease once and then increase again for the remaining rows. Maybe the pattern is turning a corner and I’m having trouble visualizing it (highly likely!). Thank you so much for sharing your designs, talent, and insights with us!
Hi Kathy! Thanks so much for your comment, and for catching that mistake. You ARE meant to repeat Row 10, NOT Row 9. Sorry for the confusion. I’ve updated the blog and PDF versions of the pattern.
Thank you so much! I appreciate the quick reply!
I have practiced the Tunisian stitch with several types of yarn. Mine all seem to be stiff and not “soft and “pliable” like this afghan appears to be. I love this afghan and want to try it but am afraid…
This blanket was made with a hook larger than the yarn calls for, plus it was steam blocked which adds softness and drape. Tunisian crochet is typically quite stiff when you first start – try going up a hook size then steam block your piece, and see if the fabric feels better.
Thanks. I love this stitch. I will try what you suggest.
SO in Section 4, the pattern is as follows???
…Row 7 color E
Row 8 color D
Row 9 color F
Row 10 color F????
Row 11 color E
Is that right?
Here’s the breakdown
2 – E
3 – D
4 – F
5 – E
6 – D
7 – F
8 – E
9 – D
So, Row 10 would be worked with F.
Hope that clears things up.
Hi I am working on this pattern and I thought the first row of section 4 began with E so wouldn’t row 10 in that section be E?
Hi Megan, The pattern does have a color repeat but is interrupted occasionally in the pattern.
Section 4
1-E change to D at end
2-9 DEDFEDFE
10- F
Hope that helps 🙂
Do you have any tips for blocking such a large piece? Blocking isn’t my favorite and I usually skip it..
For something like this, I’d lay it over a bannister and steam it with a garment steamer or steam iron. And you can do this in parts – steam one half, then steam the other half. Pay close attention to the corners, as those are likely to curl.
Hello! Do you have any tips/recommendations for changing the colors? Do you carry them up the side until you’re done, or do you cut and tie? I’m thinking you carry them but I’m not sure-
Thank you for the wonderful pattern btw!!
Hi! One of the joys of this project is having minimal ends. Carry the yarns throughout the project, and don’t cut and colors until instructed 🙂
Ah thank you for the response! I look forward to getting to this :]
Am I missing something? Where is the list of which colors are A, B, C, D, etc.? Or am I meant to assume the order you have them listed under materials determines which is A, B, C, D, etc.?
Hey love – sorry for the confusion. I just updated the post to include the color assignments 🙂
Hi! I want to make the pattern bigger I’m trying to follow these instructions:
“To make your blanket wider, continue Row 1 repeats in Section 3. To make your blanket longer, continue Row 1 repeats in Section 5.”
1. Should it be continue the Row 1 repeats in section 4 (instead of section 3)?
2. Will I have to do anything different in the remaining sections to actually finish off the rectangle?
Thank you so much! 🙂
Hey there, Sammi,
The extra increases are correctly listed on Section 3, as Section 4 is split between increases and decreases since this is the center of the blanket. Though, if you do choose to increase the width, you may want to adjust the amount of rows in each section to account for this decision. As for the remaining sections, it is up to you whether or not you will want to also make the blanket longer to match the wider width. Otherwise, the only other adjustment is that you will have to do more decreases in total to counter the extra increases.
Please let us know if you have any other questions! Happy making 🙂