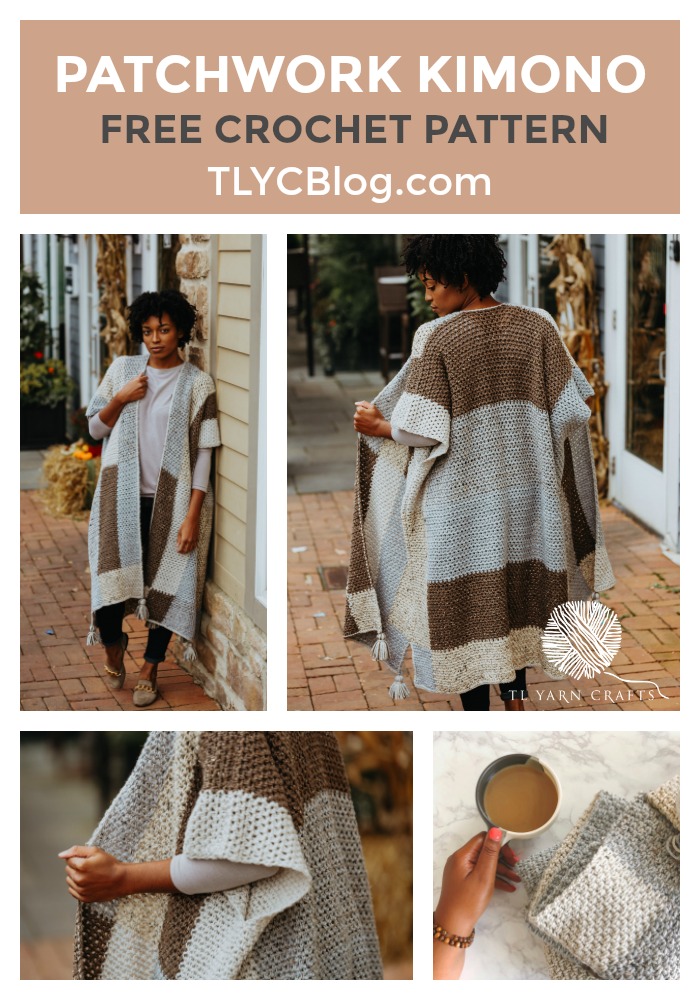
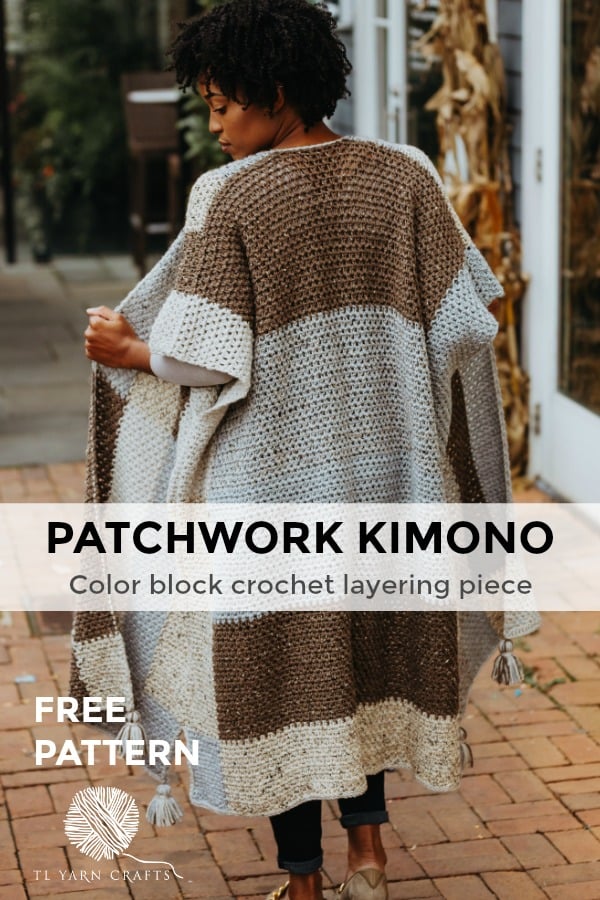
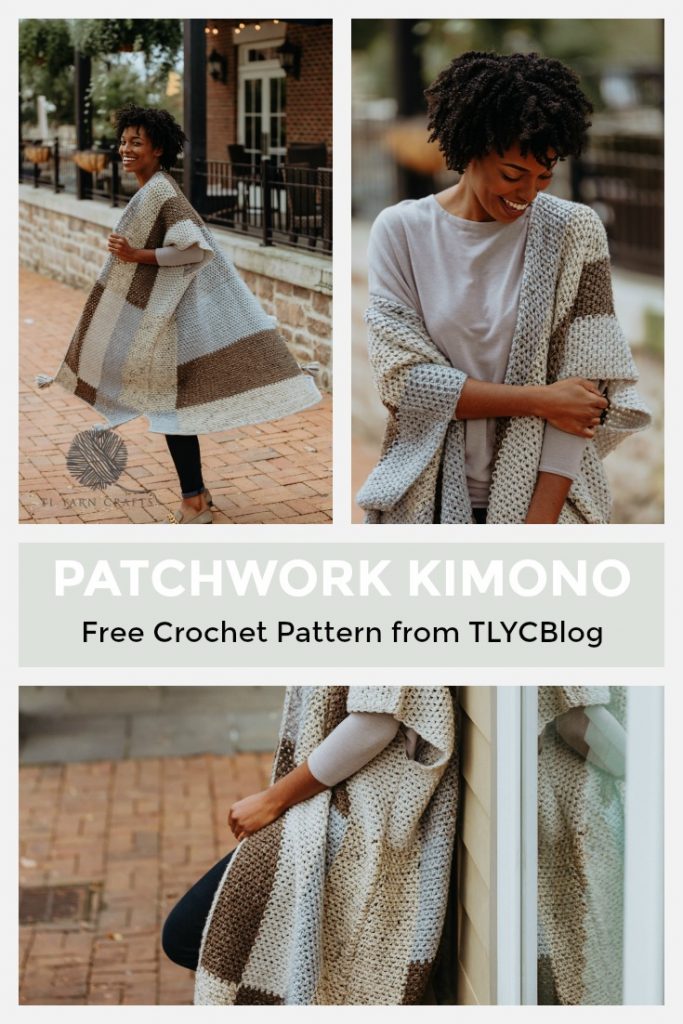
The Patchwork Cardi, an Oversized Layering Top – Free Crochet Pattern

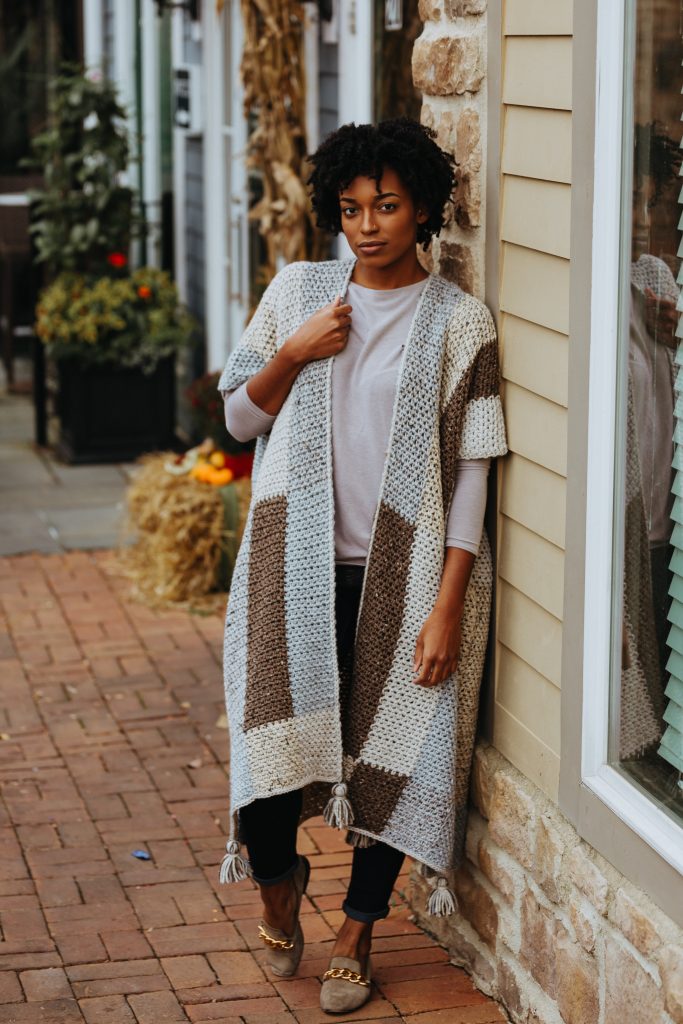
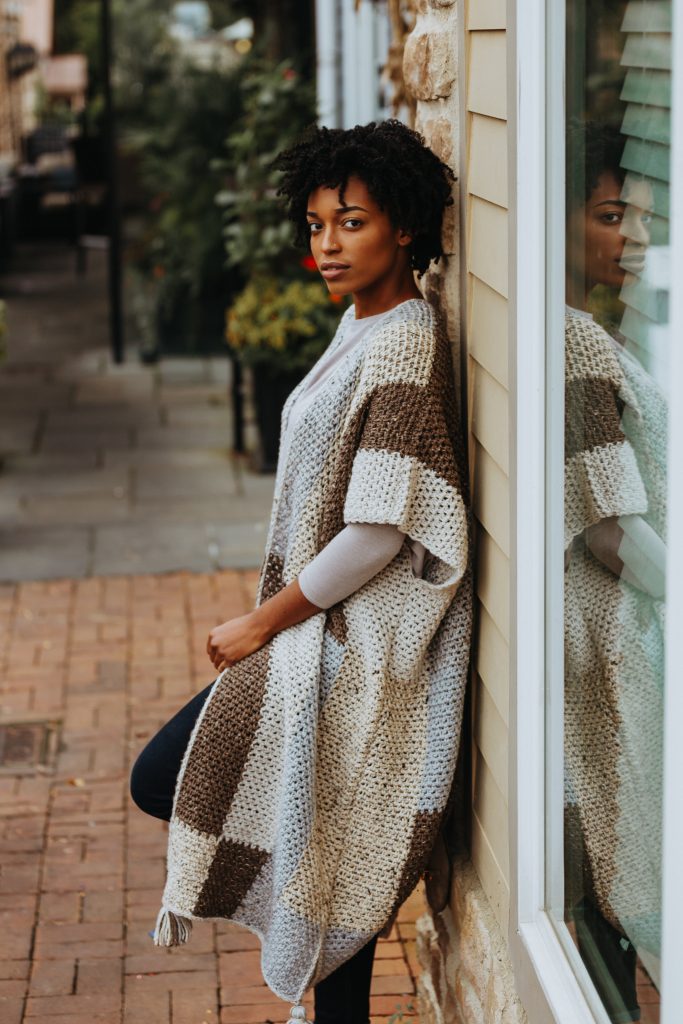
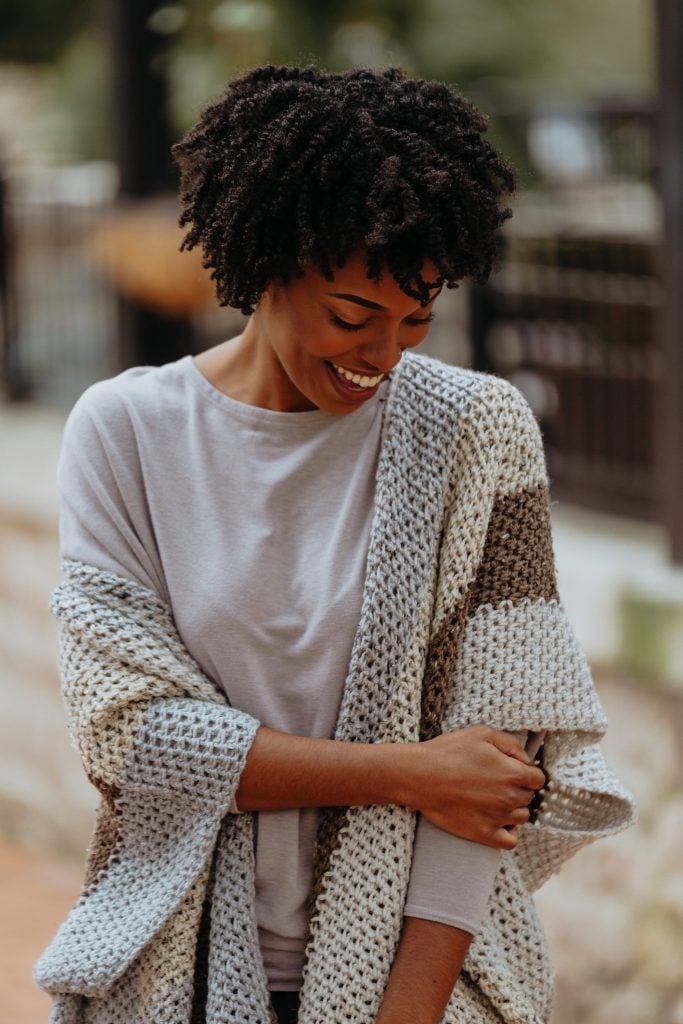
Fall is my favorite season for one reason – LAYERS! That’s why I’m so excited to introduce the FREE Patchwork Cardi, a lofty layering piece perfect for long afternoons at the apple orchard.
I’m going back to basics with this latest design, made in collaboration with my friends at JOANN Stores. With so many lovely novelty yarns available, we can’t lose sight of the staple fibers that we’ve grown to love. I used a tried-and-true favorite for my sample, Lion Brand Vanna’s Choice in a warm neutral palette. The Patchwork Cardi makes getting ready for a day (or night) out easy and is available as a FREE pattern here on TLYCBlog.com.
This post contains affiliate links that support TLYCBlog content. All opinions are my own.
PIN IT NOW, MAKE IT LATER
Find a printer-friendly PDF version of the Patchwork Cardi in my Ravelry Shop and on TLYarnCrafts.com. PDF version includes full-color 6-page instructions, photo explanations, and graphic supplements.
Favorite this pattern and share your projects with me on Ravelry – CLICK HERE!
Edit 6/1/2019: The Patchwork Kimono has been renamed the Patchwork Cardi. Special thanks to writer Emi Ito for challenging designers to reflect on the (mis)use of culture in fashion. For more information on this, please read My Kimono is not your Couture.
October is here and it’s safe to say that we’re squarely in fall, a maker’s favorite season. And what’s not to love? Everything is pumpkin spice, there are apple cider donuts are on demand, you don’t have to fear sweating through your makeup. Pinch me – I’m in heaven!
And we can’t forget about that fall wardrobe – booties, lightweight sweaters, and layers upon layers. That’s what I had in mind when designing the Patchwork Cardi.
My inspiration came from the most random Pinterest spiral I’ve ever been in. It started somewhere around keto recipes, took a left at motivational Instagram captions, and landed in the fall fashion category. The page was filled with all these gauzy, colorful layering pieces. I love gauzy as much as the next girl, but when it’s 50 degrees outside, I need something with a little more meat on it’s bones.
Other Pieces Perfect for Fall
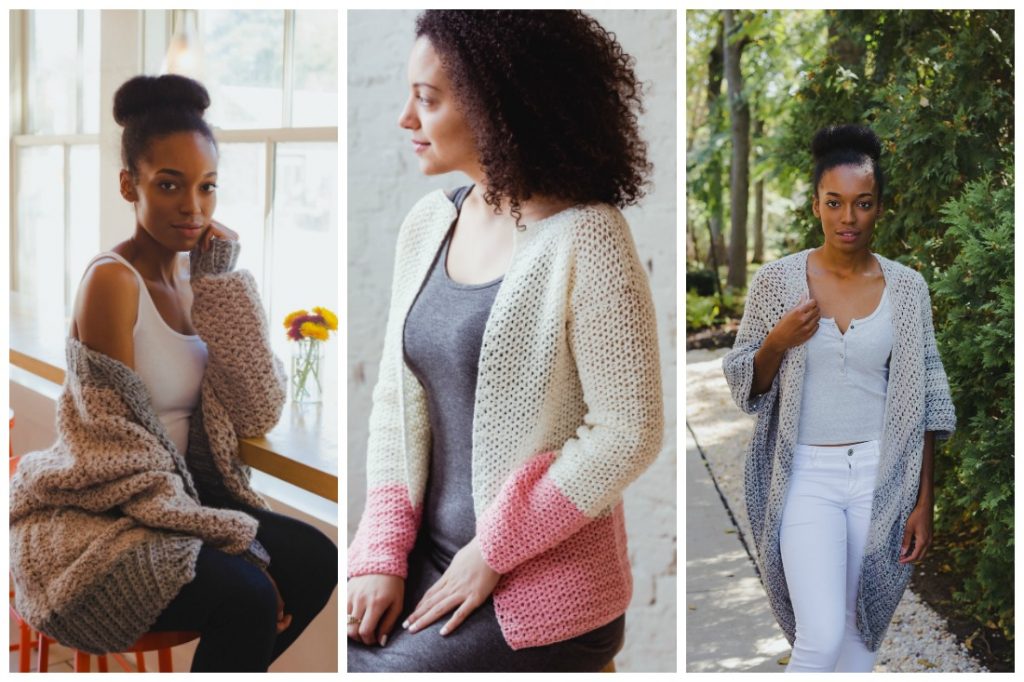
- Veronica Cardi // 2. Sophia Cardi // 3. Astrid Ruana
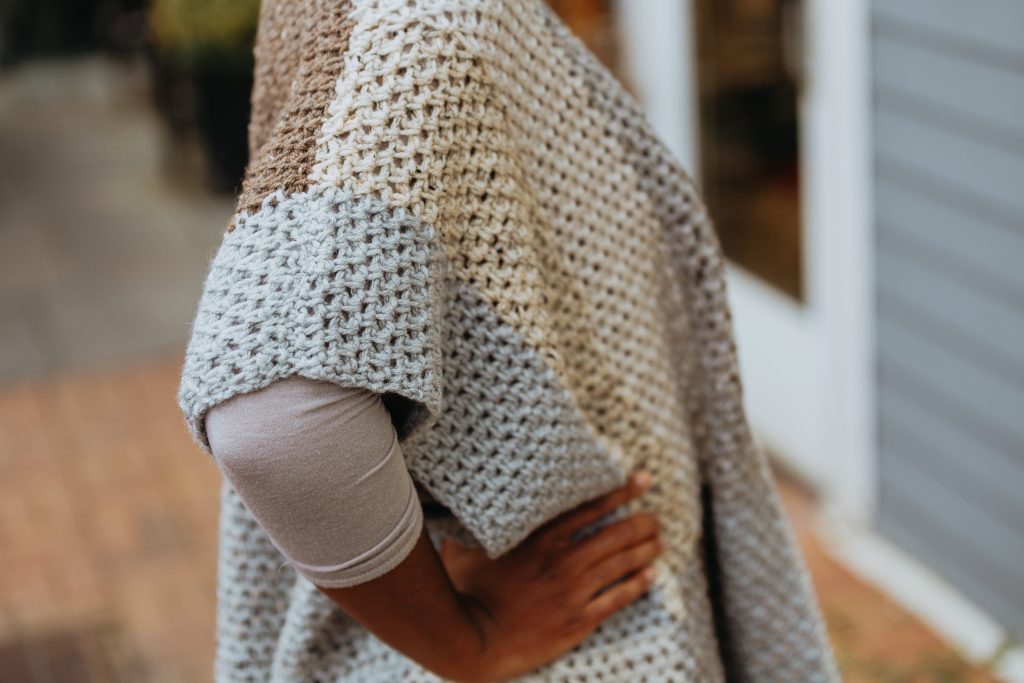
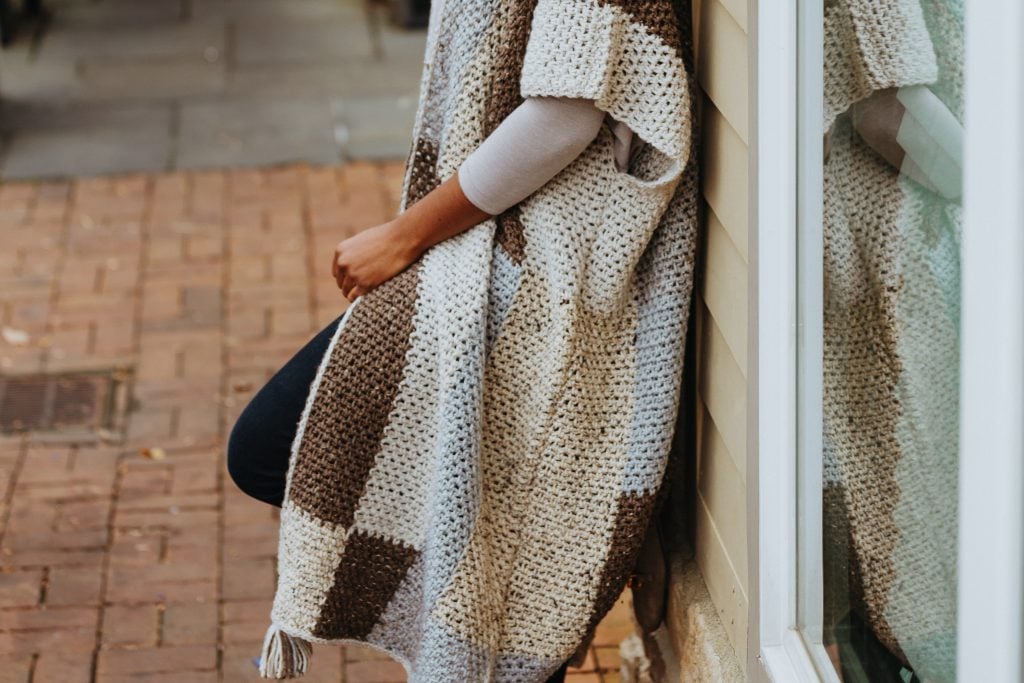
Enter the Patchwork Cardi, a beginner-friendly number that goes well over long sleeve tees and light sweaters. I designed it using the fan favorite crochet seed stitch, also known as the granite or moss stitch. This stitch pattern creates a dense fabric to keep the chill away and is also visually pleasing.

I’ll be completely honest, I’ve been indulging in the novelty yarn trend this season. We’ve been graced with velvets, wool blends, and cakes of all kinds. I even made a whole blanket with the cool loop yarn that debuted last month. But no matter how far I stray, I always make it back to my stash, which is packed with my favorite staple yarn, Lion Brand Vanna’s Choice.
There’s something about high-quality acrylic yarn that makes my designer heart leap. And with 62 color options from solid to tweed to variegated, there’s something for everyone to love. It’s been my go-to yarn since I started designing – I made my original Mega Pom Beanie sample with Vanna’s Choice in the color Honey! It’s machine washable and dryable, making it super easy to care for. And you can find it anywhere – but the best selection of colors is always at your local JOANN store, am I right?!
There are a couple techniques you’ll want to practice before you start your Patchwork Cardi. The most important is going to be the foundation single crochet stitch. This is a way to make the starting chain AND the first row of single crochet stitches at the same time. I went for this method because it allows for the starting rows of the garment to be stretchy and makes for a consistent shape once you block your finished piece.
Learn how to work the foundation single crochet technique using this video tutorial:
Patchwork Cardi Pattern
FINISHED SIZE
- One size: 39” long x 34” wide after blocking
- Due to the weight of this garment, it may grow considerably in length.
MATERIALS
- Lion Brand Vanna’s Choice Yarn in 5 colors. Sample made with Linen (A, 2 balls), Silver Heather (B, 3 balls), Barley (C, 3 balls), Grey Marble (D, 2 balls), and Oatmeal (E, 3 balls)
- 7mm crochet hook (here’s my favorite)
- Scissors
- Yarn needle
- Measuring tape (optional)
- Tassel making supplies (helpful video for perfect tassels)
ABBREVIATIONS
- Ch = chain
- FDNsc = foundation single crochet
- RS = right side
- SC = single crochet
- Sk = skip
- Sl st = slip stitch
- St(s) = stitch(es)
- WS = wrong side
PATTERN STITCH (crochet Moss Stitch)
Where indicated, work the Pattern Stitch as follows:
ROW 1: Ch 1; keeping color changes consistent across row, sc in the first sc and the next ch-1 sp, ch 1, (sc in the next ch-1 sp, ch 1) across, ending with a sc in the final sc, turn.
ROW 2: Ch 1; keeping color changes consistent across row, sc in the first sc, ch 1, (sc in next ch-1 sp, ch-1) across, ending with a sc in the final sc, turn.
Repeat rows 1 and 2 for Pattern Stitch.
Front Panel – Left
Pattern Chart, Front Panel – Left

FOUNDATION: On one continuous foundation, FDNsc 15 A, 15 E, 15 B, 16 D, turn.
ROW 1: Ch 1; keeping colors changes consistent across row, sc in first sc, ch 1, sk 1 st, (sc in next st, ch 1, sk 1 st) across row, ending with a sc in the last st, turn.
ROW 2-15: Work in Pattern Stitch beginning with Row 1, keeping color changes consistent across row. (14 rows)
ROWS 16-63: Continue working in Pattern Stitch, but change colors according to Pattern Chart for Front Panel – Left, Section 2. (48 rows)
ROW 64-111: Continue working in Pattern Stitch, but change colors according to Pattern Chart for Front Panel – Left, Section 3. Bind off, leaving a long tail for sewing. (48 Rows)
Front Panel – Right
Pattern Chart, Front Panel – Right

FOUNDATION: On one continuous foundation, FDNsc 16 B, 15 D, 15 C, 15 E, turn.
Repeat Front Panel – Left directions, instead using the Pattern Chart for Front Panel – Right.
Back Panel
Pattern Chart, Back Panel

FOUNDATION: On one continuous foundation, FDNsc 16 D, 97 E, 16 B, turn.
ROW 1: Ch 1, keeping colors changes consistent across row, sc in first sc, ch 1, sk 1 st, (sc in next st, ch 1, sk 1 st) across row, ending with a sc in the last st, turn.
ROW 2-15: Work in Pattern Stitch beginning with Row 1, keeping color changes consistent across row. (14 rows)
ROWS 16-39: Continue working in Pattern Stitch, but change colors according to Pattern Chart for Back Panel – Section 2. (24 rows)
ROWS 40-63: Continue working in Pattern Stitch, but change center color to B according to Pattern Chart for Back Panel – Section 2. (24 rows)
ROWS 64-87: Continue working in Pattern Stitch, but change colors according to Pattern Chart for Back Panel – Section 3. (24 rows)
ROWS 88-111: Continue working in Pattern Stitch, but change center color to C according to Pattern Chart for Pack Panel – Section 3. (24 rows)
FINISHING
STEP 1: With WS facing, using remaining tails to whip stitch Front Panels to Back Panel at shoulders, leaving a 2” space for the neck opening.
STEP 2: Still with WR facing, using remaining tails to whip stitch sides together, starting at Section 2 for hip slits and stopping 10” from shoulder for armhole.
STEP 3: With RS facing, join any color to the center back of neck opening. Loosely and evenly sl st around the perimeter of the entire garment, returning to the neck opening. Join with a sl st in the first st.
STEP 4: Use remaining yarn to make 4 – 3” tassels. Attach to bottom points of Front Panels.
STEP 5: Weave in all ends. Steam block lightly and allow to completely dry.
Purchase the printable PDF Patchwork Kimono pattern HERE!
Thanks so much for dropping by to make the Patchwork Cardi! I hope you love it as much as I love mine. I can’t wait to see your progress and finished piece. Share your Patchwork Cardi with me!
Instagram: Use #PatchworkCardi and #TLYCMakers for a chance to be featured on the TL Yarn Crafts feed!
Facebook: Join my NEW Facebook group, TLYCMakers and share your piece with our community!
Comment below and let me know what colors you’re using for your Patchwork Kimono 😊
Click here to pin this post


Omgosh! I just discovered your blog and I can’t wait to start on the Patchwork Kimono. Thanks much for offering it for free!
I’m so happy to see you here, Wendy! And it’s my pleasure to offer it for free. Happy hooking!
Hi! I’m trying to start this but I have a question that’s just stumping me for some reason. How do we change colors in the seed stitch? I keep starting out but then on the second row we need to keep the color blocks consistent…this is where I get lost. Do I change colors during a chain? The last SC before the new color? The first SC in the new block? All of these don’t seem to leave a nice pretty line between colors when I’ve been trying them.
Hi Abby! Thanks so much for your question. If the last color of a block is a sc and the next color is a ch, change color on the last step of the sc stitch. If the last color of the block is a ch and the next color is a sc, work the ch in the new color. Hope that helps! Feel free to email me if I can clarify anything 🙂
This is beautiful. Will be adding to my crochet must-do list!
I’m so excited to hear that, Christine! I can’t wait to see it 🙂
Everything is very open with a clear description of the challenges.
It was truly informative. Your site is very helpful. Many thanks for sharing!
Thank you for sharing the link to the insightful article by Emi Ito. Have you considered changing your Pinterest images to reflect the new name?
I think your cardi could be personalized with some surface crochet or embroidery in some of the squares… So many ideas, only so much time to crochet!
I am crazy about this pattern/project and can’t wait to start. I ordered all the yarn listed in your description and found it to be darker than the photo. I was hoping for off white and a blue/silver like the photo. Just checking…was the yarn used in the photo different from the yarn listed in the pattern instructions?
All of the yarn used in the project is the same exact yarn used in the sample in the photos. Dye lots tend to differ and the lighting in these photos might have skewed the color slightly as well.
This Patchwork Cardigan is beautiful. I would like to make it for my daughter, but only hip length. She’s only 5’3″ and feels anything longer makes her look shorter. Would it be easy to do this?
Thank you so much for this beautiful pattern.
Hi! Yes, this should be a pretty easy change to make. You’d just make the panels to your desired length.
oh I can’t wait to start this! Are there pictures of the construction in the pdf? Can’t quite understand how the panels attach once crocheted up – thanks 🙂
HI! Once your panels are complete, you simply lay the front panels over the back panel and seam as instructed in the pattern. It should make much more sense when your panels are complete 🙂
Love this, have just ordered some yarn in a different palette to try it out (really struggled to get the recommended yarn). I’m currently practising with a plain colour aran yarn from my stash. Whats the worse that can happen eh?
So excited to try this pattern out!! I couldn’t find a gauge to try a swatch though – is there a specific gauge I need to aim for?
Hi! The gauge for this pattern is 15 stitches x 14 rows to four inches.