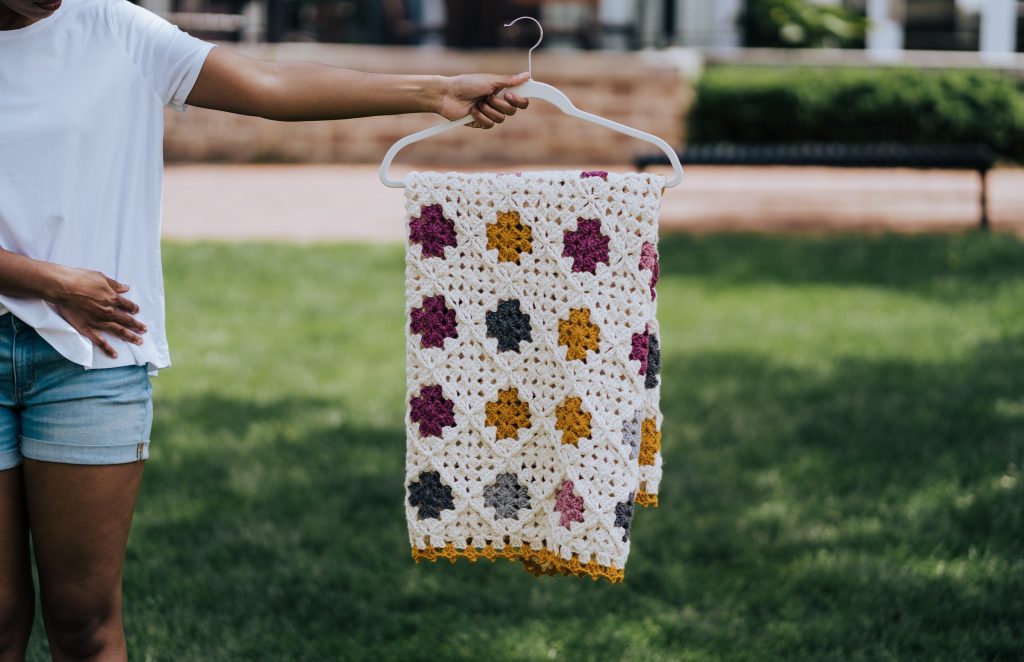
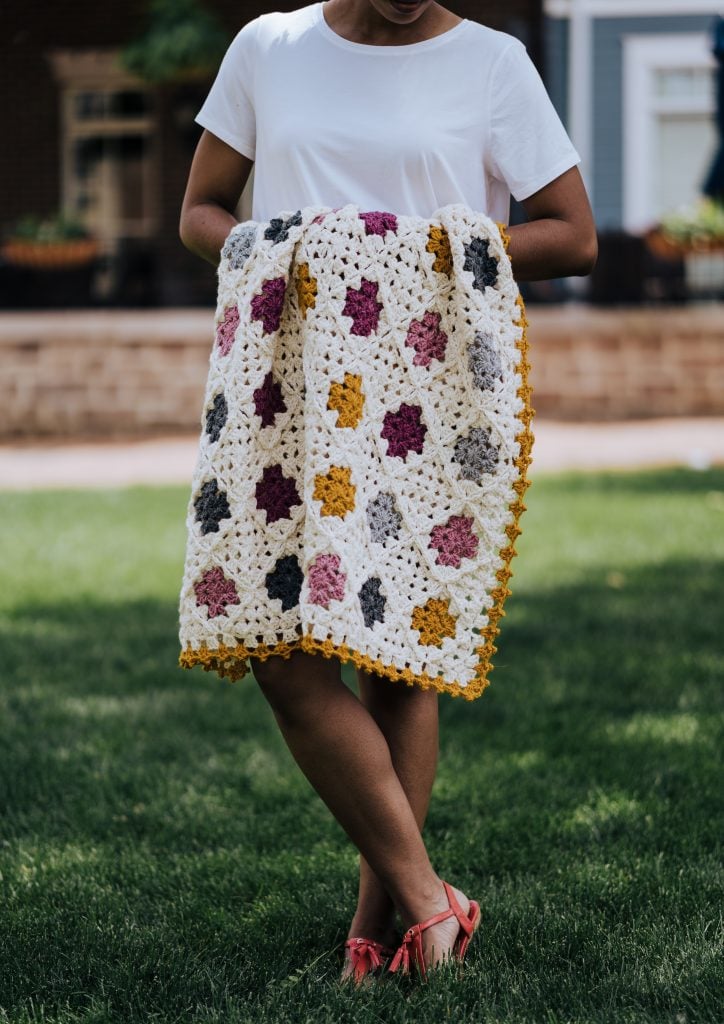
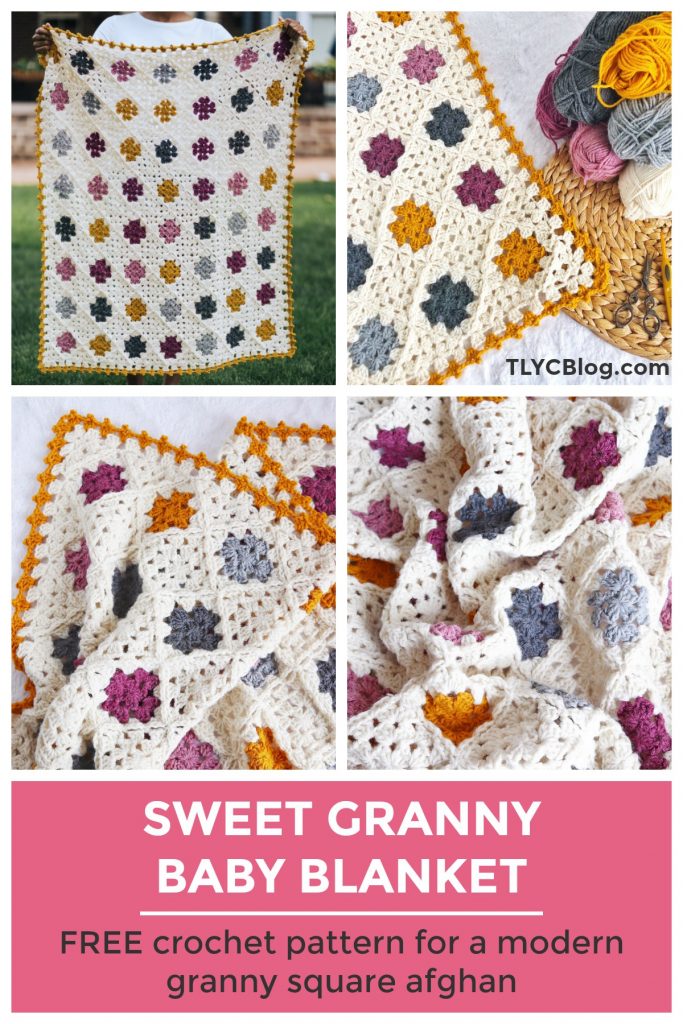
The Sweet Granny Baby Blanket, a modern granny square afghan

Show your love in classic crochet style by making the Sweet Granny Baby Blanket, a FREE pattern thanks to JOANN.
Want to hear something funny? We’re barely halfway through the year and my friends and family have already announced 6 babies that will be born before Christmas. Namely, I’ll have a new niece or nephew coming in the fall. I’m secretly hoping for a niece and made the new Sweet Granny Baby Blanket to welcome her to the world!
This post contains affiliate links that support the content on TLYCBlog.com. All opinions are my own. Find my Privacy & Disclosures Policy here.
Pin It Now, Make It Later!

Find a printer-friendly PDF version of the Sweet Granny Baby Blanket in my Ravelry shop and on TLYarnCrafts.com. PDF version includes a full-color, 8- page instructions and full schematic to chart your very own color scheme.
There’s really nothing more classic in crochet than the granny square. It’s the technique that first made me fall in love with crochet. When I was 13, my mother put a tiny granny square in my hands and told me to “keep going”. That granny square turned into a hideous camouflage blanket that we immediately donated, but the love for turning yarn into something useable never left me. Designing the Sweet Granny Baby Blanket brought back all the nostalgia of those early crocheting days.
Whenever I have a new baby blanket idea in my head, my first stop is to my local JOANN. Even though I have a project in mind, I usually spend a little time browsing the store to see what’s new. On this trip, I had an awesome coupon and finally treated myself to a pair of Gingher sewing scissors before I made my way to the yarn (because you can never have enough scissors!).
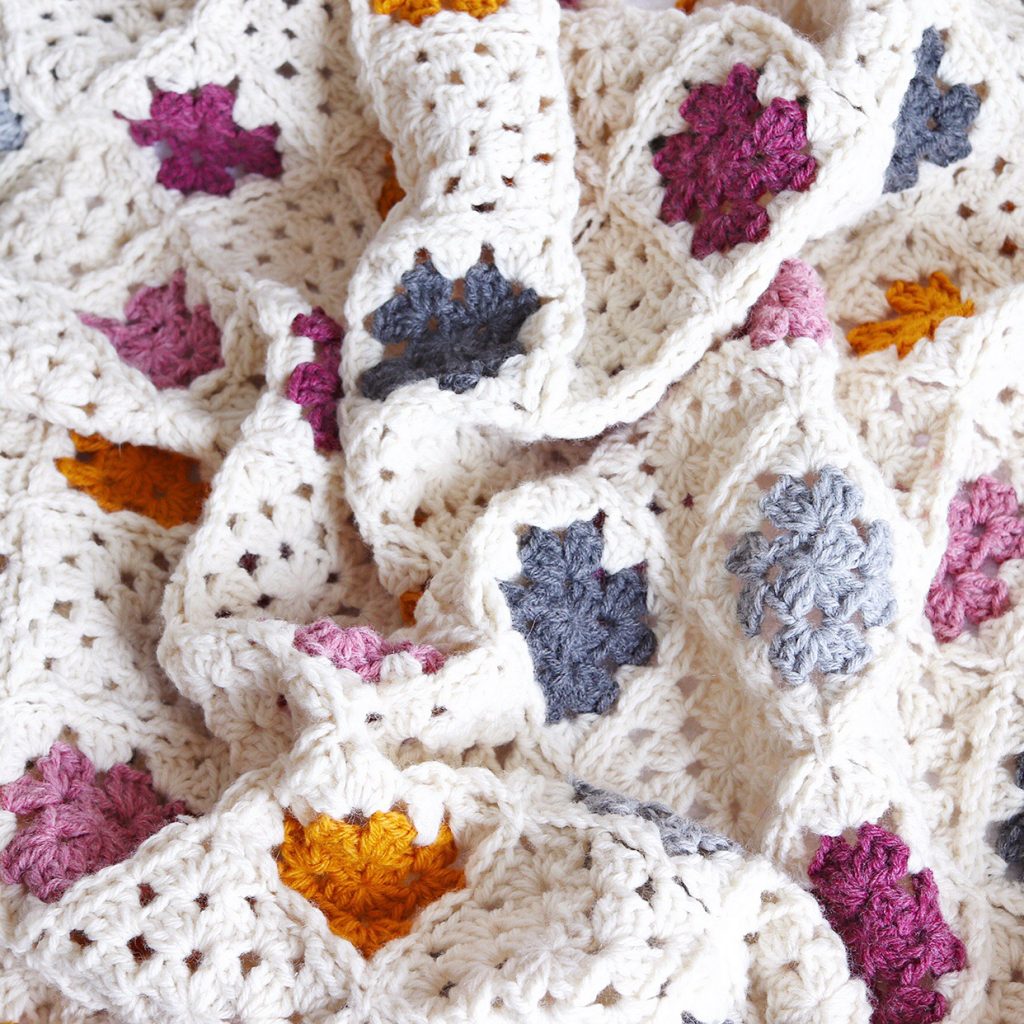
I finally made it to the yarn section and bypassed the baby yarns for an old standby – Lion Brand Wool-Ease. I’m no stranger to this particular yarn, and even used it for the original samples of my Hot Cocoa Poncho, Sweater Weather Cardi, and the Sweet Gingham Baby Blanket. The acrylic yarn mixed with a touch of wool means the blanket will be soft but still easy to care for.
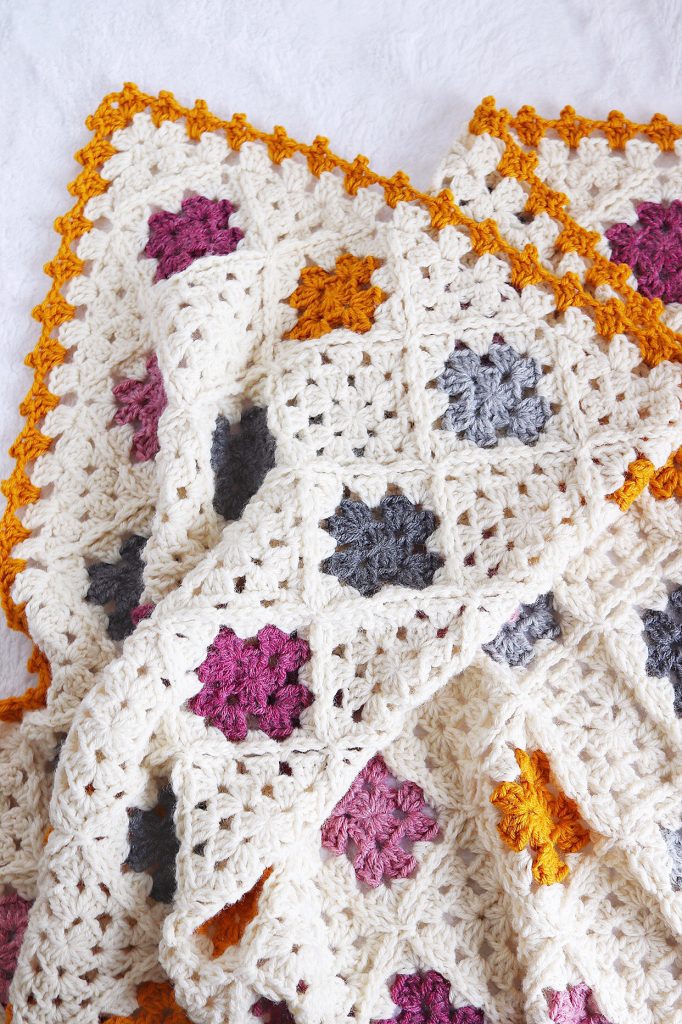
JOANN has a robust selection of Wool-Ease colors, which made it a little hard to narrow things down. Since I knew I was going for a blanket with Fisherman as the base and 5 accent colors, I started mixing and matching the different options. I landed on a range of pinks and grays with a pop of mustard. But there were also great options for blues with grays, all neutrals, and even a woodsy assortment of blue, red, and green. The options are endless!
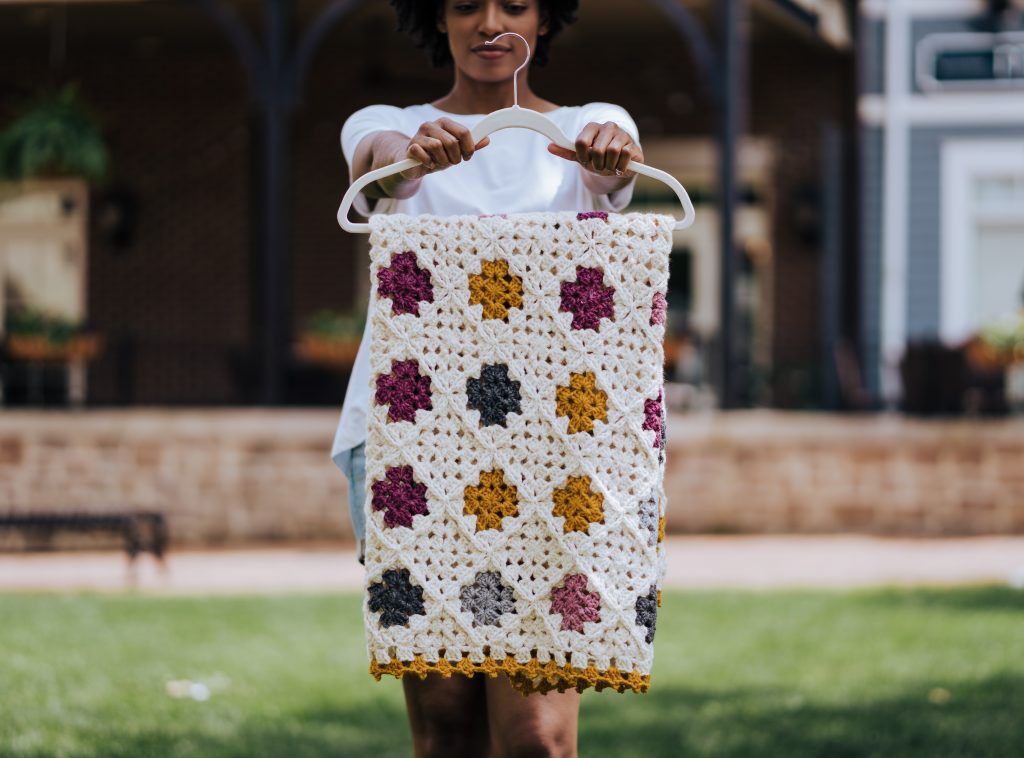
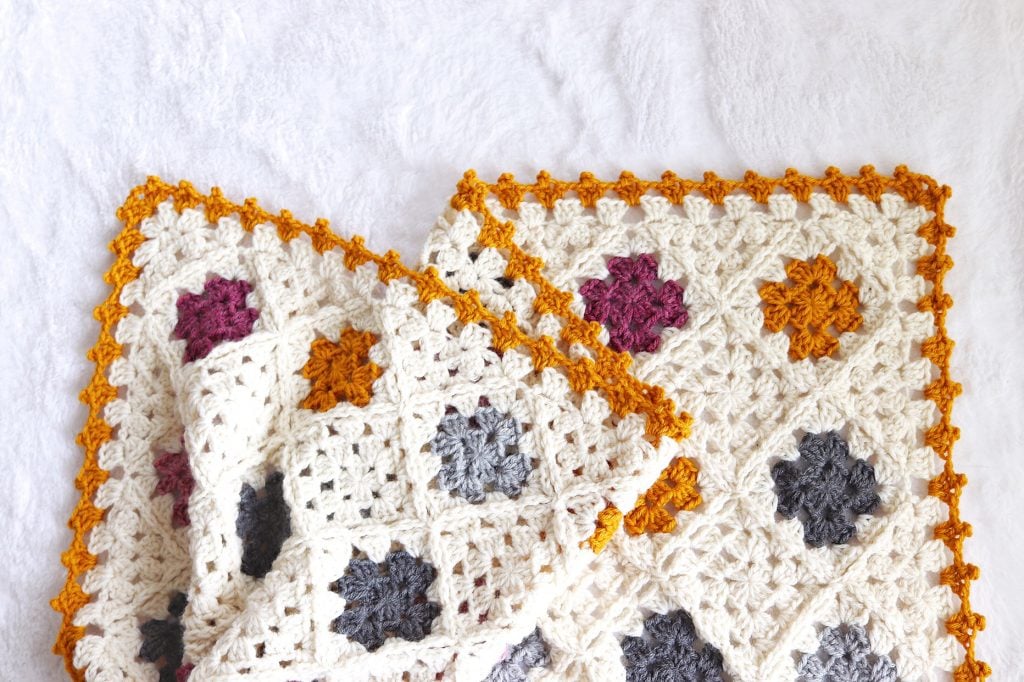
The Sweet Granny Baby Blanket starts with a single granny square and additional squares are added using the join-as-you-go method. This eliminates the need to seam your squares together later. Once all squares are seamed, triangles are added to make straight edges. The entire project is finished off with a 2-round picot border.
If you’re ready to start your Sweet Granny Baby Blanket, keep scrolling for the free version, or pick up a printable PDF copy from TLYarnCrafts.com.
Click here to purchase the Sweet Granny Baby Blanket pattern on Ravelry.
Click here to explore more free crochet patterns on TLYCBlog.com.
Sweet Granny Baby Blanket Pattern
MATERIALS:
- 5 balls of Lion Brand Wool-Ease in Fisherman (MC)
- 1 ball each of Lion Brand Wool-Ease in Light Gray (CA), Dark Gray (CB), Rose Heather (CC), Dark Rose Heather (CD), and Mustard (CE)
- US I/9 5.5mm crochet hook
- Scissors
- Yarn needle
FINISHED SIZE:
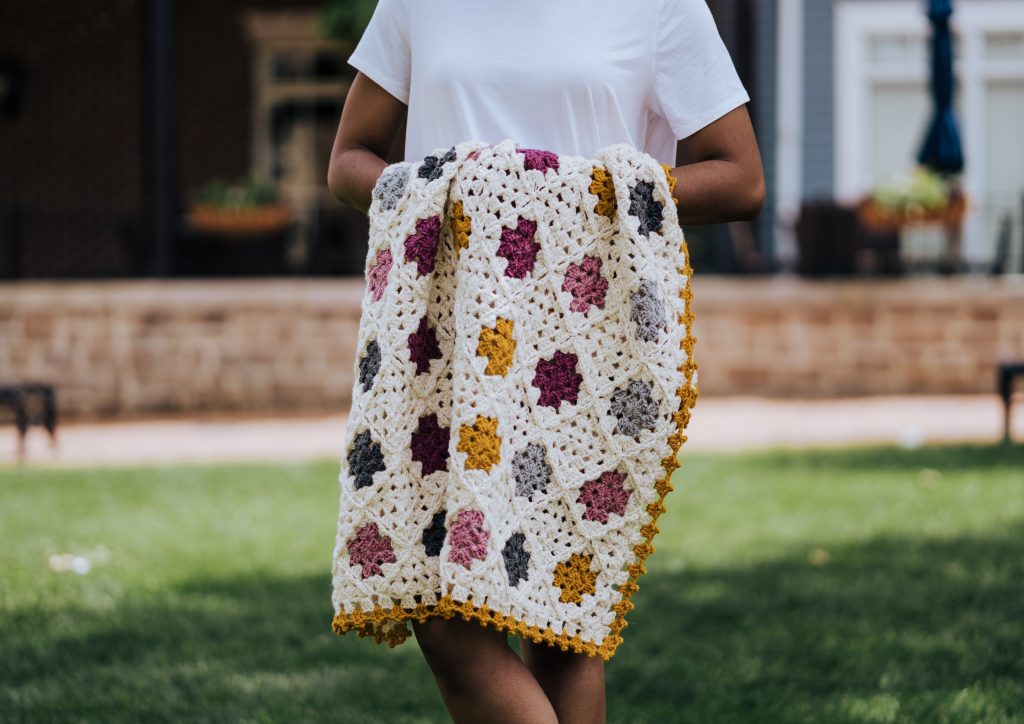
40 inches x 44 inches after blocking, including border.
GAUGE:
On square measures 5.5” from corner to corner when measured across the center.
ABBREVIATIONS:
- Ch = chain
- Dc = double crochet
- MR = magic ring
- Pic = picot (see Special Stitches)
- Rep = repeat
- RS = right side
- Sl st = slip stitch
- Sp = space
- St = stitch
- Tch = turning chain
SPECIAL STITCHES:
- Picot (pic) – ch 3, sl st in first ch.
NOTES:
- The pattern chart below indicates the yarn color used for the first two rounds of the square. For example, the bottom left square begins with 2 rounds of CC and ends with one round of MC. White squares are worked entirely with MC.
- As you complete the join-as-you-go method, the “working square” is the square you are completing and the “joining square” is the completed square you are connecting the working square to.
- This project results in a lot of ends. Try to weave them in as you go.
- Portions of this pattern are written in crochet shorthand, for example, “2dc” means to place 2 dc stitches in the same stitch, while “3dc” means to place 3 dc stitches into the same stitch.
- Starting ch 3 counts as dc, starting ch 4 counts as dc + ch 1.

Are you more of a visual learner? Watch the tutorial video:
First Square
Round 1: With CC, [ch 3, 2dc, ch 2, (3dc, ch 2) 3 times] in MR, join with a sl st in the 3rd ch of the starting ch-3, close MR.
Round 2: Sl st to next ch-2 sp, (ch 3, 2dc, ch 2, 3dc) in ch-2 sp, [ch 1, (3dc, ch 2, 3dc) in ch 2 sp] 3 times, , ch 1, join with a sl st in the 3rd ch of the starting ch-3. Cut C.
Round 3: Join MC with a sl st in any ch-2 sp, (ch 3, 2dc, ch 2, 3dc) in ch-2 sp, ch 1, 3dc in next ch-1 sp, [ch 1, (3dc, ch 2, 3dc) in next ch-2 sp, ch 1, 3dc in next ch-1 sp] 3 times, ch 1, join with a sl st in the 3rd ch of the starting ch-3. Cut yarn.
From here, use the written directions to complete the remaining motifs in the blanket, changing colors as instructed in the chart.
Joining 2 Corners
Rounds 1-2: Complete Rounds 1 and 2 of First Square with accent color or MC as instructed in chart. Cut accent color if needed.
Round 3: If changing form an accent color, join MC with a sl st in any ch-2 sp. If continuing with MC, sl st to next ch-2 sp. (Ch 3, 2dc, ch 2, 3dc) in same ch-2 sp, ch 1, 3dc in next ch-1 sp, ch 1, (3dc, ch 2, 3dc) in next ch-2 sp, ch 1, 3dc in next ch 1 sp, ch 1, 3dc in next ch-2 sp, sl st into ch-2 sp of joining square, ch 1, 3dc in same ch-2 sp of working square, sl st into next ch-1 sp of joining square, 3dc in next ch-1 sp of working square, sl st into next ch-1 sp of joining square, 3dc in next ch-2 sp of working square, sl st in next ch-2 sp of joining square, ch 1, 3dc in same ch-2 sp of working square, ch 1, 3dc in next ch-1 sp of working square, ch 1, sl st in the 3rd ch of the starting ch-3. Cut yarn.
Joining 3 Corners
Rounds 1-2: Complete Rounds 1 and 2 of First Square with accent color or MC as instructed in chart. Cut accent color if needed.
Round 3: If changing from an accent color, join MC with a sl st in and ch-2 sp. If continuing with MC, sl st to next ch-2 sp. (Ch 3, 2dc ch 1, 3dc) in same ch-2 sp, ch 1, 3dc in next ch-1 sp, ch 1, (3dc in next ch-2 sp, sl st in ch-2 sp of joining square, ch 1, 3dc in same ch-2 sp of working square, sl st in next ch-1 sp of joining square, 3dc in next ch-1 sp of working square, sl st in next ch-1 sp of joining square) 2 times, 3dc in next ch-2 sp of working square, sl st in net ch-2 sp of joining square, ch 1, 3dc in same ch-2 sp of working square, ch 1, 3dc in next ch-1 sp, ch 1, join with sl st in the 3rd ch of the starting ch-3.

Side Triangle
Row 1: With MC in MR, ch 4, 3dc, ch 2, 3dc, ch 1, dc, close MR, turn.
Row 2: Ch 4, 3dc in ch-1 sp, ch 1, (3dc ch 2, 3dc) in ch-2 sp, ch 1, 3dc in tch sp, ch 1, dc in 3rd ch of tch, turn.
Row 3: Ch 3, sl st in ch-2 of joining square, 3dc in ch-1 sp of working square, sl st into next ch-1 sp of joining square, 3dc into next ch-1 sp of working square, sl st in next ch-1 sp of joining square, 3dc in next ch-2 sp of working square, sl st in next ch-2 sp of joining square, ch 1, 3dc in same ch-2 sp of working square, sl st into next ch-1 sp of joining square, 3dc into next ch-1 sp of working square, sl st into next ch-1 sp of joining square, 3dc into tch sp, sl st into ch-2 sp of joining square, dc in 3rd ch of tch. Cut yarn.

Corner Triangle
Row 1: With MC in MR, ch 4, 3dc, ch 1, dc, close ring, Turn.
Row 2: Ch 4, 3dc in ch-1 sp, ch 1, 3dc in tch sp, ch 1, dc in 3rd ch of tch, turn.
Row 3: Ch 3, sl st in ch-2 sp of joining square, 3dc in ch-1 sp of working square, sl st in ch -1 sp of joining square, 3dc in ch-1 sp of working square, sl st in ch-1 sp of joining square, 3dc in tch sp of working square, sl st in ch-2 sp of joining square, dc in 3rd ch of tch. Cut yarn.

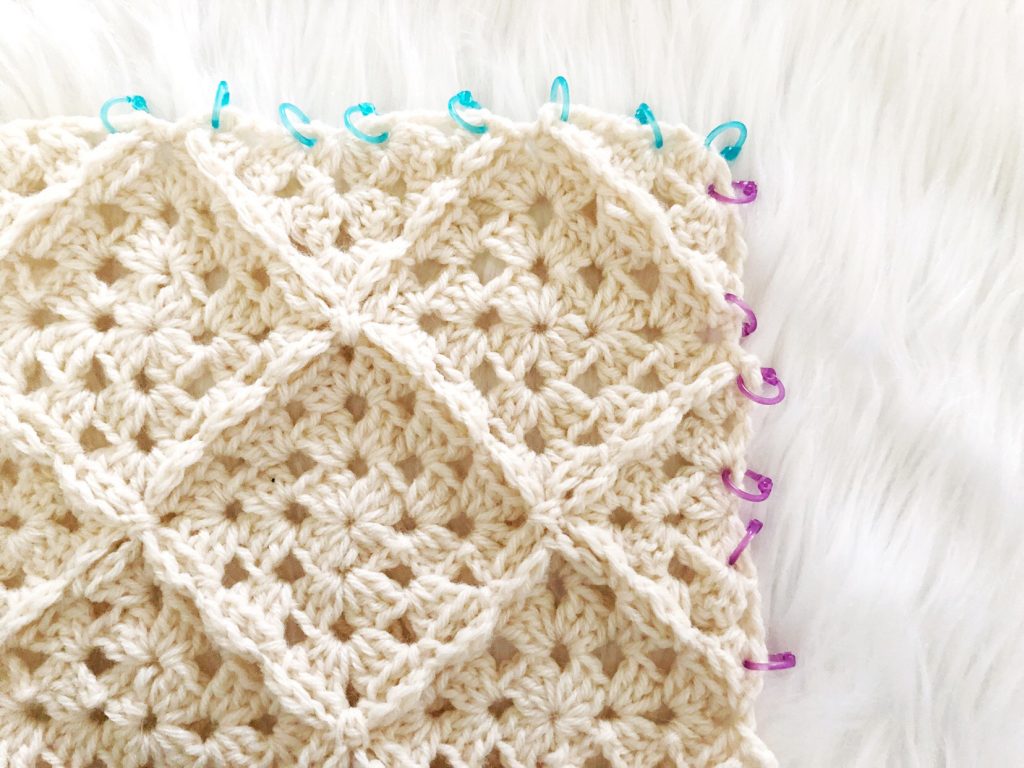
Border
Round 1: With RS facing, join MC in the MR of the Corner Triangle attached to the First Square with a sl st, (ch 3, 2dc, ch 2, 3 dc) in same sp, *ch 1, evenly place (3 dc, ch 1) groups across row (see photo supplement below)**, (3 dc, ch 2, 3dc) in MR of next corner triangle; rep from * around, ending last rep at **, sl st in 3rd ch of starting ch-3. Cut yarn.
Round 2: Join CE in any ch-2 sp with a sl st, (ch 3, dc 1, pic, dc 1, ch 2, dc 2, pic, dc 1) in same sp, ch 1, *[(dc 2, pic, dc 1) in next ch-1 sp, ch 1] across row**, (dc 2, pic, dc 1, ch 2, dc 2, pic, dc 1) in next ch-2 sp, ch 1; rep from * around, ending last rep at **, sl st in 3rd ch of starting ch-3. Cut yarn.
Finishing
Weave in all ends. Steam block to shape.

Purchase the printable Sweet Granny Baby Blanket pattern HERE!
I hope you had so much fun making the Sweet Granny Baby Blanket. I can’t wait to give mine to my future niece (*fingers crossed*). Share your blanket with me on Instagram using the hashtags #SweetGrannyBabyBlanket and #TLYCMakers. And show off your blanket in the TLYCMakers Facebook group too!
Do you like the free patterns on TLYCBlog.com? Pinning this post shares my content with hundreds of other makers, helping generate income that supports free patterns like this one!
CLICK HERE TO PIN THIS POST


love your pattern and colors you chose
Thank you so much! 🙂
It’s really wonderful, Toni! I love the color scheme you’ve chosen. Have a wonderful weekend! 💕 🍃🌸🍃
I absolutely love this blanket! Do you do YouTube videos?
Thanks so much, Kelly! I’m glad you love it. Yes, I do Youtube videos. I don’t have one for this pattern, but I plan to make one 🙂
So difficult to find the free pattern. Took me a very long time.
It shouldn’t be so hard – the free versions of my patterns are always at the end of the blog post.
I love the blanket! I’m just having a hard time connecting it the way you did. 😭
What’s the trouble? I’m happy to help.
Is there any way to get a video tutorial? I am really struggling to understand the written directions
There likely will not be a tutorial video for this, but I’m always happy to help where I can. Feel free to email [email protected].
How many do you chain to begin? Having trouble figuring out where to start!
Hi – this pattern is made with motifs worked fro the center out so you don’t start with a chain.
You have inspired me to pick up my hooks and “Hook It Up!”Lol 𝐓𝐡𝐚𝐧𝐤 you❤️ It started with holiday blanket. I’m hooked up👍
This is gorgeous! I would like to make a larger size, how would I go about that? Thank you for the patter and videos 🙂
Hi! You can just keep adding squares to the size you want, then even out the sides by adding triangles.
This is a beautiful blanket with a gorgeous color palette!
I chose this pattern a year or two ago after scouring the internet for the perfect heirloom baby blanket. We’re finally expecting our first and I’ve been excited to start it.
I’m not the most experienced crocheter, so I did find the written directions a bit challenging at first. The video tutorial is very helpful and has also helped me better understand the written directions. Thank you!
Absolutely loved doing this project! The tutorial was a life saver, as it’s been awhile since I picked up a crochet hook. I followed the video for most of the project and ran out of the main color but realized that in your tutorial you added more double crochets. I figured it out by looking over the instructions, pulled it out and then redid the border with the less amount. I had enough yarn and was able to finish my project! Love your work. I will definitely be trying you other patterns!! Thank you 💕
I’m doing your crochet academy right now and just completed the granny square join as you go, when i found this pattern. It’s adorable, and I just started working on a version of it. One thing I am not seeing is the same consistent rib pattern after I complete the join. Do you have any recommendations for how to get that? I’m finding that some have a beautiful ridge like yours and others are on the back side. Thank you!
Hi darling – I’m not quite sure what you mean. There’s no ribbing in this pattern.