Sedona Sweater, free Tunisian crochet pullover pattern from leftover yarn

Leftover yarn never looked so good! Dive deep into your yarn stash and give the Sedona Sweater a try.
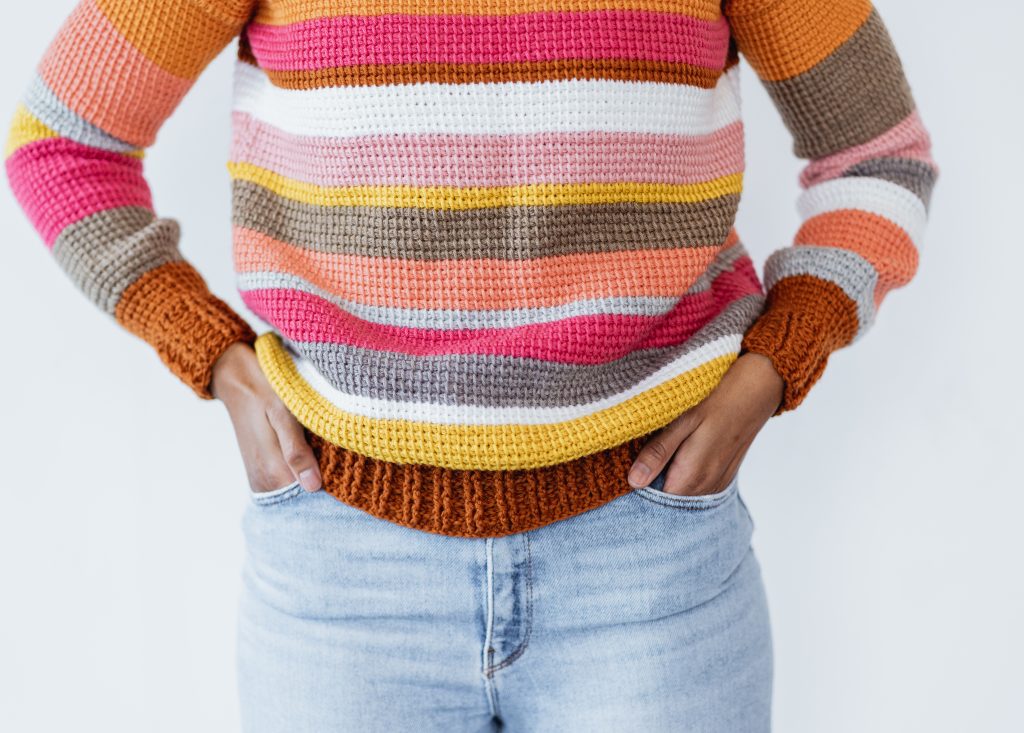
Crocheting a sweater can seem intimidating at first. With some many panels to make and elements to think about, it can feel overwhelming. Overcome your sweater-making fears with the Sedona Sweater, a truly beginner-friendly crochet sweater pattern. I made mine with leftover Swish DK from my 2019 Temperature Blanket, but you can use any yarn you want!
This post contains affiliate links that support the content on TLYCBlog.com. All opinions are my own. Find my Privacy & Disclosures Policy here.
Pin It Now, Make It Later!

Find a printer friendly, ad-free PDF version of the Sedona Sweater in my Ravelry shop and on TLYarnCrafts.com. The PDF version is a full-color, 7-page set of instructions with a full supply list and details on my original stripe pattern.
Keep scrolling for the FREE version of the Sedona Sweater.

IS THIS SWEATER TRULY BEGINNER FRIENDLY?
Does the idea of crocheting a sweater make you want to turn and run? Well, you’re not alone! My biggest concerns before designing the Sedona Sweater were how to get the fit just right and make sure the overall silhouette was flattering but still casual.
By keeping the pattern simple and easy to customize, every crocheter who tries the Sedona Sweater will have a finished garment they can feel proud of. You’ll never want to take it off!

PRACTICE TUNISIAN CROCHET BASICS
The majority of the Sedona Sweater is made with Tunisian crochet (TC). I’ve been obsessed with TC since I first tried it in 2017, but this is my first time designing a full-sized garment with it. I’m confident that you can make the Sedona Sweater even if you are brand new to Tunisian crochet.
To make your own Sedona Sweater, you’ll need to know the following techniques:
-Tunisian simple stitch. Practice with this tutorial video.
-Changing color in Tunisian crochet. Practice with this tutorial video.
Other techniques like picking up stitches and doing a half double crochet bind off are explained in the pattern itself.
Want more Tunisian crochet practice? Try these patterns:

Hot Cocoa Poncho (FREE PATTERN) // Upstate Scarf // Daydream Shawl (FREE PATTERN)
CUSTOMIZE YOUR SWEATER EVERY WHICH WAY
The Sedona Sweater pattern is written like a recipe, allowing each maker to customize different elements and personalize their own sweater. Here are some easy ways to make adjustments in the Sedona Sweater pattern:
- A SWEATER FOR EVERY BODY. Customize the fit of the Sedona Sweater using your own body measurements. Measure your torso at the widest point – that might be your bust or your stomach. Add 4-10″ depending on how loose you want your sweater to fit. Divide that number in half – that will be the width of each of your body panels. Based on your gauge, adjust the Body panel instructions for your custom fit. Make the same adjustments for the sleeves and the neckline.
- DIVE INTO THAT YARN STASH. I had a lot of lovely Swish DK yarn left over from my 2019 temperature blanket (learn more about that project here!). I didn’t want it to go to waste, so I used as much as I could in my Sedona Sweater. You can do the same! Gather up bits and bobs of yarn from your stash that you’ve wanted to use. If you use DK weight yarn, you can keep the pattern as is. If you use heavier or lighter weight yarn, be sure to adjust your hook size and make other changes based off your new gauge.
- SWITCH YOUR STITCH. The Sedona Sweater pattern is a recipe, meaning your can add your own flavor! Try switching up the stitch pattern used in your sweater. I love the look of the classic Tunisian simple stitch, but this would also be beautiful in the Tunisian knit stitch or the Honeycomb stitch. Play around with different options to see what’s right for you.

CHOOSING THE RIGHT HOOKS
The Sedona Sweater uses both Tunisian and traditional crochet, so you’ll need both kinds of hooks. The cuffs and lower body ribbing will need a small crochet hook, which means the ribbing will be tighter in these areas. The neckline ribbing uses a slightly larger hook, which allows the neckline to be more relaxed and comfortable.
The body and sleeves of the sweater will require a corded Tunisian crochet hook. A cord is required because the panels in these areas are wider than the length of a traditional crochet hook. The length of the cord will depend on the size sweater you are making. Most interchangeable Tunisian crochet hook sets come with varying lengths of cords. Need help picking a Tunisian crochet hook set? Watch this video, where I count down my Top 5 sets!

Do you enjoy the FREE patterns available on TLYCBlog.com? Pin this post to support my blog and free content!
Click this Image to Pin this Post!

Sedona Sweater Details
Find a printer-friendly PDF version of this pattern on Ravelry and TLYarnCrafts.com now!
MATERIALS:
- Knit Picks Swish DK or comparable DK weight yarn. Sample is made from leftover yarn – exact yardage is not available. Approximate total yardage is 1450 (1600, 1670, 1960, 2030, 2095) yards; 12 (14, 14, 16, 17, 18) balls. Colors used are Carnation, Rouge, Conch, Clementine, Allspice, Honey, Dove Heather, Squirrel Heather, White, and Camel Heather.
- 6mm Tunisian crochet hook with varying cord lengths up to 24″. Use this post to help pick your ideal Tunisian crochet hook set.
- 4mm AND 5mm crochet hook
- Scissors
- Tape measure
- Tapestry needle
FINISHED SIZE:
S, M, L, XL, 2XL, 3XL. All sizes intended to have 4-10″ of positive ease. Measurements taken before blocking.
- Bust – 40 (44, 46, 54, 56, 58)”
- Length – 24 (25, 25, 26, 26, 27)”
GAUGE:
4″ = 16 Tss x 14 rows
ABBREVIATIONS:
Bpdc = back post double crochet
Ch = chain
Dc = double crochet
Fdndc = foundation double crochet
Fpdc = front post double crochet
Hdc = half double crochet
RS = right side
Sk = skip
Sl st = slip stitch
St(s) = stitch(es)
Tss = Tunisian simple stitch
Tss2tog = Tunisian simple stitch 2 stitches together (insert hook behind the vertical bars of the next TWO stitches, yarn over, pull up a loop – decrease made)
Tss3tog = Tunisian simple stitch 3 stitches together (insert hook behind the vertical bars of the next THREE stitches, yarn over, pull up a loop – decrease made)
PATTERN NOTES:
- Special Stitches – Find a video tutorial for the Foundation Single Crochet (fdnsc) here; find a video tutorial for a standing double crochet here.
- Pattern is written for size S with M, L, XL, 2XL, and 3XL in parentheses. For some sections, instruction for sizes are written separately. Only follow instructions for the size you are making.
- Numbers in parentheses at the end of some rows indicate the total number of stitches in that row.
- Beginning chain 2 counts as hdc throughout pattern.
- Pattern rows are for Forward Pass instructions only.
- Return Pass: Follow each Tunisian crochet row with the return pass in the same color.
- Return Pass Instructions: Ch 1, *yarn over, pull through next 2 loops on hook; repeat from * until 1 loop remains on hook.

Sedona Sweater Pattern
Body Panels (Make 2)
ROW 1: With 4mm hook, fdndc 82 (94, 98, 114, 118, 122), turn.
ROW 2: Ch 2, (fpdc 2, bpdc 2) across row to last st, hdc in last st, turn.
ROWS 3-8: Repeat Row 2.
ROW 9: Switch to Tunisian crochet hook. Place loop on hook. Sk first st, pull up a loop in each remaining st across row. Complete the Return Pass.
ROW 10: Tss across row.
Repeat Row 10 to 24 (25, 25, 26, 26, 27)” including ribbing. Complete the sl st bind off loosely and leave a long tail for sewing.
Place Body panels together with RS facing each other. Seam each shoulder from outside edge for 23 (29, 29, 37, 38, 40) sts. Cut yarn.

Sleeves
ROW 1: Lay the seamed Body panels flat with RS facing you. Using the shoulder seam as the midpoint, use the Tunisian crochet hook to pull up loops in 24 (25, 29, 32, 34, 37) stitches along the edge of the panel to the right of the seam, and the same number of stitches along the edge of the panel to the left of the seam. Complete the Return Pass.
ROW 2: Tss across row.
Repeat Row 2 until sleeve measures 15 (15, 15, 15, 14.5, 14.5)”.
WRIST SHAPING
FOR SIZE SMALL ONLY
ROW 1: Tss 1, tss2tog, (tss 2, tss2tog) across row (last tss2tog includes the edge stitch – be sure to work under both loops of the edge stitch). (36 tss)
ROW 2: Tss across row.
ROW 3: Tss 1, tss2tog, (tss 2, tss2tog) across row to last 4 sts, tss remaining sts. (28 tss)
ROWS 4-6: Tss across row.
FOR SIZE MEDIUM ONLY
ROW 1: (Tss 2, tss2tog) across row to last 6 sts, tss remaining sts. (39 tss)
ROW 2: Tss across row.
ROW 3: (Tss 1, tss2tog) across row to last 6 sts, tss remaining sts. (28 tss)
ROWS 4-6: Tss across row.

FOR SIZE LARGE ONLY
ROW 1: (Tss 2, tss2tog) across row to last 2 sts, tss remaining sts. (44 tss)
ROW 2: Tss across row.
ROW 3: (Tss 1, tss2tog) across row to last 2 sts, tss remaining sts. (30 tss)
ROWS 4-6: Tss across row.
FOR SIZE X-LARGE ONLY
ROW 1: (Tss 1, tss2tog) across row to last 4 sts, tss remaining sts. (44 tss)
ROW 2: Tss across row.
ROW 3: (Tss 1, tss2tog) across row to last 2 sts, tss remaining sts. (30 tss)
ROWS 4-6: Tss across row.
FOR SIZE 2X-LARGE ONLY
ROW 1: (Tss 1, tss2tog) across row to last 2 sts, tss remaining sts. (46 tss)
ROW 2: Tss across row.
ROW 3: (Tss 1, tss2tog) across row to last 4 sts, tss remaining sts. (32 tss)
ROWS 4-6: Tss across row.
FOR SIZE 3X-LARGE ONLY
ROW 1: (Tss 1, tss2tog) across row to last 2 sts, tss remaining sts. (50 tss)
ROW 2: Tss across row.
ROW 3: Tss3tog, (tss 1, tss2tog) 6 times, tss 1, tss3tog, (tss 1, tss2tog) 6 times, tss 1, tss3tog, tss 2. (32 tss)
ROWS 4-6: Tss across row.
CUFF
FOR SIZES SMALL, MEDIUM, 2X-LARGE, AND 3X-LARGE ONLY
ROW 1: With 4mm crochet hook, ch 2, sk first vertical bar, hdc in each vertical bar across row, hdc under both loops of last st, turn.
ROW 2: Ch 2, (fpdc 2, bpdc 2) across row to last st, hdc in last st, turn.

ROW 3: Ch 2, (bpdc 2, fpdc 2) across row to last st, hdc in last st, turn.
ROWS 4-7: Repeat Rows 2 and 3.
ROW 8: Repeat Row 2. Fasten off leaving a long tail for sewing.
FOR SIZES LARGE AND X-LARGE ONLY
ROW 1: With 4mm crochet hook, ch 2, sk first vertical bar, hdc in each vertical bar across row, hdc under both loops of last st, turn.
ROW 2: Ch 2, (fpdc 2, bpdc 2) across row to last st, hdc in last st, turn.
ROWS 3-8: Repeat Row 2. Fasten off leaving a long tail for sewing.
FOR ALL SIZES
Complete instructions in SLEEVES for the other side.
Use remaining tails to seam SLEEVES along underarm to side of BODY and down to bottom ribbing.
Neckline
ROW 1: With RS facing and 5mm hook, join with standing double crochet (see Special Stitches) in the first st of neck opening, dc in each st across Front Body panel, turn. (36, 36, 40, 40, 42, 42 dc)
FOR SIZES SMALL THROUGH X-LARGE ONLY
ROW 2: Ch 2, (fpdc 2, bpdc 2) across row to last st, hdc in last st, turn.
ROW 3: Repeat Row 2. Fasten off leaving a long tail for sewing.
FOR SIZES 2X-LARGE AND 3X-LARGE ONLY
ROW 2: Ch 2, (fpdc 2, bpdc 2) across row to last st, hdc in last st, turn.
ROW 3: Ch 2, (bpdc 2, fpdc 2) across row to last st, hdc in last st, turn. Fasten off leaving a long tail for sewing.
Repeat NECKLINE instructions for Back Body panel.

The NECKLINE is finished by folding and sewing the ribbing on the Front and Back Body panels across one another as follows:
Begin with the RS of the sweater facing you and identify the ribbing on the Front and Back Body panels (Figure 1). Lay the ribbing on the Front Body Panel so the top of the last stitch meets the base of the 6th stitch on the Back Body panel (Figure 2).
Use the tail from the Front Body to seam the ribbing to the base of the Back Body ribbing (Figure 3). Then, fold the Back Body ribbing and seam in the same manner (Figure 4). Repeat for the other side of the NECKLINE.
Finishing
-Weave in all remaining ends.
-Steam block lightly if needed.
You did it, friend! I hope the Sedona Sweater becomes one of your favorite projects to make. Special thanks to my friends at WeCrochet for sponsoring this project. Find more of my collaboration projects with WeCrochet by clicking here.
Please take a moment to upload your projects to Ravelry and don’t forget to PIN this pattern on Pinterest so you can make it again next time. Share your Sedona Sweater on Instagram with hashtag #SedonaSweater, then drop by the TLYCMakers Facebook group and share it there too!
Want more FREE TLYC x WeCrochet collab patterns? Try these!

Mika Vest // Drexel Beanie (FREE PATTERN) // Skyward Kerchief


Thanks for a marvelous posting! I really enjoyed reading it, you could be a great author.
I will always bookmark your blog and will come back in the
future. I want to encourage you to ultimately continue your
great work, have a nice evening!
I have had this pattern saved on Pinterest for several months and am finally going to try it out in the next week or so! I can’t wait! I’ve never done Tunisian crochet before, but your explanation and links look easy to follow! Thanks for the freebie! Toni-Lou 🙂
I would like to make this sweater (or any sweater) with fingering weight yarn. Do you have a pattern for that? Or suggestions on how to convert this pattern using a fingering weight. I especially worry about the arm holes being wrong?
Hi! I don’t have a crochet sweater pattern in fingering weight yarn. You can alter the Sedona Sweater for fingerging weight yarn and you shouldn’t have too many issues with the armholes. I would recommend searching Ravelry for the type of sweater you want (you can adjust the filters in a Ravelry search to narrow down the options to exactly what you’re looking for).
Do I have to count the vertical bars or the horizontal v’s when it comes to tss per 4 inches?
What direction should I go when counting (from the left or right)?
I count one vertical bar and the horizontal V to its right as a stitch.
Thank you so much for this wonderful pattern. I modified it to create a cardigan instead of a pullover. It is the warmest sweater I own.
Super adorable sweater. I just learned to crochet, but I need to learn Tunisian style next because I really want to make this sweater! The stripes remind me of the 70s when I was in junior high/high school. Thank you for making a sweater that even a beginner could make.
I am having trouble getting the gauge of my ribbing to match my gauge with the TSS. Can you please tell me how long should the ribbing be for the M size before I start the tunisian crochet part? (When I did it with a size 4mm hook, it was 33 inches – clearly too long!)
I am trying to figure out how small a hook I need to go down to. (I make gauge with the 6 mm hook for the tunisian part.)
Thanks!
Hi! Please send pattern support questions to [email protected]
This is great! It looks perfect for a project I want to make, how warm is it?
Very very warm. Dk weight wool is a great option for a very warm sweater.
At first, I made this for myself and with the left over yarn, I made a 3T size for my granddaughter. They both turned out great! I didn’t like the collar on this pattern, so I made my own collar. The neckline looks fantastic in my granddaughter’s one. You see, I HAD to make this because my granddaughter’s name is Sedona!
A Sedona Sweater for Sedona – how cute!! It warms my heart to know you have a matching sweater with your sweet granddaughter. I’m sure they both look lovely.