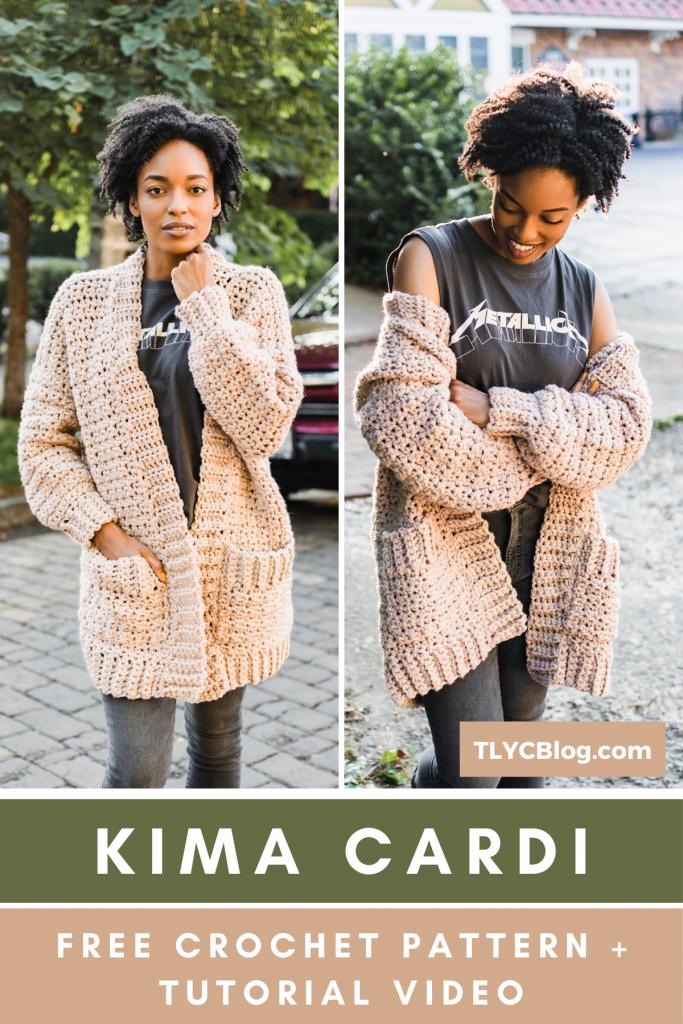
Kima Cardi: Free Chunky Crochet Cardigan Pattern
")
If you’ve always wanted to make a chunky crochet cardigan, now is the time! Try the Kima Cardigan, a FREE pattern designed for Crochet Academy.
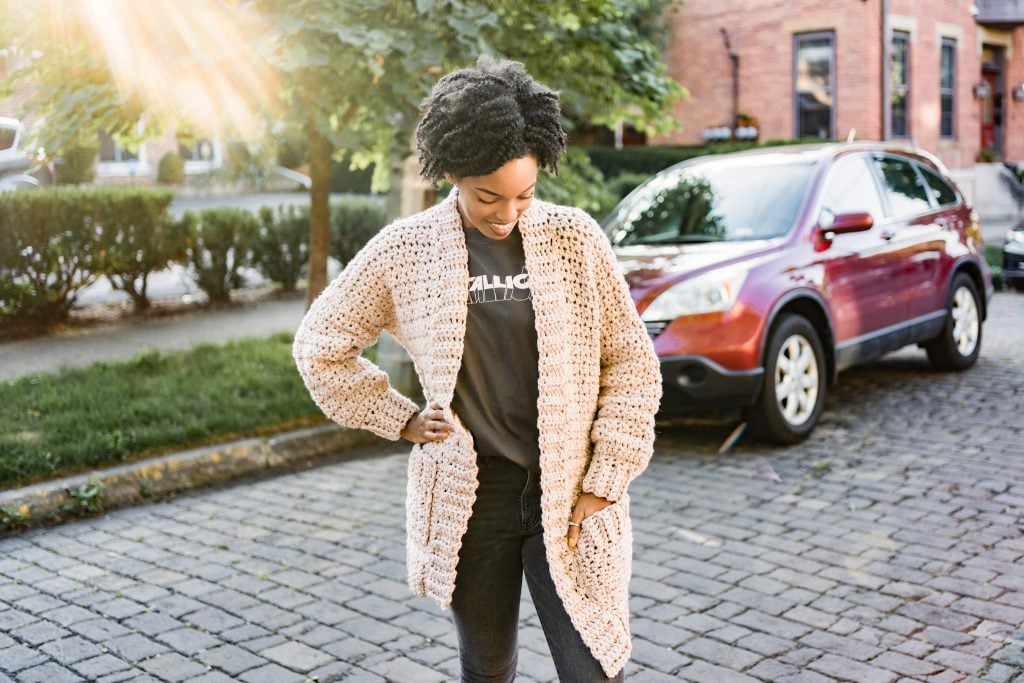
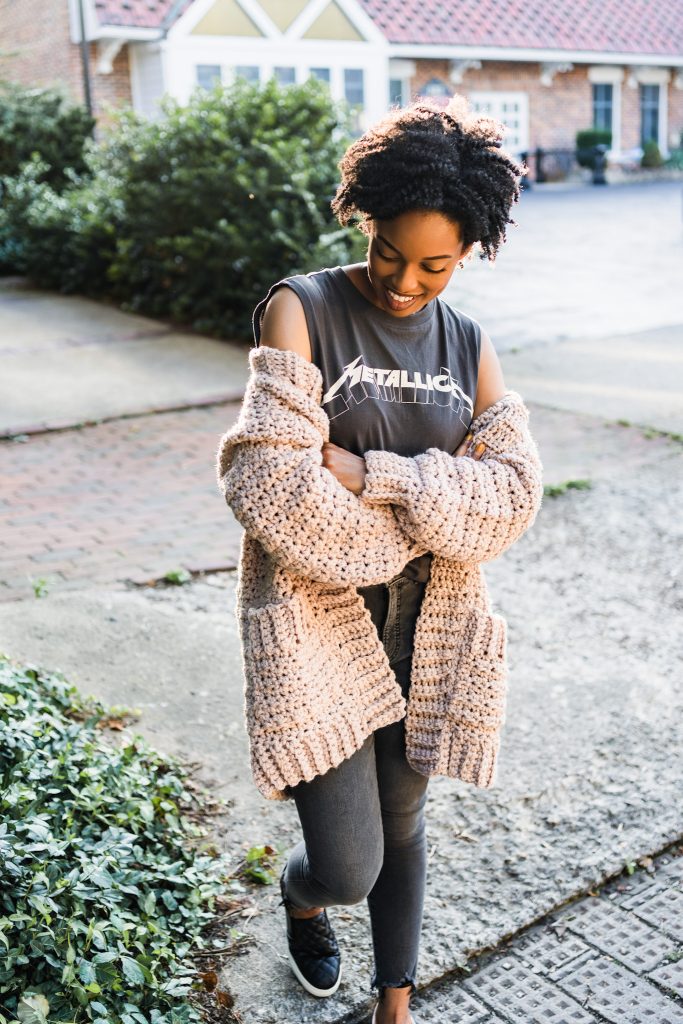
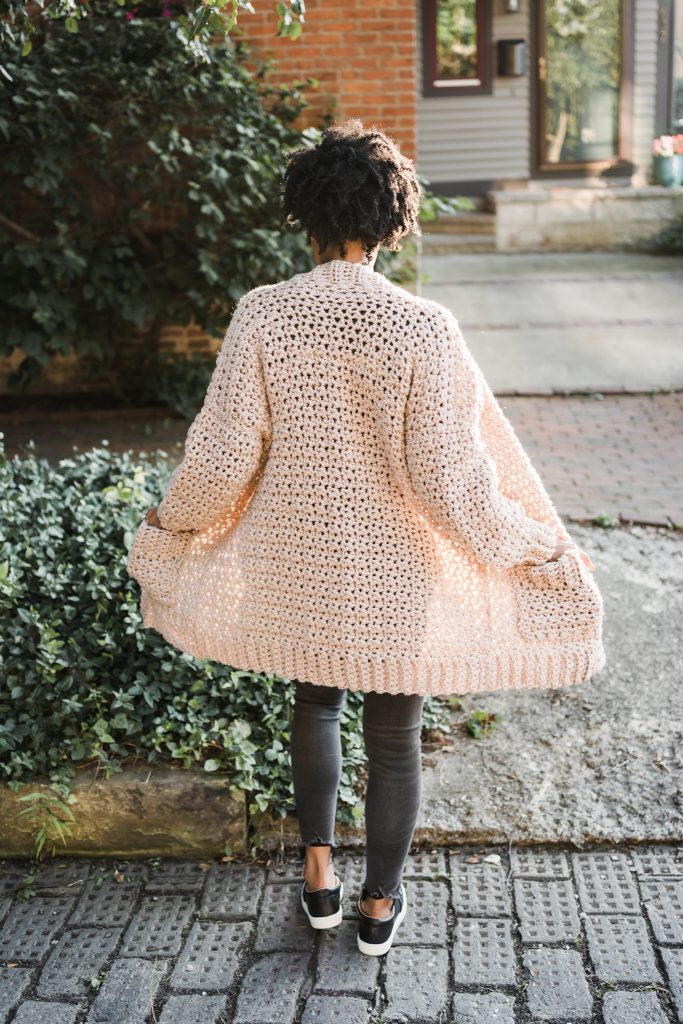
Every wardrobe deserves a chunky cardigan. Create a layered look for fall and winter with the Kima Cardi. The overall feel is comfy and cozy without being too heavy. The cardigan is constructed in simple pieces, then seamed together. The thick neckline ribbing and deep pockets are the finishing touches. Start your Kima Cardi project now with this free crochet pattern and tutorial video.
This post contains affiliate links that support the content on TLYCBlog.com. All opinions are my own. Find my Privacy & Disclosures Policy here.
PIN IT NOW, CROCHET IT LATER!
Get the Kima Cardi
- FREE PATTERN: Keep scrolling for the FREE version of the Kima Cardi + helpful totial video.
- PRINTABLE PDF: Pick up the beautifully formatted, ad-free PDF version of the Kima Cardi from Ravelry or TLYarnCrafts.com.
- CROCHET KIT: Get everything you need to make the Kima Cardi in a convenient kit from Lion Brand. Customize your kit now!
Beginner Chunky Crochet Cardigan
It’s so exciting to see beginner crocheters trying a chunky crochet cardigan as their first project. Makers are always encouraged to try small projects like washcloths as their first project, but there’s no reason you can’t start with a cardigan or sweater.
The benefit of the Kima Cardi is how simple it is. Start by making the five panels – 2 Fronts, 1 Back, and 2 Sleeves. Seam them together, then sew on the ribbed opening and a couple of pockets and you have a cardigan that you can wear!
Picking the Right Yarn
I chose Lion Brand Hue + Me to make the Kima Cardi. After using it for the Avon Throw Blanket, I knew I needed this yarn to be close to my skin. Hue + Me is a category 5 chunky weight yarn that is a blend of acrylic and wool yarns. The combination is soft but strong and is even machine washable. Find Hue + Me on the Lion Brand Website.
If Hue + Me isn’t the right fit for you, swap in a suitable substitution. A substitution should be a category 5 bulky weight, preferably with some wool, but 100% acrylic is ok too. Try to find a smooth yarn that is plied with an even color throughout the skein. Some recommended substitutions would be Lion Brand Woolspun, Brava Bulky, and Amigo Chunky.
Learn my 3 Step Method for Yarn Substitutions in this blog post.

If you want to take the guesswork out of making your Kima Cardi, get the all-in-one kit from Lion Brand. With just a few clicks, you can choose the color of your chunky crochet cardigan and add in any hooks and notions you need. Complete your purchase to get the yarn sent to our door and a PDF version of the pattern sent to your inbox.
Want to make the Kima Cardi? Customize your kit by choosing your favorite shade of Lion Brand Hue + Me. START HERE!
Get the Kima Cardi
- FREE PATTERN: Keep scrolling for the FREE version of the Avon Throw Blanket + helpful tutorial video.
- PRINTABLE PDF: Pick up the beautifully formatted, ad-free PDF version of the Avon Throw Blanket from Ravelry or TLYarnCrafts.com.
- YARN: Shop the yarn used in the Kima Cardi HERE.
Kima Cardi Details
DESCRIPTION
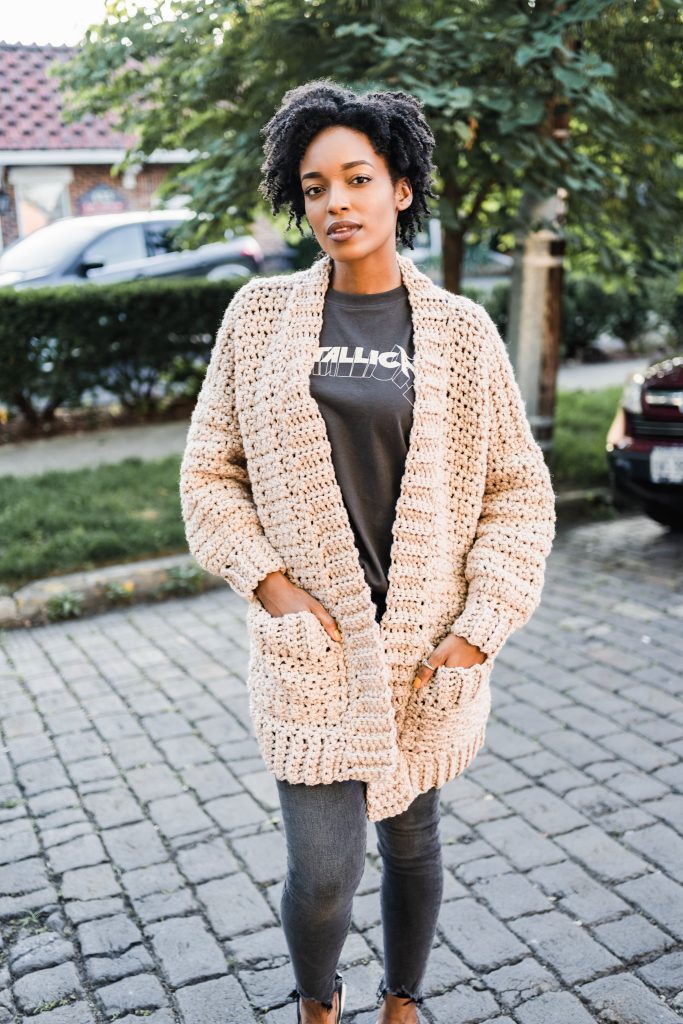
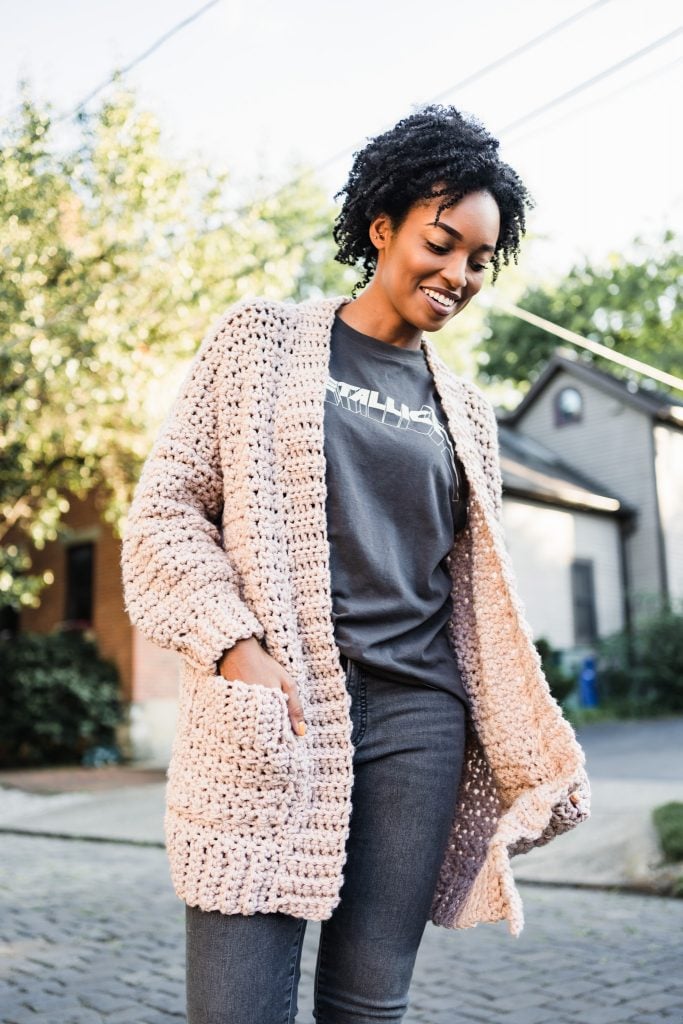
Whether you’re going to brunch with friends, sitting in the pickup line at your kid’s school, or heading out to check the mail, you need a chunky crochet cardigan. The Kima Cardi is a beginner-friendly, oversized open-front sweater with a ribbed collar and cozy pockets. Made with chunky yarn, this fun project works up quickly so you can make one for yourself and one for your best bunch buddy.
MATERIALS
- Lion Brand Hue + Me (category 5) bulky weight yarn. XS/S – 7 skeins, M/L – 9 skeins, XL/2XL – 11 skeins, 3XL/4XL – 13 skeins
- 10mm crochet hook (like this one!)
- Scissors
- Tapesry needle
- Locking stitch markers
- Tape measure
FINISHED SIZES
XS/S (M/L, XL/2XL, 3XL/4XL). All sizes are intended to have 12-18” positive ease. Measurements were taken after light steam blocking.
- Length: 28 (30, 32, 34)”
- Finished Bust: 46 (54, 60, 68)”
GAUGE
4” = 8 sts x 7 rows in (sc 1, hdc 1) stitch pattern
ABBREVIATIONS
Blo = back loop only
Ch = chain
Hdc = half double crochet
Rep = repeat
Sc = single crochet
St(s) = stitches
Kima Cardi Pattern
Let’s make the Kima Cardi together! Follow along in this tutorial video:
Front (Make 2)
RIBBING
ROW 1: Ch 7, sc in 2nd ch from hook and each ch across row, turn.
ROW 2: Ch 1, sc BLO across row, turn.
Rep Row 2 to 18 (22, 26, 30) rows. Rotate to work along row ends.
PANEL
ROW 1: Ch 1, (sc 1, hdc 1) across row, placing 1 stitch in the end of each row and ending with a hdc, turn. [18 (22, 26, 30) sts]
ROW 2: Ch 1, (sc 1, hdc 1) across row, turn.
Rep Row 2 until panel measures 28 (30, 32, 34)” long. Fasten off leaving a long tail for seaming the shoulders. Set Front panels aside.
Back
RIBBING
ROW 1: Ch 7, sc in 2nd ch from hook and each ch across row, turn.
ROW 2: Ch 1, sc BLO across row. turn.
Rep Row 2 to 46 (54, 60, 68) rows. Rotate to work along row ends.
PANEL
ROW 1: Ch 1, (sc 1, hdc 1) across row, placing 1 stitch in the end of each row and ending with a hdc, turn. [46 (54, 60, 68) sts]
ROW 2: Ch 1, (sc 1, hdc 1) across row, turn.
Rep Row 2 until panel measures 28 (30, 32, 34)” long and equals the same number of finished rows as the front. Fasten off. Set Back panel aside.
Sleeves (Make 2)
Work sleeve instructions for your size as indicated below.
XS/S
RIBBING
ROW 1: Ch 7, sc in 2nd ch from hook and each ch across row, turn.
ROW 2: Ch 1, sc BLO across row. turn.
Rep Row 2 to 16 rows. Rotate to work along row ends.
PANEL
ROW 1: Ch 1, sc across row, placing 1 stitch in the end of each row, turn. (16 sc)
ROW 2: Ch 1, sc 1, (2sc, sc 2, 2sc, sc 1) 3 times, turn. (22 sc)
ROW 3: Ch 1, sc 1, (2sc, sc 3, 2sc, sc 2) 3 times, turn. (28 sc)
ROW 4: Ch 1, (sc 1, hdc 1) across row, turn.
Rep Row 4 until Sleeve measures 15” long including cuff. Fasten off leaving a long tail for seaming the sleeve.
M/L
RIBBING
ROW 1: Ch 7, sc in 2nd ch from hook and each ch across row, turn.
ROW 2: Ch 1, sc BLO across row. turn.
Rep Row 2 to 18 rows. Rotate to work along row ends.
PANEL
ROW 1: Ch 1, sc across row, placing 1 stitch in the end of each row, turn. (18 sc)
ROW 2: Ch 1, (sc 1, 2sc) 3 times, (sc 2, 2sc, sc 1, 2sc) 2 times, sc 2, turn. (25 sc)
ROW 3: Ch 1, sc 3, (2sc, sc 2) 7 times, sc 1, turn. (32 sc)
ROW 4: Ch 1, (sc 1, hdc 1) across row, turn.
Rep Row 4 until Sleeve measures 15” long including cuff. Fasten off leaving a long tail for seaming the sleeve.

XL/2XL
RIBBING
ROW 1: Ch 7, sc in 2nd ch from hook and each ch across row, turn.
ROW 2: Ch 1, sc BLO across row. turn.
Rep Row 2 to 18 rows. Rotate to work along row ends.
PANEL
ROW 1: Ch 1, sc across row, placing 1 stitch in the end of each row, turn. (18 sc)
ROW 2: Ch 1, (sc 1, 2sc) across row, turn. (27 sc)
ROW 3: Ch 1, (2sc, sc 2) across row, turn. (36 sc)
ROW 4: Ch 1, (sc 1, hdc 1) across row, turn.
Rep Row 4 until Sleeve measures 15” long including cuff. Fasten off leaving a long tail for seaming the sleeve.
3XL/4XL
RIBBING
ROW 1: Ch 7, sc in 2nd ch from hook and each ch across row, turn.
ROW 2: Ch 1, sc BLO across row. turn.
Rep Row 2 to 20 rows. Rotate to work along row ends.
PANEL
ROW 1: Ch 1, sc across row, placing 1 stitch in the end of each row, turn. (20 sc)
ROW 2: Ch 1, (sc 1, 2sc) across row, turn. (30 sc)
ROW 3: Ch 1, (2sc, sc 2) across row, turn. (40 sc)
ROW 4: Ch 1, (sc 1, hdc 1) across row, turn.
Rep Row 4 until Sleeve measures 15” long including cuff. Fasten off leaving a long tail for seaming the sleeve.
Assembly
- Panels do not have a set right side or wrong side. Choose what will be the right and wrong sides of your cardigan before you start seaming.
- Lay the back panel flat and line up the corners of the front panels with the corners of the back. Using the available tails, seam the front panels to the back panel.
- Unfold the cardigan at the shoulders to lay it flat. Line up the top edge of the sleeve with the seam of the shoulder. Seam the sleeve to the cardigan.
- Fold cardigan at shoulders. Using a length of yarn, seam the side of the cardigan, starting at the cuffs working toward the underarm, then down the body.
- Weave in all ends.
Front Ribbing
ROW 1: Ch 7, sc in 2nd ch from hook and each ch across row, turn.
ROW 2: Ch 1, sc BLO across row. turn.
Rep Row 2 until ribbing measures approximately 60 (65, 70, 75)”. Do not fasten off.
Lay cardigan flat with the front opening facing up. Align the starting chain of the ribbing with the bottom left of the front opening. With the help of locking stitch markers, fasten the ribbing to the front opening evenly, ensuring that the ribbing isn’t stretching or buckling.
Continue fastening the ribbing in this way around the front opening. Add or remove rows as needed when you come to the end of your ribbing.
Using a length of yarn, seam the ribbing to the front opening. Fasten off when done and weave in all ends.
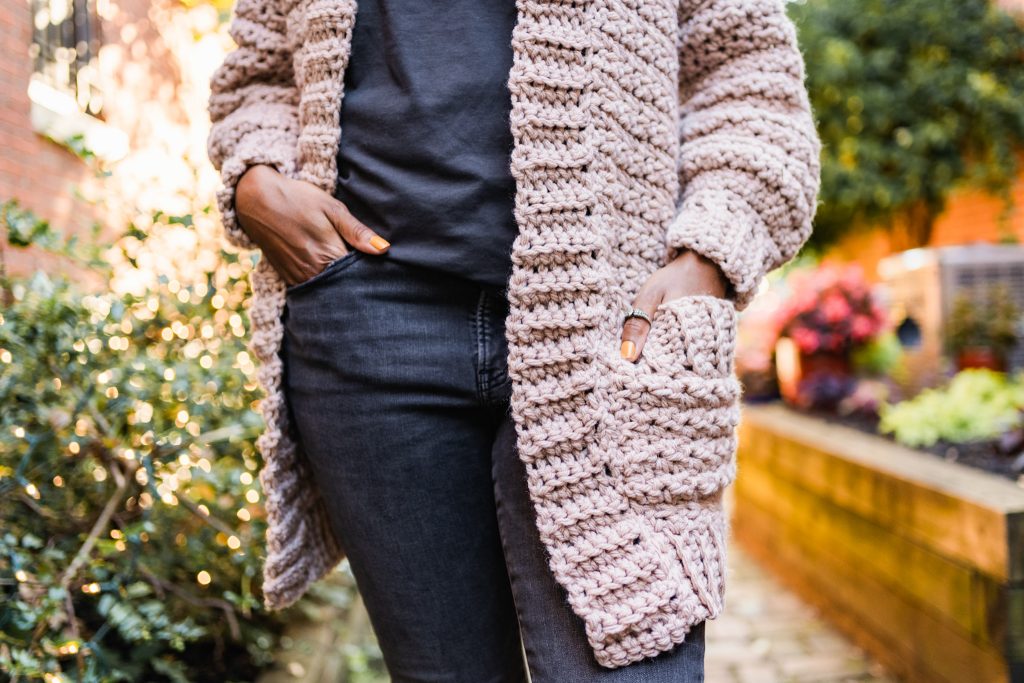
Pockets (make 2)
RIBBING
ROW 1: Ch 7, sc in 2nd ch from hook and each ch across row, turn.
ROW 2: Ch 1, sc BLO across row. turn.
Rep Row 2 to 12 rows. Rotate to work along row ends.
PANEL
ROW 1: Ch 1, (sc 1, hdc 1) across row, placing 1 stitch in the end of each row and ending with a hdc, turn.
ROW 2: Ch 1, (sc 1, hdc 1) across row, turn.
Rep Row 2 until panel measures 7.5” long. Fasten off.
With the help of locking stitch markers, align the pockets on the front panels at your desired height, being sure not to overlap the ribbing on the bottom or front opening.
Use a length of yarn to seam the pocket to the front panel, leaving the top side open. Take care to fasten the pocket securely to the panel so it will not loosen over time.
Finishing
- Weave in all remaining ends.
- Steam block lightly as needed.
Prefer an ad-free, printable version of the Kima Cardi? Get it HERE!
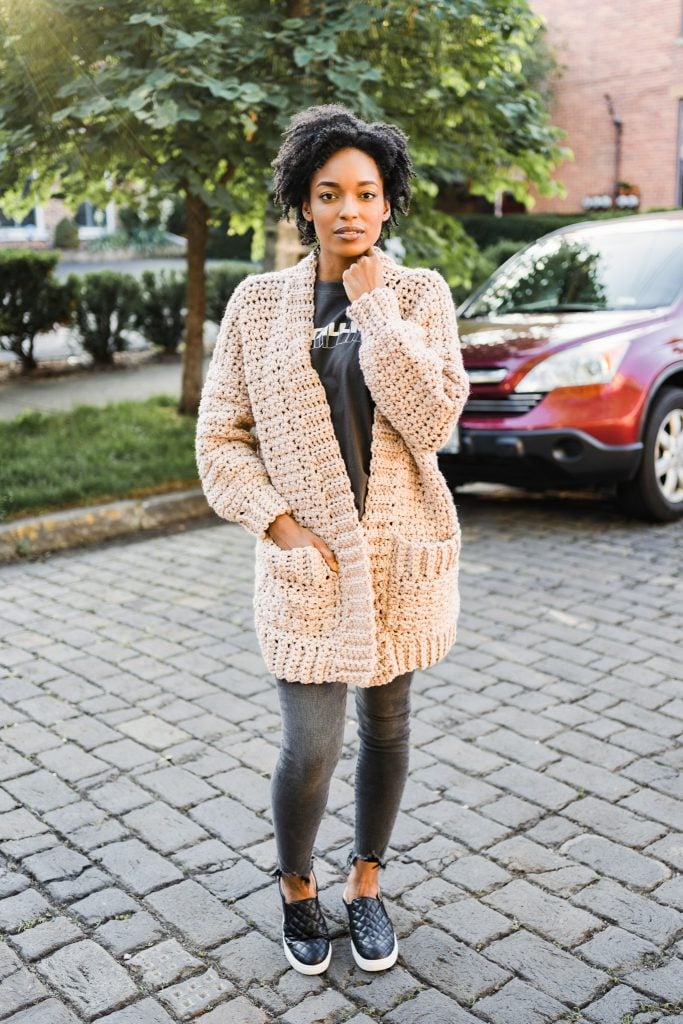
Whether styled over distressed denim, a pencil skirt, or leggings, you’re always dressed for the occasion when you wear the Kima Cardi. Where are you taking your new chunky crochet cardigan?
Share your projects with me on Instagram @TLYarnCrafts. Then drop by my private Facebook group, TLYC Makers, and share there too!
Find more free beginner crochet patterns here:


Love this model! I’m never made human clothes only knitting for dogs. And to be even more special I’ll use recycled yarn from unraveled thrift shop’s sweaters. 😊😊
Thank you for this pattern and this wonderful adventure, Toni!
Bought the PDF as I like hording patterns I use and I find it easier to read on my phone. I love that Toni’s patterns are in columns so I can zoom way in
YAY! Can`t wait to begin my first cardigan. 🤗
I really want to do all four CALs, but my gauge is waaaaay off (only swatched the throw and cardi so far but considering how that went and how tight I crochet..)
I just wanted to know if you have measurements for how wide the panels are supposed to be? I can just continue crocheting until I reach the right length but I have no idea how wide they are supposed to be.
Please help!
Hi! Exact measurements for each of the panels are in the paid version of the panels. Otherwise, you can calculate the length and width from the gauge.
Great tutorial! Toni is so easy to follow and pleasant to listen to and watch. Can’t wait to get started on this cardigan. Thanks Toni for the great instruction!
I bought 9 skeins of heartland yarn to make another cardigan but now I’m in love with your cardigan. It’s #4, not #5. Can I still use it? What do you think?
Thanks
Hi! I wouldn’t recommend Heartland for this cardigan – the yarn I used is significantly heavier. Maybe save the Heartland for another project down the line? 🙂
Hi Toni! Would you recommend blocking this as a completed piece or is it okay to block each piece separately?
That’s great! Thank you!
And done! What an awesome five day crochet experience 🥰🥰🥰
Hi Toni, Love the video! You make the pattern so clear. I made a swatch and my gauge matched what the pattern is asking for. It seems more dense than what is shown on the model. Shall I go up a hook size for it to be more open and fluid? Or will this compromise the size and shape?
I’d recommend sticking to the hook size that allows you to meet gauge. This sweater is on a model, so it’s reacting to gravity. Your finished cardigan will be pretty heavy, allowing you to achieve the drape you see in the photos.
Watching you make this one makes me want to make one for a three year old. Could you share how to figure out the dimensions/pattern to fit a specific pint sized person?
I have only been crocheting for about 2 years and have only done afghans and a few beanies. I decided to tackle this cardigan and I loved it! I used Bernat blanket yarn because my local Joann didn’t have any 5 weight yarn and so I said “what the heck? Why not?!” AND it only took me three days to complete! Thank you for the great and easy to follow pattern, Toni!!
That is so amazing to hear! Congrats on making your first cardigan. I’m sure it won’t be your last 🙂
Hi Toni ! Thank you for the video very easy to follow. I completed my first cardigan. My granddaughter sent me yarn #4
I combined it with #2 cotton yarn ,it is perfect for late fall and winter weather. I love it.
My first crochet sweater. I love it and can’t wait for the cool weather so I can wear it. Thank you so much for this beautiful, easy pattern.
I wore my Kima Cardi today– thank you, Fall! The barista at the Starbucks drive-thru commented on it. Said she LOVED it and it looked so cozy and WHERE did I get it?? 😁 It was so, so fun to say I made it myself!!
That is so awesome! I bet that won’t be the last compliment you get 🙂
I love this pattern. I just finished my first Kimi cardi and it is very large!!! I was surprised it was so big since I followed my size. I was going to make a xs for my granddaughter who is 11 but afraid it will be way to big! Any advice. I also bought the pattern. I really need a video and am just learning to read patterns with your help. I would not know how to make it smaller for her when it came to the sleeves. I could figure out the panels I think just not sure about the sleeves Any suggestions?
Hey I was wondering what color of yarn you have in the picture one your online page?
Hi – the yarn color is mentioned in the pattern at the bottom of the blog post.
Hi. I really enjoy this pattern. I have used this st for baby blankets. I have made 5 cardigans in the last couple months, and almost finished with 6th and 7th. I have used #4 yarn and 5.75 – J hook. I know that 10 rows is 4 inches. I make them shorter and with “self stripping” yarn. The last 2 are bottom half stripping yarn, upper half solid color. I also put a collar on some. But most instead of ribbing around the front, i did 9 rows of the st pattern (1 sc, 1 hdc). It looks nice.
It’s been fun making them for others. Some day I’ll make one for me 😊
Thank you for the great pattern 😀
So excited to try this pattern! Could you share with me what size the model is pictured in? I think that would be perfect for my sister!
Sure! The model is wearing the smallest size.
Hi,
Please help! I have the front and back panels and sleeves done, but can’t for the life of me figure out how to assemble it. There are no pictures for this. The sleeves are 15”, as instructed, but they seem so short. It almost seems like there’s a top horizontal back panel thats in the picture but nothing in the instructions. HELP!
Hi! It may help to check out the tutorial video. You’ll start by connecting the front panels to the back at the shoulders, then lay the whole thing flat and attach the sleeves, using that shoulder seam as a midpoint.
I would like to ask, as I can’t find any category 5 weight yarn.
If I am to use a Light/category 3 yarn, how many stitches/row would I have to make for a size L/XL??
Hello – This pattern has only been made with the dimensions and materials mentioned in the pattern. To adjust for a different yarn, try making a swatch and measure how many stitches you will need for the size you are making.
Hi! I love this pattern and can’t wait to start making this cardigan, my first one! I have a 44″ bust, but not sure which size to do. It is a bulky yarn and I don’t want it to be too big on me if I do the M/L size. Do you think the XS/S size will be too small for me? Or do I go with the M/L size just in case it fits my chest?
Hi! This cardigan is very oversized, so I think the smaller size will fit just perfectly on you 🙂
Hi! I’m almost finished making this beautiful cardigan, thank you so much for the pattern. I’m on the pockets now, and I have one question: should the entire pocket measure 7.5 inches or just the “panel” part minus the ribbing?
Just the panel, but you can make the pockets as large as you like 🙂
Hi Tony. Thank you so much for the pattern! I can’t find how many skeins do I need for size M?
Thank you for your reply! <3
Hi! All supply needs are listed under MATERIALS in the pattern 🙂
Hi Toni! I know this is technically a women’s cardigan but it looks neutral enough where I would love to make this for my fiance. He normally wears a size L, but do you think the M/L pattern would be too small? He’s tall but slender so I think the oversized fit of the M/L might be okay?
The cardi is made to be oversized so a m/l might work, just be a little less oversized. I would make sure to measure the arms before seaming it though. I hope that he loves it!
This is gorgeous. How can u make it longer though? Thanks
Just keep stitching on the body and fronts until it’s as long as you want it to be.
Hi Toni! this cardi looks squishy! would Lion Brand Homespun be a good choice?
You certainly could use Homespun, but I would recommend swatching it before you buy a whole sweater quantity. I fear the texture of the yarn will compete with the texture of the stitch. If that happens, consider using a smoother yarn.
I’ve enjoyed making this first for me cardigan so much, thank you! I’d like to make another different cardigan. Do you have another free pattern for a different style by any chance?
Hey there, Beth! I’m glad you enjoyed the Kima Cardi! We do have several other cardigan patterns on the blog for free, including the Rose, Issa Mesh, Hexagon, Toni Cuffed, Dina, French Pressed, Sandbar, Veronica Cocoon, Sweater Weather, Patchwork, and the Sophia Cardis! I would flip through and look at each to see which one best fits your style 🙂 Happy stitching!
I have the lion brand jiffy bonus bundle yarn and size k(6.5mm) hook. How do I convert? The yarn is stretchy too. Thank you. This is my first wearable.
Hey there, Ashlea! Though Jiffy Bonus Bundle is also considered a bulky weight yarn, it is just slightly thinner in terms of gauge to Lion Brand Hue + Me. I would just be sure that your gauge swatch matches the gauge in the pattern, and adjust your hook size if needed! Otherwise, it should be a good alternative and would make a wonderful Kima Cardi 🙂
hi there ashlea how mutch wool do i need voor size l i.m from holland
i hope to hear from you
Hello! Thanks so much for your message. You will need 1160 yards of bulky weight yarn to make the M/L size of this sweater 🙂
Thank you Toni for this tutorial! I just finished the Kima Cardigan and it was such a joyful make. I started crocheting because I couldn’t sew “on the go”. After I learned how to crochet I was “hooked”! I honestly did not see this on my crochet vision board, but this was my first cardigan and I’m obsessed! There was no pressure, I just picked up the hook whenever I was riding in the car, or when I was at an appointment waiting, or the rare moments when I just sat on the couch with my feet up or as I was unwinding before bed. Point being, this make was slow and savory…no deadlines involved! I really enjoyed seeing progress stitch by stitch.
Your tutorials are very good!!! You are a great teacher and I am learning so much. Thank you for what you provide to this community. I’m working on my next cardigan by you….The Savannah Cardigan!
Hey there, Oneika! I’m so glad you were able to have such an enjoyable experience with your first cardigan, and that it was with the Kima Cardi 🙂 A nice, slow and relaxing experience can make all the difference! We are excited for you to experience the Savannah Cardigan, too. You will have to update us with pictures!