How to Read Crochet Patterns for Total Beginners
")
Many beginner crocheters avoid learning how to read crochet patterns. I heard one maker say, “How does anyone even make sense of all of those abbreviations and punctuation marks? It’s like a whole different language!” Well, you’re not wrong. BUT! I believe you can learn crochet language and tackle any pattern you set your mind to. With this helpful guide, you’ll be on your way to mastering any written crochet pattern.
This post contains affiliate links that support the content on TLYCBlog.com. All opinions are my own. Find my Privacy & Disclosures Policy here.
CLICK TO PIN THIS POST

There are entire books, magazines, and websites devoted to sharing crochet patterns. But, if you don’t know how to read crochet patterns, you’re missing out on a whole new world of possibility. In this guide, I’ll lead you through the technical (and mental!) skills you should practice to get proficient at reading patterns.
It’s Not Hard, It’s Just New
This quote comes from one of my fairy yarn mothers, Gaye of @GGMadeIt. Learning to read crochet patterns can be especially daunting to new crocheters. On top of learning about yarn, hooks, and stitches, you now have to learn to read what feels like another language. But, the steepest point of this learning curve is at the very beginning.
Once you get over the mental focus needed to absorb the information (the newness of learning a skill), you’ll realize that patterns really aren’t all that hard. No one expects you to learn to read patterns in an hour, a day, or even a week. And you shouldn’t expect that of yourself either.
My best advice for this step on your crochet journey is to go slowly – even slower than you think you need to. Working a hook and yarn flexes different mental muscles than learning to read a pattern, so don’t get discouraged if this part takes you longer than you think it should. Take your time, give yourself some grace, and celebrate your wins!
How to Read Crochet Patterns
Learning to read crochet patterns takes practice. There’s a lot to learn, but I broke it all down in this video:
Parts of a Crochet Pattern
Every designer formats their patterns a little differently, but there are standard sections that should be present in every pattern. Look for these headings when you practice how to read crochet patterns. We’ll use my Jessie Stash Basket pattern as an example throughout this guide.
// Title

The pattern title is the name of the design represented in the pattern. Typically found on the first page in the most prominent text, the title can be a description of the pattern (“Ripple Baby Blanket“) or something more whimsical and proprietary (“Autumn Skies Afghan“) depending on the designer’s style.
// Images
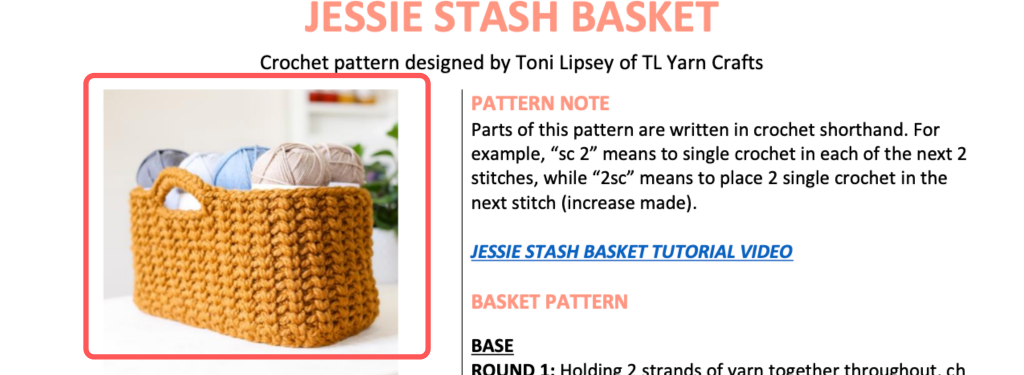
Images in a crochet pattern serve 2 purposes:
- To “sell” the pattern. Designers will include lifestyle photos of the pattern to make it more appealing to their target audience. This is part of the marketing strategy to sell patterns.
- To clarify construction. Photos in a pattern can also be used as visual queues to the maker if they get hung up on a section. The designer may have close-up photos of tricky sections or an undoctored shot of the finished project so you can better understand how it should look at different points.
// Materials

The materials section of the pattern explains the exact supplies the designer used to make the sample that you likely see in the photos. It is assumed that, if you use the exact materials mentioned in the pattern and meet the gauge the designer mentioned, you should have the right amount of yarn to finish your project.
- The first bullet is the yarn. In the Jessie Stash Basket pattern, the yarn is formatted as follows: “XXX number yards of [yarn company and name] – [fiber content], XX yards/ XX grams (total balls used). Sample color.” Use this information to find the exact yarn used by the designer OR to substitute yarn using the 3 Step Method. Learn more about the 3 Step Method for Yarn Substitutions in THIS POST.
- The next bullet shares the hook size used. The hook size can be formatted as the metric size (millimeters), US hook size number, or the US hook size letter. I find it beneficial to be able to recognize a hook size by any of these indicators, but, if you come across a hook size explanation that you don’t understand, check out THIS POST for conversions.
- The last bullet lets you know what notions or accessories you might need. This is anything beyond the crochet hook and yarn. Typically you will see scissors and a tapestry needle listed in most patterns, along with things like pom pom makers, locking stitch markers, a tape measure, or any other necessary notions.
// Sizes + Measurements
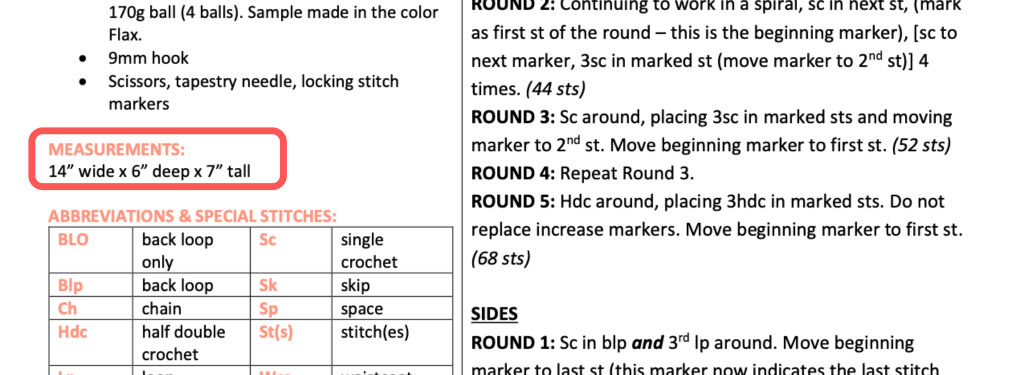
Size typically represents the finished and blocked dimensions of the piece. In the best-case scenario, a designer will share as many dimensions as possible for the given project. For a blanket, the length and width will suffice. For the Jessie Stash Basket, I shared the finished length, width, and height so makers can adjust the pattern to their needs.
For a garment like a sweater or a cardigan, you may find a full grid of measurements. This grid outlines the different dimensions of the sweater (body length, bust measurements, sleeve opening, sleeve length, etc.) for each size. Remember, these are the FINISHED AND BLOCKED measurements. So, if your work in progress isn’t measuring up to the finished dimensions, you may need to block your project.
Garment patterns will also mention the “ease” the pattern is designed with. Ease is the difference between your actual measurement and the finished measurement of the garment. “Positive ease” means the finished garment will be loose on the body. +4″ positive ease refers to an oversized sweater. “Negative ease” means the finished garment will be more form-fitting. -2″ negative ease refers to a sweater that will hug your body.
// Gauge

Gauge, also sometimes called tension, helps you compare your stitches to those of the original designer. As mentioned above, matching the designer’s gauge (among other things) ensures that your finished project will meet the intended dimensions and use the suggested amount of yarn. It is best to test your gauge by making a gauge swatch BEFORE diving into a pattern. Crocheters have a reputation for ignoring gauge but I strongly suggest you don’t skip this step.
Gauge is not listed in the Jessie Stash Basket Pattern (a conscious decision, considering I wanted to keep the pattern to 1 page), but here’s an example of gauge that we can break down.
4″ = 8 rows x 15 sts in double crochet with 4.5mm hook.
This sentence is saying that to match the designer’s gauge, a 4″ area of crochet fabric stitched in double crochet should have 15 stitches and 8 rows.
To make your gauge swatch, start with a chain that is a few more than what is mentioned in the gauge. In this case, 4″ equals 15 stitches, so I’ll start my swatch with 20 chains, then place a double crochet in the 2nd chain from the hook and each chain across the row, ending with 19 double crochet in a row. I’ll keep working double crochet rows to 10 rows, 2 more than suggested in the gauge.
To measure the gauge swatch, find a 4″ square of stitches that does not include the first or last stitch, or the first or last row. Gauge can get wonky on the edges – measure inside the swatch for a truer representation of your personal tension. Using a rigid ruler or a gauge ruler, determine how many stitches and rows you have within that measurement.
If your gauge is right on the first try, give yourself a gold star – you can move onto the pattern! If you’re like the rest of us and your gauge is off, it’s time to make some simple adjustments and try your swatch again.
- If you have too many stitches/rows in your swatch, try going up a hook size.
- If you have too few stitches/rows in your swatch, try going down a hook size.
// Abbreviations + Terms

You will likely find a list of abbreviations and terms near the beginning of patterns on blogs or patterns that you purchase individually. Books and magazines will have a list of abbreviations at the beginning or at the end of the book that you can reference throughout. The designer will not only share the abbreviations they are using but also what those abbreviations mean in this particular pattern. Each designer has a unique style, so you may see a mix of standard and proprietary abbreviations.
Abbreviations are used in crochet patterns to say a set of instructions in the most succinct way possible. As you get more skilled at understanding abbreviations, the shorthand used in patterns will reveal itself as a full set of instructions in your mind. If needed, write out the long form of the abbreviated instructions while you are still learning.
For a standard list of abbreviations, I can’t think of a better resource than the Craft Yarn Council. Their Crochet Abbreviations Master List lists 60+ common abbreviations and terms you’ll come across in crochet patterns, as well as differences you may find between US and UK patterns and those found in Tunisian crochet. Most of these terms mean something specific (that you can Google or look up on YouTube very easily), while others will be further clarified in the pattern. I have added a list at the bottom of this blog post to clarify some of the standard terms you may see.
// Notes
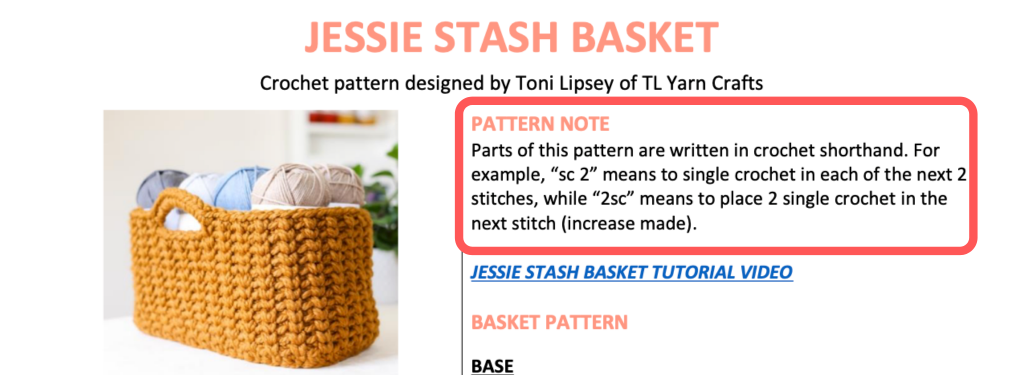
The Notes section in a crochet pattern is a catchall for anything that has not been said in other sections. Designers may share insight into their writing style, links to helpful tutorial videos or blog posts, or advice that may help you navigate the pattern easier. Suffice it to say – if a designer has seen fit to add notes to the pattern, it will only help you to read them thoroughly.
// Pattern Instructions

Pattern instructions are the actual row-by-row or round-by-round instructions to make the thing you’re planning to make. Note that most patterns start with a slipknot on the hook before making chains (unless the pattern mentions a magic ring or foundation stitches). Starting with a slipknot on your hook is so common that it is often implied and not even mentioned in the pattern.
When reading crochet pattern instructions, look for titles and headings to help you stay on track. For example, a crochet sweater might have several different parts (Front, Back, Sleeves, Neckline, etc.). Start by reading the pattern thoroughly, then focus on one section at a time.
// Other Common Sections
While the sections mentioned are found in most patterns, here are a few others that you may come across:
- Difficulty. Project levels, a.k.a. difficulty, are pretty standard in patterns produced by larger companies, but difficulty hasn’t made its way into the most patterns written by independent designers. The Craft Yarn Council has done a great job of breaking down standard project levels in THIS POST. Difficulty is purely subjective and should not discourage you from learning a new skill or trying a challenging pattern.
- Special Stitches. Special stitches are the specific way a designer wants a stitch used in their pattern. While “cl” might be the standard abbreviation for a cluster, the designer may list cluster under special stitches with directions on how to make a cluster when it shows up in that particular pattern.
- Schematics. A schematic is an outline drawing of a crocheted piece. The schematic typically shows the measurements along different angles of the project at a glance. Schematics are especially helpful for garment designs or other 3D projects. They’re great to use alongside the Size/Dimensions listed in the pattern.

Crochet Punctuation
You’ll find punctuation alongside terms and abbreviations when you read crochet patterns. Specifically, commas (,), asterisks *, parenthesis ( ), and brackets [ ] are used as shorthand to prevent crochet patterns from becoming too wordy.
// Commas
Commas are used throughout crochet patterns to separate important information. Think of a comma in a crochet pattern as a pause and a breath. Focus on the information between commas to keep from getting overwhelmed.
- Small (Medium, Large). This use of a comma is an indicator that instructions for different sizes may be separated by a parenthesis OR a comma. Use this as a visual indication of which instructions to use based on the size you are making.
- Round 2: Ch 1, sc 2, 2sc, turn. In this case, commas are used to separate stitch instructions. If I were to read this out loud, I would say “Chain 1, THEN single crochet in each of the next 2 stitches, THEN place 2 single crochet in the next stitch, THEN turn.” A comma is a chance to focus on one instruction or stitch before moving on to the next stitch in the pattern.
// Asterisks
Asterisks are used to indicate a group of instructions that are repeated in a row or round. There are two ways you may find asterisks used:
- Row 4: Ch 1, sc 1, *dc 1, sc 1; rep from * across row, turn. In this case, the repeated instructions begin with the * and end with a semicolon (;). Directly after the semicolon are details on what to do with the instructions between the symbols (rep means repeat – repeat from * to ; across the row). In this case, you are to repeat the instructions between the symbols until you reach the end of the row.
- Row 4: Ch 1, sc 1, *dc 1, sc 1*, rep from * to * across row, turn. This set of instructions is identical in execution to the instructions above. The only difference is the use of an asterisk to close the instructions instead of a semicolon.
// Parenthesis
Parentheses are used in a myriad of ways throughout a crochet pattern. The best way to understand their use is in context to the information around them or by explicit instruction from the designer.
Repeats. Parentheses can be used much like asterisks to indicate repeats in a pattern. For example:
- Row 4: Ch 1, sc 1, (dc 1, sc 1) across row, turn. Here, the instructions are executed the same as the 2 examples in the Asterisk section. You repeat the instructions within the parenthesis across the row.
Stitch Counts. You might find a number within parenthesis at the end of the row to indicate the total number of stitches or the total number of a type of stitch that was found in that row. This is helpful, especially at the beginning of a pattern, so you know that you are on the right track. Typically, you will only see stitch counts at the end of the row if the stitch count has changed from the previous row.
- Row 3: Ch 1, 2hdc, hdc in each st across row, turn. (5 hdc). Here, you see (5 hdc) at the end of the pattern instructions. This means that you should have 5 half double crochet stitches in total when this row is complete.
Working Multiple Stitches Into the Same Stitch or Space. Basic crochet patterns typically have you place one stitch in the stitch below. As you get into more advanced stitch patterns, you may be instructed to put multiple stitches into an upcoming stitch or the space between stitches. Parentheses can clarify what stitches need to go into that stitch or space.
- Row 1: In MR (ch 3, hdc 3, ch 1, hdc 1, ch 1, hdc 3, ch 1, hdc 1), close ring, turn. In this case, the project starts with a magic ring (MR). The stitches within the parentheses should be worked inside the magic ring before pulling the ring closed and turning your work.
Different Sizes. If a crochet pattern is written for multiple sizes, parentheses can be used to differentiate those sizes both at the beginning of the pattern and throughout the pattern.
- Sizes: Small (Medium, Large).
- Row 1: Ch 111 (135, 171), hdc in 2nd ch from hook and each ch across row, turn. (110, 134, 170 sc) This line of pattern indicates how to start Row 1. 111 denotes the number of chains for Size Small, 135 is for Size Medium, and 171 is for Size Large. When beginning the pattern, choose the size you plan to make and highlight the instructions in parentheses that correspond with the size you are making. The stitch counts at the end also correspond to the three different sizes in the pattern.
// Brackets
Though used much less often, you will see brackets in conjunction with or in place of parenthesis depending on the designer’s writing style.
In Place of Parenthesis. Use brackets in place of parentheses in the examples mentioned above.
In Conjunction with Parenthesis. Brackets are typically used in conjunction with parentheses to shorten a more complicated row of repeating pattern. If you’re familiar with algebra, you may know how parentheses and brackets work in equations. A take on that “order of operations” concept plays out here as well.
- Row 6: Ch 4, [sk next dc, (5dc in next dc, sk 1 dc, sc in next sc, sk 1 dc) 3 times] across to last st, dc in last st, turn. In this example, begin the row with a chain 4. This is only completed once. Then skip (sk) the next double crochet stitch. Complete the sequence inside the parentheses 3 times, then go back to the beginning of the brackets and start all over again until only 1 stitch remains in the row. Place a double crochet in that last stitch.
Common Crochet Terms & Phrases
The Craft Yarn Council does a great job of listing the crochet terms you may come across while you learn how to read crochet patterns, but here’s a list that further clarifies what these terms mean, practically speaking.
| Abbreviation | Definition |
| CAL | Short for “crochet along”. This is an event when a group of crocheters works on the same project or different projects with the same goal at the same time. They will periodically share their work with one another based on the rules of the event. |
| Ch-sp | Short for “chain-space”. This indicates the space between stitches that is beneath a chain. If told to work into the ch-sp, insert your hook into this open space and not through the loops of the chain itself. |
| Fsc, fhdc, fdc | Short for “foundation single crochet”, “foundation half double crochet” and “foundation double crochet”. Foundation stitches are worked at the beginning of a project to replace the chain and the first row of stitches. Learn foundation stitches HERE. |
| FO | Short for “finished object”, this is any project that is considered complete. |
| Join | Join is used in a pattern to indicate connecting the end of a row with the beginning of that same row as with working in the round. A designer will indicate the join method you should use. Join can also be used when adding a new color to your project, as with standing stitches. |
| MR | Short for the magic ring, which is an adjustable ring used at the beginning of a crochet project, most commonly when working in the round. Learn an easy method of making the Magic Ring HERE. |
| RS/ WS | RS refers to the “right side” of your work, while the WS refers to the “wrong side”. If you were wearing a sweater, the right side would be the outside of the sweater, that faces the world. The wrong side would be the inside, which faces your skin. A pattern will reference the RS or WS when joining the work, turning the work, or completing special instructions. |
| Turn | Turn indicates rotating your work to look at the backside of the stitches you just completed. If you are right-handed, you crochet rows from right to left. When no more stitches remain in your row, turn your work to begin another row of stitches worked from right to left. You can turn your work clockwise or counterclockwise – it doesn’t matter. Learn about turning your work in my beginner crochet video. |
| T-ch | Short for turning chain. It is common for designers to use a series of chains at the beginning of a row as the turning chains. These chains replace a traditional stitch at the beginning of a row, and you should work into these chains when doing the last stitch in a row. The designer should indicate how many chains count as a turning chain. For example, ch-4 counts as dc + ch 1 means that the chain 4 at the beginning of a row replaces a traditional double crochet AND a chain 1 to follow. |
| WIP/ UFO | Short for work in progress or unfinished object. Refers to a project you have started but not finished. |

Where to Find Crochet Patterns
The only way to get better at reading patterns is with practice. Below are some ideas on where to find a written pattern for your next crochet project. This isn’t an exhaustive list – check Google and Pinterest for additional ideas.
// Online – Direct from the Designer. The best way to support your favorite crochet designers is by purchasing individual patterns and ebooks from their websites. This way, designers do not have to split their profits with any other entity. Join your favorite designers’ email lists to learn about their upcoming designs and releases. Start your pattern collecting journey by browsing my pattern library and joining my email list.
// Online – Marketplaces. Marketplaces are online and app-based resources to find a collection of crochet patterns from different designers and magazines in one place. Marketplaces offer the benefit of browsing hundreds or thousands of patterns from different designers in one place. Some examples are Ravelry, LoveCrafts, and WeCrochet.
// Books. Crochet is experiencing a boom in high-quality, beautiful, and informative books. Many will have helpful crochet instructions in the front followed by perfectly photographed and edited patterns in the back. Look for books with themes related to the projects you like to make, from amigurumi to beginner crochet and Tunisian crochet. Need some books for your new crochet library? Check out this rundown of my favorites.
// Magazines. You can easily find crochet magazines at local yarn stores and big-box stores. Each magazine has its own style and typically caters to beginner-to-intermediate crocheters. Find magazines in stores or check out these ones online – Moorit, Simply Crochet, and Crochet Now.


So helpful!!! Exactly what I need. Thanks.
Amazing advice really clarify reading a pattern thanku so much
When making a guage swatch – how do you determine if the stitch or row is more important? I can match one – but rarely do both match with the same hook size.
Hi! I just shared a post on gauge today – check out my home page for a link to correcting row and stitch gauge.
Hi Toni
Just wondering if you were going to talk about how to follow and interpret graphs at all. Just got a shawl pattern and its just a graph, understand the symbols just having a difficult time following it
Hi! I find that reading charts is more of an intermediate-level skill, so I won’t be including it in Crochet Academy. But I’ll hang onto this idea for a potential future post 🙂
Phew – that is a LOT to diget! But thank you sooooo sooo much for these explanations, Toni. Up to now I was avoiding written patterns and concentrated on YouTube videos for finding new projects or ideas. But now I will definitley try to work a project using a written pattern. Thank you for sparking the courage to do so, Toni!
So many questions – SO MANY ANSWERS!! Thanks for this very thorough post along with links. Specifically, thanks for the link redirecting me back to how to make yarn substitutions and how to repurpose old project yarn. 🙂
This was very helpful. I learned so much. Thank you.
Toni,
Thank you for this post. Even though I have been reading patterns for a while, I find that I need to rewrite the instructions for me to understand them. I need to do each line separately to keep my place and complete the project. Is this normal?
I do the exact same thing Denise!! I just posted that! It is the only way I can follow a pattern and not get lost!
I do the same thing. I need space between the lines 😂. Glad I’m not alone
Toni, Thank you for all this great information! I retype my patterns so that each row of crochet is its own typed line on the page. This has helped me so much to be able to clearly follow patterns!
Thank you Toni for all your hard work! I do the same thing with my patterns I retype on my Microsoft Excel.
I love utilizing my local library system! They have supplied me with numerous books that have helped me learn to read patterns & understand the whys I have. Books, magazines ebooks & videos are often accessible if you’re not sure you’re ready to invest or if you’re unable.
Wow Toni you are amazing, you have a great skill in writing all these posts and emails and still crochet along with it!! Can’t wait to buy your book!!!
Hi Tony,
I’m not always sure how to tell the right side of a project from the wrong side when it’s in progress. Will the pattern tell me or how do I know?
Crochet Academy has been wonderful! Thank you so much!
It depends on the stitch! There’s not much of a difference from back to front in a single crochet, but it’s more obvious in complicated stitches or stitch patterns. It just looks different, sometimes it’s also just a matter of preference which side is the ‘correct’ side
Hi Mary Beth! I am most definitely not Toni, but maybe I can help you out. In my experience, the written pattern will indicate which is the right side or wrong side. If it doesn’t, I’ll go by where my slip knot yarn tail is located. I’m right-handed, so if my beginning yarn tail is on the left side of my work that is my right side. If the beginning yarn tail is on the left side of my work, that is the wrong side. Basically, left is right/right is wrong. Hope this wasn’t too confusing. Have a wonderful day!
Hi Mary Beth. I was taught the right side faces you when the starting tell is on the left. I have started putting a stitch marker on the right side (usually in the middle of the row) when I get done stitching the third row.
Another way to tell is the direction of the top V of the row you are stitching. If the curved part of the V is toward your left hand, then the right side of the piece is facing you. Hope this helps
Thanks for this very helpful post, Toni. I’ve been croccheting for a while and still find the informmation that you have shared throughout Crochet Academy quite valuable. You are an absolute gem!
Hello Toni. Thank you for this post. Even though I’ve been reading patterns for a while, I’ve learned something new regarding terms and phrases. You’re awesome!
This is the post I’ve been waiting for! I’ve seen several different written patterns that I want to try, but couldn’t figure out the language, especially the punctuation. Now I can try my hand at one and add new patterns to my list in addition to YouTube videos. Thanks so much, Toni! 😃
Excellent! I’ve been crocheting in fits & starts since Mama started teaching me about 60 years ago. Wish you’d been around when I got passionate about it in the early ’70s & had to relearn it from books, with her half a continent away! Crochet and my cat helped me survive Covid! I am proudly still learning about crochet and you are an EXCELLENT teacher my love! Thank you so much!
Thank you Toni! The tip about figuring gauge is awesome. I will definitely try to measure gage with your method.
Thank you so much for this information. I am excited to begin practicing this skill. And I love the crochet networking and comments in this class. Your ideas and advice on reading patterns will be most helpful as well.
Thanks for the information Toni,am happy to be part of your academy
I’ve found it really interesting how inconsistent or incorrect use of syntax in a pattern can completely change the outcome. I’ve gotten incredibly frustrated with some projects because I was reading the syntax correctly, but still ending up with discrepancies. I have to figure out what the pattern writer is TRYING to say, rather than what they actually said. It’s very frustrating. Good pattern writing is so important and bad syntax makes more of a difference than people would think.
Will you also instruct us on how to read diagrams as well?
I consider diagrams to be more of an intermediate-level skill, so they won’t be included in Crochet Academy. But I will keep this in mind for a future blog post.
Thank you for this! Off to practice.. is it common to do a slip stitch when turning your work. I think I have my work cut out for me as the T-ch instructions seem a bit foreign but I am very much very new at this but loving it! Thanks again. Your instructions are very clear and reference links are fabulous!
You got this! It’s much easier to understand when you have a project to practice on. Turning chains are usually chain stitches, not slip stitches, if that’s what you mean.
These crocheting patterns are for right handed people. I am left handed and it’s hard for me to learn from a right handed person doing crochet. Is there a way that the patterns can be fitted for a left handed people.
Hi! I have a few too many patterns to change them all for left handed people. But there are Chrome browser extensions that can flip a video for you, and websites that can flip photos. A quick google search will uncover some good options.
Hey Toni! Question about a pattern on page 99 of the suggested book Crochet Every Way Stitch Dictionary. Wide V stitch. Left column. Row 1. What does fnd mean? It says: “(5 sk ch count as 2 fnd ch and dc)”. I looked in abbreviations and googled but I’m still lost 😞
Hey y’all. I got an answer from the author of the book.
fnd = foundation
Thank you Toni! This is a great post. As a kid I used to knit a lot, and there wasn’t YouTube so I learned how to read knitting patterns quite early and proficiently. I’m a visual learner when it comes to crochet though. I’m going to practice reading crochet patterns more now that I have your guide.
For me, this is harder than counting my stitches, and for now that is priority #1. I do best with the youtube videos that demonstrate effectively; I make lots of notes and pause quite a bit, but I can usually follow good enough; Plan of action is to conquer the written patterns soon.
Toni, Thanks! You did a great job at explaining things. I will be waiting for that diagram reading workshop!!!
Hi lovely Toni. I am in dire need of help with row 1 of one of your patterns. It states “(Ttss, Ttks) next st” which I assume means (twisted Tunisian simple stitch, twisted Tunisian knit stitch) in the next stitch. It means to do both in that same next stitch, or am I reading it incorrectly? I am very confused as to how to accomplish that. I know how to do each of those stitches seperately, but cannot comprehend how to do them together in the same stitch. Please help. You are just so awesome girl and I know you can clarify this for a newbie like me. Thank you in advance and keep up your awesome work. Have a safe and blessed day.
I only have one instruction left to finish my crochet project (I am a beginner) that I don’t quite understand… it reads;
“14 sc in next ch-12 so.”
Please explain to me . Also; how do you do this? Thanks😀
Hi! It sounds like you’ll place 12 single crochet around the chain of the chain-12 space. Does that make sense?
Hi Toni –
I can’t tell you how much I love tuning in to watch your instructions and excellent teaching. One thing I always need to be aware of here in Australia is whether I’m looking at an American crochet pattern or an English crochet pattern as the name of stitches are different. I am putting a link here to a handy reference, your international students will probably be aware – but now that patterns are sourced from round the world – I always find it very useful to check this out first.
https://www.craftsy.com/post/british-vs-american-crochet-terms/
OMG! Toni! Thank you for this…*Chain 1, THEN single crochet in each of the next 2 stitches, THEN place 2 single crochet in the next stitch, THEN turn.”
I will never again read a pattern without doing this.l mentally.
I am learning a lot in The Crochet Academy and can’t wait to start my Cardi. The kit arrived and I got my buttons. It will be my first wearable other than a scarf or shawl.
You’re such a great teacher and a HUGE asset to the crochet world. I hope you know that. You truly are leaving a legacy that is priceless.
I was doing the same thing to Denise. What I started doing was put a check mark or a X next to what I have already completed. I also started printing the pattern and highlight each row as I complete them with different color highlighter.
Yes!!!!! I have been scared to complete a project by reading a pattern and have been relying on tutorials. After this post I think I am ready!! Wish me luck and patience. :-). BTW, ” A Bad Day for Sunshine” is AWESOME!!!! Listening to ” A Good Day for Chardonnay” now!
What about CHARTS???? some patterns i would like to try have no written instruction, just the charts! I know I could keep a key to the marks handy, but yikes, just trying to get started and following row by row looks so daunting.
If your project i has a pattern is it best to swatch in pattern on just the gauge in crochet?
What about crochet charts? I notice you don’t include them for your patterns…..they can be extremely helpful vs trying to find the line in the pattern for the row you are on – especially when the pattern is a 4-5 row repeat or more. I’d love to see you add some charts. ( I cannot be alone in this =)
xo
It’s like cooking, there is a difference between 1/2 cup chopped parsley and 1/2 cup parsley, chopped. Thanks for explaining it so clearly, sc 2 vs 2sc etc. I’ve mainly only watched videos to get new stitches, patterns but will be referring back to this to understand written patterns better.
I have found this course so instructive and really got me excited to be a crocheter. The reading of patterns has been explained beautifully, and all the links to learn exactly what to do brilliant. Thank you so much. Love listening to your videos.
What a great lesson. Thank you for all the helpful tip and links. I am a bit more at ease with reading patterns now after this. Toni is a great teacher for sure.
This is great and so helpful! I feel prepared to start practicing reading patterns. Thank you!
My comment is more of a question, I’m not a beginner but I’ve never come across this before. What does it mean when your pattern tells you ch (3) up?
Hi! That simply means to chain 3 🙂
Are there any designers who write out the instructions with no abbreviations? I dont care how many pages I have to print but I hate trying to decipher silly abbreviations…it slows down my crocheting so much! Im over it! I want to crochet a simple baby blanket, maybe a little newborn cap, love the little animals but the instructions stop me from enjoying it. If they were standard it would be one thing but they arent.
Probably not. Abbreviations make writing and reading crochet patterns easier, so they are universally used.
Very clear information! Love your content!
FABULOUS AND THOROUGH. I didn’t know what the number before or ate the stitch name meant. Very useful. Something that turned on the light bulb for me was learning STITCH ANATOMY. You are my “go to” person when I need help. THANKYOU!!!!
Thank you as always for your wisdom Toni! I was wondering – I’m starting to get more on board the granny square train and I noticed a lot of patterns are written as pictures with symbols that look like T’s or I’s (hard to explain) and I have NO idea how to read these… curious if you could do a post on that sometime?? I would love it, as I do all of your things 🙂 I’m finishing up my Rose Cardigan and it’s looking so good!!
Hi darling! Sounds like you’re talking about crochet charts – they use symbols instead of text, which can be helpful with intricate crochet square patterns. I have this topic on my to-do list and hope to share more in the coming months 🙂
This was excellent Toni! You are a great teacher, and are appreciated very much!!
Thanks for the lesson today. It’s always good to refresh on how to read patterns.
I am working on a project that has a Ch 8 at the beginning of a row. After you finish this row and turn, when you get to the end of the next row it says sc in 5th ch of ch-8. Is that the 5th chain from the base of the stitch or is that the 5th chain from the top of the stitch? Thank you in advance for your help.
Great question – yes, it would be the 5th chain from the base.
Thank you Toni for this lesson on reading patterns. It’s always good to get a refresher.
Hey there! Thanks for all the help. I might have missed this explanation somewhere, but is there a universal stitch (like single crochet) when a pattern or label on yarn only gives you number of stitches and rows. I want to be way better about a gauge swatch but many times it will just say 15 stitches 10 rows. What stitch?
Hmmmm, that’s definitely an issue with the pattern. The designer should specify what stitch was used for a gauge swatch. If it’s not there, I’d recommend making your swatch with the most used stitch in the pattern.
Thank you for this video. I was one of those people who only made projects that had a video tutorial, until now! This video has taken away the anxiety I had about crocheting, specifically how to count stitches and the parts of a stitch. I am loving Crochet Academy!
Yayyy! This is music to my ears. I’m so glad you’re taking the time to learn to read patterns. It really opens up a whole new world of designs you can try out. Happy stitching!!
Thanks for the encouragement regarding absorbing all the terms! Great tip given- practice the stitches in swatches before trying a new pattern.
So happy to help! Sometimes all we need is a reminder that learning new things takes time. Happy stitching!!
Thanks Toni
Definitely will pin this one… Great stuff!
You are amazing! Thank you for this incredibly helpful lesson and I’ve added it to my favorites!
I’m curious about crochet charts as well. Excited to hear that you’ll tackle the topic in an upcoming video.
Really enjoying all the Crochet Academy posts. Read this thoroughly a few days ago. Yesterday I set about a new granny square pattern and then had to pull the whole thing apart because I didn’t read the notes because I thought I knew what I was doing. Moral of the story, Toni knows best. When she says always read the notes, she means ALWAYS read the notes. Lesson learned 😂
Sometimes we have to learn the hard way. I’ve had my moments as well. All my advice comes from bumping my own head first, lol. I’m really glad you’re enjoying the lessons 🙂
This whole post is a revelation. I see the light! You have a gift for clarity. Thank you, thank you, thank you.
Wow, I’m so glad to hear that! Honestly, I was wondering if this topic was too dense for a blog post, but I’m really happy to hear that you got so much out of it. Thanks for stopping by!!