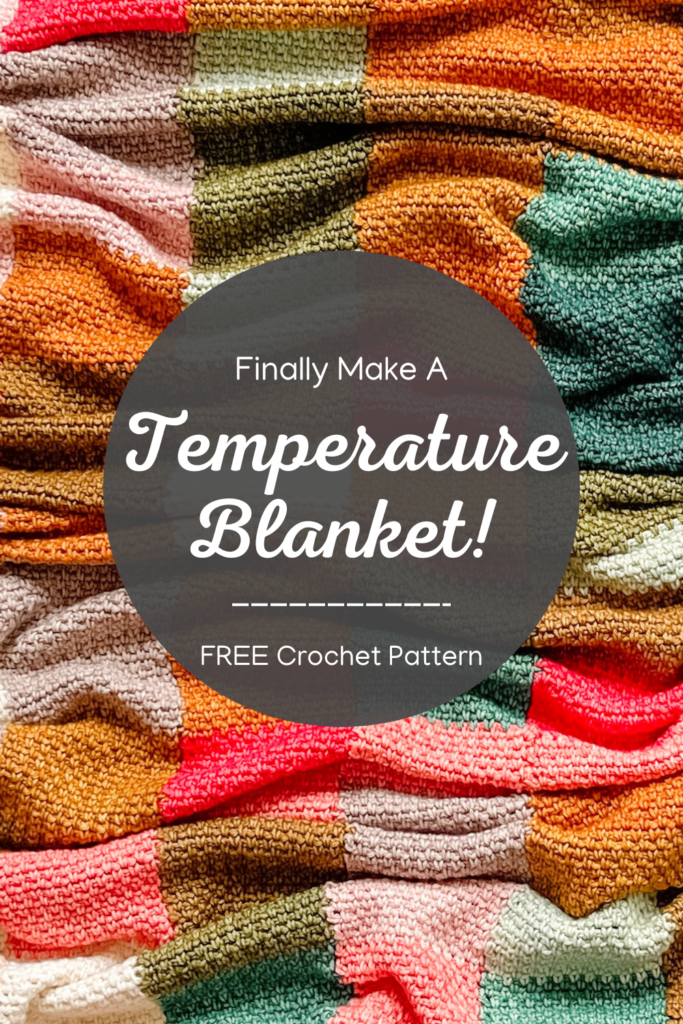
Linen Pixel Temperature Blanket – free crochet linen stitch afghan pattern
")
As we say goodbye to 2022, let’s say hello to the Linen Pixel Temperature Blanket, the latest design in my crochet temperature blanket series!
This is my 4th temperature blanket completed in consecutive years and I’m excited that the tradition is going strong. Last year I made the Linen Square Temperature Blanket, 2020 brought us the Bias Granny Temperature Blanket and 2019 featured the inaugural Tunisian Crochet Temperature Blanket. Each year’s design is a chance to stretch my skills, play with new yarns, and track my year in the best way I know – crochet! Keep reading for full details on my latest temperature blanket design.
This post contains affiliate links that support TLYCBlog content. All opinions are my own. For more information, see my Privacy & Disclosures policy here.
PIN IT NOW, MAKE IT LATER!
What the Heck is a Temperature Blanket?!
A temperature blanket is a crochet or knit afghan that represents a full year, where one row or square corresponds to the day’s temperature. This post is specific to my Linen Pixel Temperature Blanket, but you can find detailed information on temperature blanket planning and design in these posts:
- Temperature Blanket Basics + Ideas
- Plan the Perfect Temperature Blanket
- Picking Temperature Blanket Colors + Yarn
- 15 Knit + Crochet Temperature Blanket Ideas
Still curious about temperature blankets? Sign up for my FREE 5-day email course to learn the ins and outs of planning and executing your next temperature blanket. JOIN THE COURSE!

Choosing my Yarn + Colors
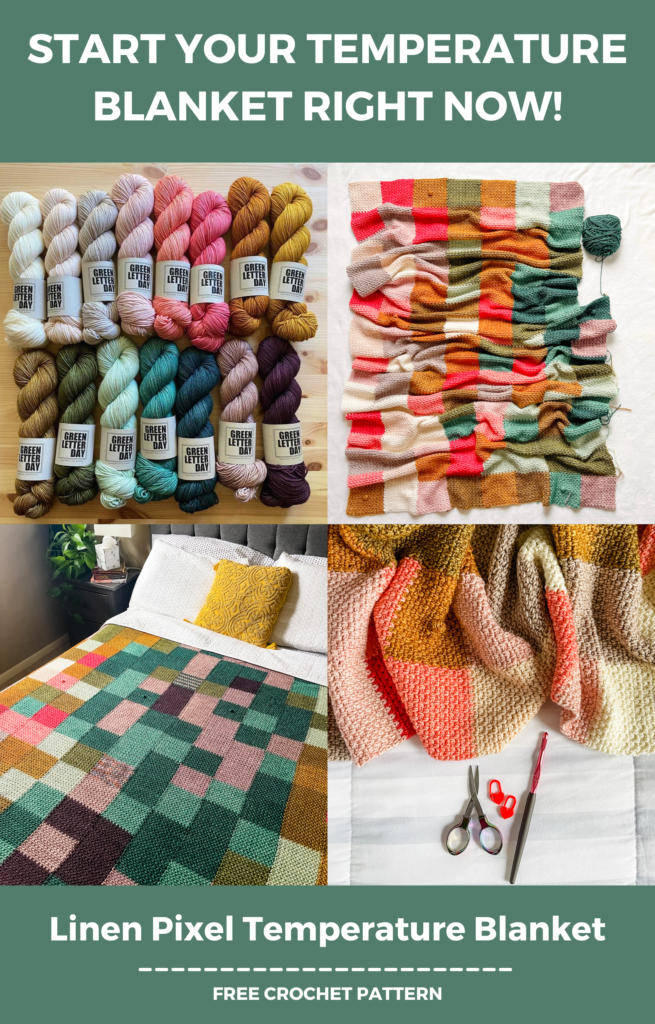
Choosing colors for a temperature blanket is equally exciting and exhausting. There is so much that goes into the decision, from yarn fiber to weight, availability, and (especially) color range. In the past, I’ve chosen yarn from large companies (specifically WeCrochet and Cascade) to ensure that I could get more if I ever ran out. For my Linen Pixel Temperature Blanket, I wanted something a bit more indulgent and luxurious. Enter Green Letter Day.

Green Letter Day is a small-batch hand-dyed yarn business run by Bonnie in San Antonio Texas. I’ve long admired Bonnie’s Instagram feed, which features gorgeous blankets in her unique color palettes. I finally mustered up the courage to ask Bonnie about doing a temperature blanket together back in July 2021 and, thankfully, she said yes!
Get your hands on the Sign of the Times color kit, exclusively from Green Letter Day. Pre-order kits and individual skeins go live Friday, January 13th for a limited time only. CLICK HERE FOR DETAILS!

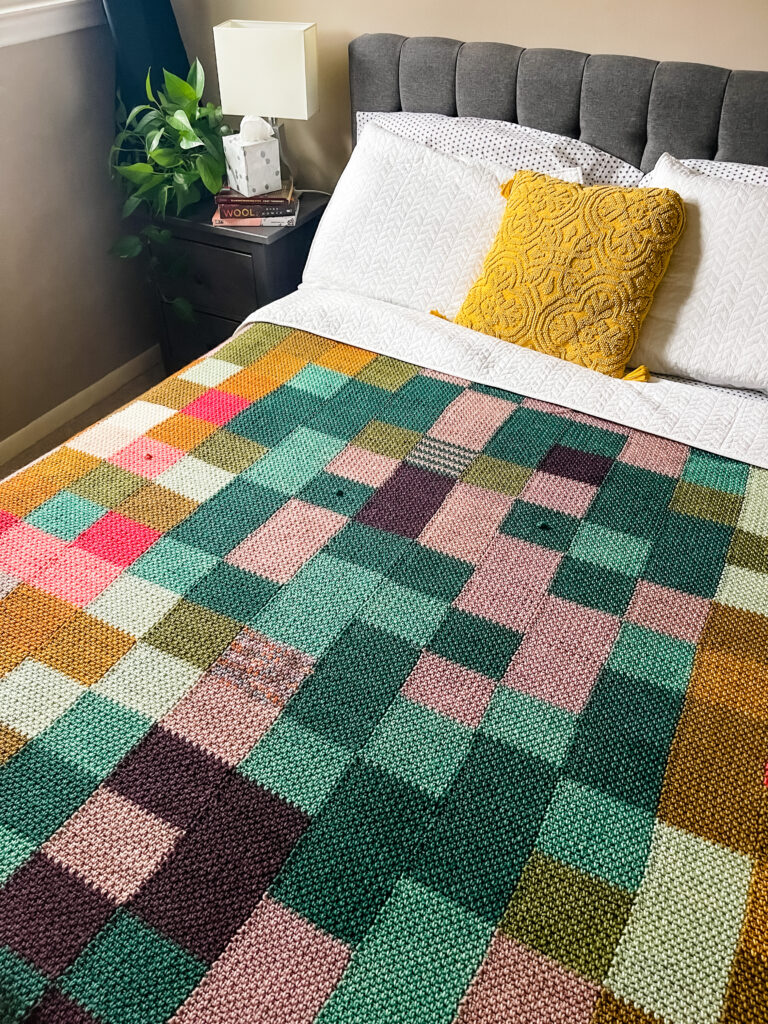
I decided on Bonnie’s DK (category 3) weight base, which is 4-ply superwash merino wool base with 250 yards in the 115g skein. This squishy DK yarn was perfect for my Linen Pixel Temperature Blanket, which I designed to fit a queen-sized bed.
The biggest change between this temperature blanket and those from year’s past is the number of colors I used. I kept things fairly tame with 9-10 colors before, but I pulled out all the stops and went for 15 colors this time. The palette is playful and romantic, but also mature and refined. Only Bonnie could put together something this perfect. I placed my colors in rainbow order, starting with the neutrals and ending with mauve and eggplant.
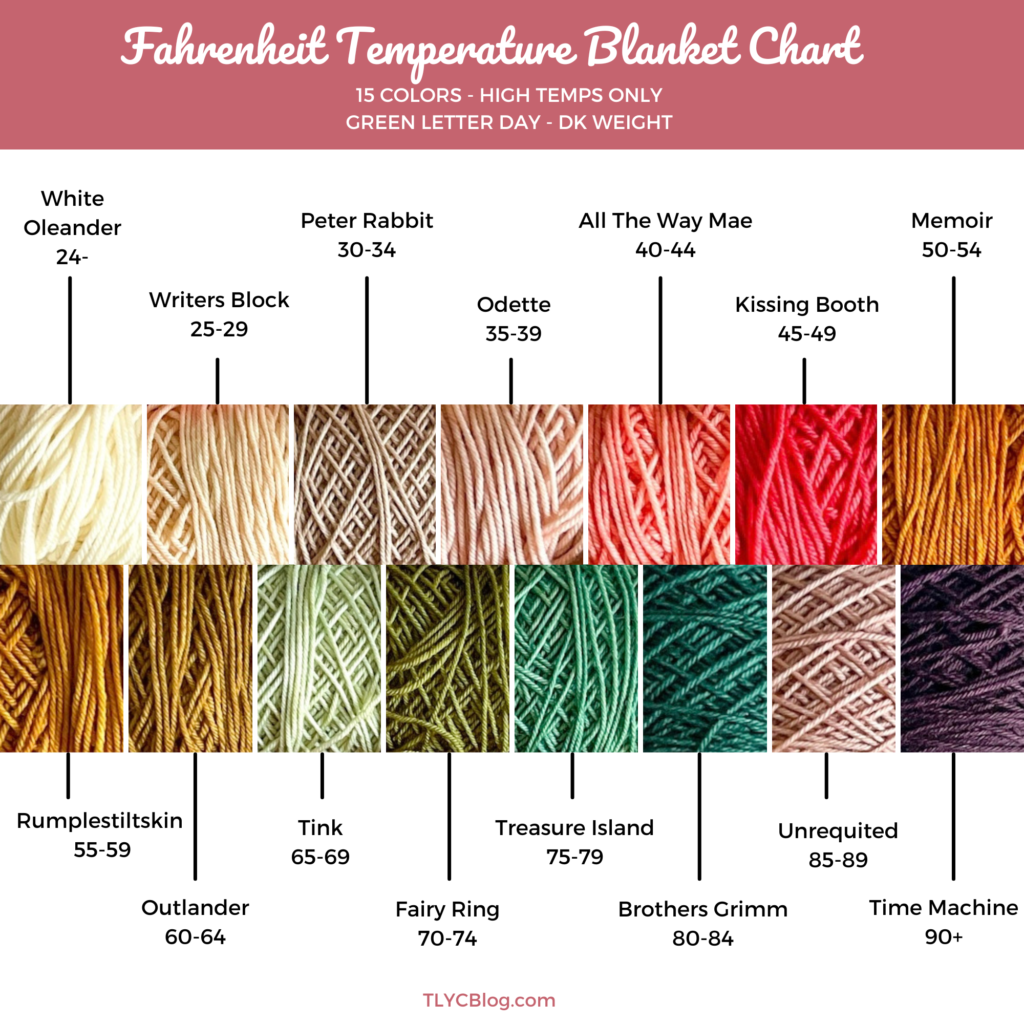
Green Letter Day Sign of the Times Kit, used as a temperature blanket:
- White Oleander – 24 degrees and below
- Writers Block – 25-29 degrees
- Peter Rabbit – 30-34 degrees
- Odette – 35-39 degrees
- All The Way Mae – 40-44 degrees
- Kissing Booth – 45-49 degrees
- Memoir – 50-54 degrees
- Rumplestiltskin – 55-59 degrees
- Outlander – 60-64 degrees
- Tink – 65-69 degrees
- Fairy Ring – 70-74 degrees
- Treasure Island – 75-79 degrees
- Brothers Grimm – 80-84 degrees
- Unrequited – 85-89 degrees
- Time Machine – 90 degrees and above
NOTE: Temperature blankets often have large blocks of days that fall into the same ranges (for example, I had a stretch of 9 days in the 80-84 range over the summer). To keep the blanket random, I never did more than 2 days of the same color. If the 3rd day was the same, I’d either go one color warmer or cooler to keep things looking random.

This was a personal choice that was made for aesthetics and also to manage the quantity of yarn. When making your own blanket, you can follow this adjustment or lean into the large blocks of color you may have throughout the year.
Tools + Supplies
I always dedicate a notions pouch to my temperature blanket, and this year was no exception. My Linen Pixel Temperature Blanket notions pouch included:
- A 5.5mm crochet hook. I used my trusty Susan Bates Silvalume Soft Handle hook throughout the year. I started with a beautiful hand-carved crochet hook, but I couldn’t maintain my speed and tension. I purchased a new hook just so I could keep it with this project all year long. Pick one up HERE.
- Embroidery scissors. I started collecting scissors years ago, and I’m always looking for excuses to use them. These rainbow folding scissors are part of the KnitPro Mindful Collection. You can find them HERE.
- Tapestry needle. I tried my best to keep up with weaving in my ends as I went, but I gave it up around March. I saved the remaining ends for my yearly reality TV binge. This year’s fare was Selling The OC on Netflix. Who knew a group of people could be so tan yet so messy!
- Locking stitch markers. There was always a live loop present while working on my temperature blanket. I didn’t want to worry about losing my stitches, so I kept these adorable heart-shaped stitch markers nearby. Pick up a set HERE.


Linen Pixel Temperature Blanket Details
MATERIALS
- Green Letter Day DK superwash merino wool. Approximately 6115 yards spread over 15 colors. That’s right around 25 skeins for the entire blanket. Find the kit HERE for a limited time only.
- 5.5mm crochet hook
- Scissors
- Tapestry needle
- Blocking supplies (optional)
FINISHED SIZE
92″ long x 83″ wide

GAUGE
Each finished square is approximately 4.5″. The size of your squares directly impacts the size of your blanket. TIP: Using the same hook throughout the year is your best bet at maintaining your tension.
ABBREVIATIONS
This pattern uses standard abbreviations from the Craft Yarn Council. Find a full list of abbreviations HERE.
NOTES
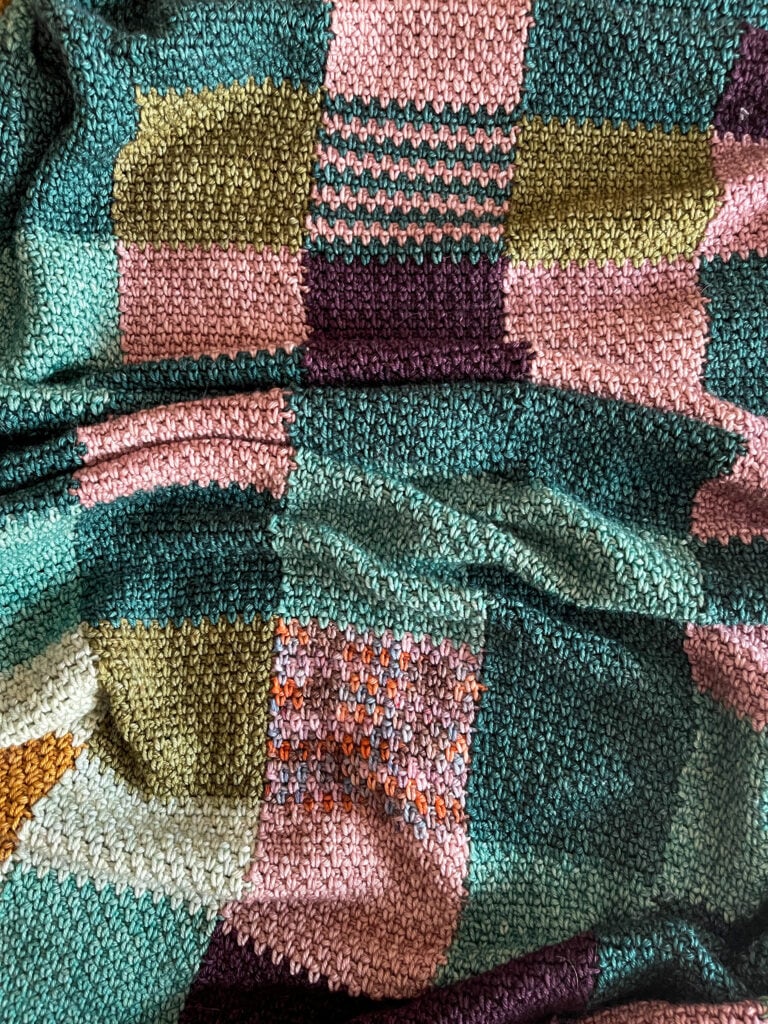
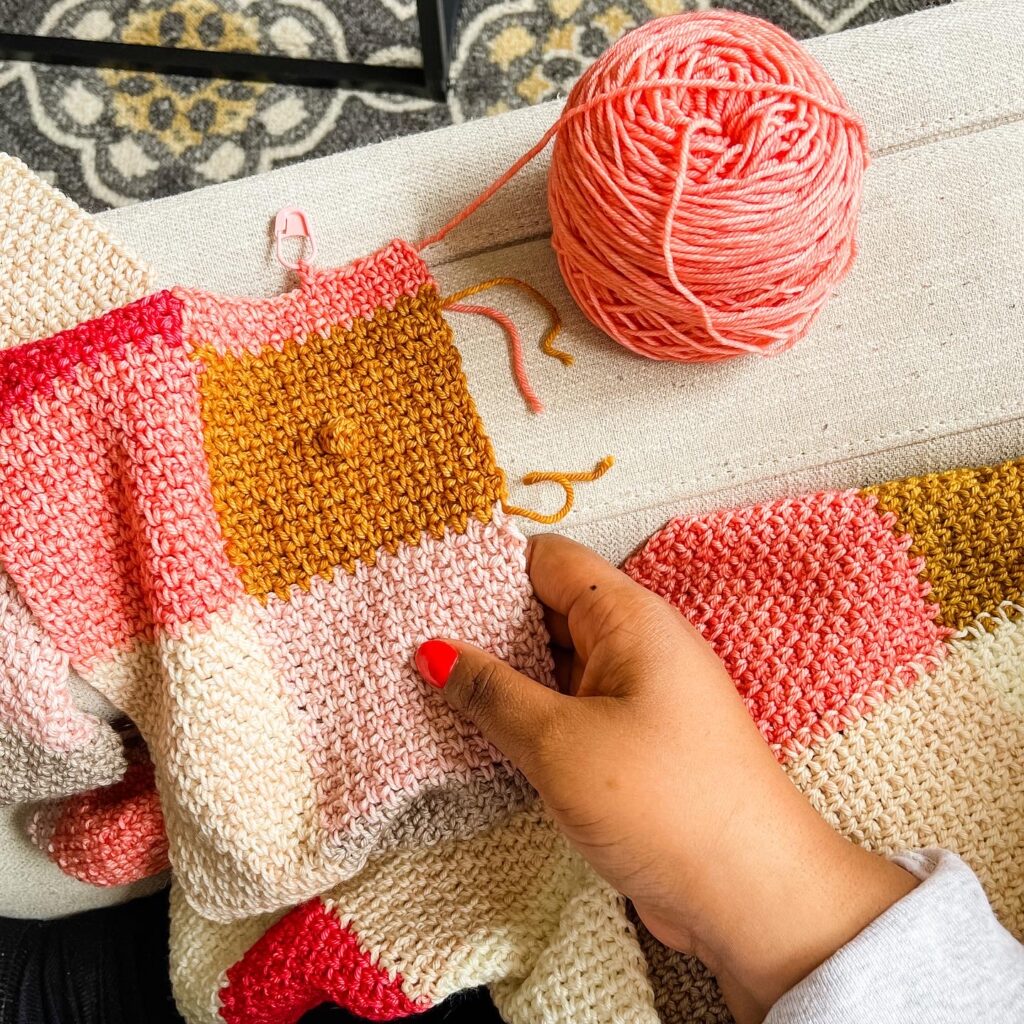
- CONSTRUCTION: The Linen Pixel Temperature Blanket uses the linen stitch join-as-you-go method. Squares are worked in strips, and each subsequent strip is joined to the previous one with the use of slip stitches. There are no manual seams – just a small ridge on the back of the blanket where strips are joined. Each square counts for one day and uses the linen stitch worked over 23 chains and 18 rows.
- MONTHS: Each month is denoted with a bobble at the center of the square. If you prefer not to do a bobble, I recommend doing this square in stripes with a neutral color or adding a small button to this square.
- Odd-numbered rows are considered the right side of the blanket.
- I worked this blanket using the high temperatures for the day only. I started the blanket with Columbus, Ohio temperatures, then transitioned to Southfield, Michigan temperatures after I moved in June 2022.
- I used a couple of different techniques to denote special days throughout the year. For my birthday, I used a variegated DK weight yarn from my stash that coordinated with the rest of the blanket. For the day that I moved, I used the temperature color from Ohio and Michigan of that same day and striped them in 2×2 stripes.
LINEN PIXEL GRID
BODY: The Linen Pixel Temperature Blanket is constructed in strips from bottom to top, beginning on January 1st. Strips of 20 blocks are added as the year goes on, with the last block on the last strip representing December 26th for a year with 365 days.
BORDER: Round 1 of the border is worked in linen stitch for a full round using the color for December 27th. Round 2 of the border is worked in linen stitch with December 28th, 29th, 30th, and 31st each represented on one side (Round 2 of the border uses 4 different colors, one on each side). The 3rd and final round of the border is worked in linen stitch for a full round using the same color as Round 1.
Below is a screenshot of the digital grid I used throughout the year. You’ll note that I wrote down the first letter of the month that starts in each column, and I highlighted the 1st of the month so I could remember to place my bobble.

JOIN AS YOU GO
The crochet join-as-you-go technique is often used with granny squares to connect squares without seaming. I found a way to do this technique with linen stitch squares worked in rows, which helped me avoid sorting and seaming a bunch of strips at the end of the year.
To execute the join-as-you-go technique, create the first strip on its own. For the second strip, pull up a loop in the bottom-right corner of the first block from the first strip. Create the starting chain, and work the linen stitch into the chain. When you reach the first strip, slip stitch into the side of the row that corresponds with the row you just made, then slip stitch into the side of the row above. Turn the work, chain 1, and continue in the linen stitch across the row.

Continue in this way, attaching the new strip to the previous strip every 2 rows. The result is a joined panel with no visible seam on the right side of the work. I enjoyed this style immensely, and it made the Linen Pixel Temperature Blanket much more appealing to work on. It also allows you to easily make adjustments for a different-sized blanket.
Want to give linen stitch join-as-you-go squares a try? Check out this tutorial video:
Linen Pixel Temperature Blanket Pattern
Column 1
ROW 1: Chain 23, place marker in 22nd chain, sc in the 3rd ch from the hook, (ch 1, sk 1 ch, sc in next ch) across row, turn. (11 sc)
ROW 2: Ch 2, sk sc at base of ch, sc in next ch-1 sp, (ch 1, sk next sc, sc in next ch-1 sp) across row, placing the last sc in the final ch-2 sp, turn.
ROWS 3-18: Repeat Row 2. Change to next color at the end of Row 18. Fasten off old color.
Continue in pattern to 20 total blocks in the first strip. Fasten off at the end of the last block.
Column 2
ROW 1: With the right side facing you, insert hook into the marked chain, yarn over with the next color, pull up a loop. Ch 23, place marker in the 22nd ch, sc in 3rd ch from hook, (ch 1, sk 1 ch, sc in next ch) across row. Sl st in coordinating space from the previous strip. Sl st in st above join on previous strip, ch 1, turn.

ROW 2: Sk next sc, sc in next ch-1 sp, (ch 1, sk next sc, sc in next ch-1 sp) across row, placing last sc in the final ch-2 sp, turn.
ROW 3: Ch 2, sk sc at base of ch, sc in next ch-1 sp, (ch 1, sk next sc, sc in next ch-1 sp) across row. Don’t forget the ch-1 sp before the join! Sl st in coordinating space from the previous strip. Sl st in st above join on previous strip, ch 1, turn.
ROW 4: Sk next sc, sc in next ch-1 sp, (ch 1, sk next sc, sc in next ch-1 sp) across row, placing last sc in the final ch-2 sp, turn.
ROWS 5-18: Repeat Rows 3-4. Change to next color at the end of Row 18. Fasten off old color.
Continue in pattern to 20 total blocks in the second strip. Fasten off at the end of the last block.
Columns 3-18
Repeat the instructions from Column 2. DO NOT FASTEN OFF at the end of the last block on the last row.
Bobble
A bobble is placed in the center of each square to denote the first day of the month. Work in the linen stitch pattern as written until Row 10 of the square.
ROW 10 (WS): Sk next sc, sc in next ch-1 sp, (ch 1, sk next sc, sc in next ch-1 sp) 4 times, (dc5tog in the next sc, sc in next ch-1 sp, (ch 1, sk next sc, sc in next ch-1 sp) across row, placing the last sc in the final ch-2 sp.
ROW 11 (RS): Ch 2, sk sc at base of ch, sc in next ch-1 sp, (ch 1, sk next sc, sc in next ch-1 sp) 4 times, ch 1, sc in top of bobble, (ch 1, sc in next ch-1 sp) across row. If working the January bobble square, finish as for Column 1, Row 2. For all remaining bobble squares, finish as for Column 2, Row 3.
Border
ROUND 1 (RS):
- Top Edge: Change to the color needed for December 27th at the end of the last block in the last column. Chain 2 and turn the work. Work in linen stitch pattern along the top of the blanket until you reach the ch-2 space in the corner, (sc, ch 2, sc) in ch-2 sp, rotate to work along the left edge.
- Left Edge: Ch 1, sk next row end, (sc in next ch-2 sp at row end, ch 1) across row* until you reach the last row end with a sc, sk the sc, (sc, ch 1, sc) in ch below the sc, rotate to work along bottom edge.
- Bottom Edge: (Ch 1, sc in base of next sc) across row to last ch-2 sp, (sc, ch 1, sc) in ch-2 sp, rotate to work along the right edge.
- Right Edge: Work as for Left Edge to *, working in pattern to last corner, sc in same space as the beginning sc, ch 2, sl st in first sc of the round. Fasten off. Turn work.
ROUND 2 (WS): Using color for December 28th, join with a sl st in ch-2 sp, ch 1, sc in same sp, work in linen stitch to next ch-2 sp, *sc in ch-2 sp, ch 1, yo with color for the next day and pull up a loop, work in linen stitch to next ch-2 sp*, rep from * to * around blanket until you reach the last ch-2 sp, sc in last ch-2 sp, ch 2, sl st in first sc of round. Fasten off. Turn work.
ROUND 3 (RS): Using the same color as Round 1 of Border, join with a sl st in any ch-2 sp, ch 1, sc in same ch-2 sp, work in linen stitch pattern to next ch-2 sp, (sc, ch 1, sc) in ch-2 sp, continue in pattern around the blanket until you reach starting ch-2 sp, sc in ch-2 sp, ch 2, sl st in first sc of the round. Fasten off.
Finishing
- Weave in all ends. I like to weave in all my ends first, then snip them for some added satisfaction.
- Lay flat and steam block lightly if needed. I did not go through the whole process of pinning and blocking my blanket. It wasn’t necessary, as th linen stitch was very flexible and smoothed itself out. If your blanket is wrinkled or wavy at the edges, give it a light steam block using a tool like this.
Temperature Blankt Q & A
Temperature blankets are always an exciting topic around the new year, and 2023 was no exception. When I debuted my Linen Pixel Temperature Blanket to my friends on Instagram, I received over 40 questions about how to get started and stay motivated.
To help answer some of these questions, join me LIVE on Instagram, Friday, January 13th at 5pm. I’ll be answering your questions to make sure you’re 100% ready to dive into a temperature blanket project. See you there!


Hey I just came across your channel on youtube and loved this design. I’ve started my 2023 blanket and realized I would probably only use my lowest temp color maybe once. So I want to add a thin strip in between columns for the lows. What do you think the best way to do this is?
I tried to do a 2 stitch line up the side using the same method but I couldn’t get it to look quite right…would love some advice 🙂 thank you!
Hi darling. I’m having some trouble envisioning what you’re trying to do. Would you mind sending a photo or expanding your idea via email? You can reach me at [email protected].
Hi Toni,
This blanket is gorgeous. 🙂 I’m planning to do one myself, but cannot figure out how to prevent it from stretching out too much. I’m guessing the finished blanket is quite heavy and the parts that are hanging from the side of the bed will stretch out, won’t they. Is there a way to prevent it?
Thanks a lot. 😀
This blanket is quite heavy. And the stretching is the nature of crochet. I wouldn’t leave the blanket on the bed like this too long – I’d likely just pull it out for company. If you plan to leave it on the bed, I’d fold it.
You mention in the video that you always turn your work away from you and that we can turn it however we like but must be consistent. I’m half way through my first column and the turning is getting annoying because my work is long and I have to keep untwisting it. Can you explain why we can’t turn the work in alternating directions so the whole blanket doesn’t get twisted on our laps? Thanks!
If you find the blanket is getting uncomfortable to turn, you can turn it however you’d like.
Love this pattern